XHLUX
Changing a display head or swapping a failed fixture should not leave a bent rail or scorched contacts. This guide shows how to remove a track light head without damaging the track, adapter or contacts—by matching the release method on your exact product.
If you searched for “how to remove track light head,” start by isolating the power and identifying the adapter’s release mechanism. Then follow the removal procedure specified by the manufacturer. The sections below cover cooling, twist-lock and button/tab removal, stuck-head decisions, damage avoidance, bulb-only changes, post-removal inspection, reinstall checks and when to stop for an electrician. For system selection and circuit grouping before you order replacements, see our 2-circuit and 3-circuit track lighting sourcing guide.
We support commercial LED track light projects where adapter families must match the track series on the drawing—removal and reuse follow the same compatibility rule.
TL;DR
- Confirm power is off and the fixture is cool before you touch the adapter.
- Identify the exact release design (twist-lock, release button, locking tab or knob)—do not guess from H, J or L labels alone.
- Support the head, fully disengage the lock, then lift free. Never force, pry or pull on wires.
- Inspect adapter, contacts and rail before reuse; damaged parts stay de-energized until assessed.
- Stop for a qualified electrician when isolation is unclear, parts are burnt or the head will not release safely.
Table of Contents
- What Should You Check Before Removing a Track Light Head?
- How Can You Identify the Track Head’s Release Mechanism?
- How Do You Remove a Twist-Lock Track Light Head?
- How Do You Remove a Track Head with a Release Button or Locking Tab?
- What Should You Do If a Track Light Head Won’t Come Off?
- How Can You Avoid Damaging the Track or Adapter During Removal?
- Do You Need to Remove the Track Head or Just the Bulb?
- What Should You Inspect After Removing a Track Light Head?
- Can You Reinstall a Track Light Head After Removing It?
- When Should You Stop and Call an Electrician?
What Should You Check Before Removing a Track Light Head?
Isolate power, let the fixture cool and stage the right support gear before any adapter moves.
How Do You Safely Turn Off the Power Before Removing a Track Head?
Turn off the power supply to the track at the appropriate circuit breaker or isolator before removal. Have a qualified person verify that the circuit is de-energized using appropriate test equipment. If you cannot confirm the power status safely, stop and contact a qualified electrician. Do not touch the fixture or adapter to “feel” whether it is live. Treat the manufacturer’s safety notes as the operating baseline for that product.
How Long Should You Wait for a Track Light to Cool Down?
Allow the fixture to cool before handling it. Some track light housings and adapters can retain heat after the power is switched off. Follow the manufacturer’s instructions before touching or removing the fixture.
What Tools and Equipment Do You Need Before Removing a Track Head?
Use a stable platform that reaches the track safely (ladder or lift rated for the height and load). Wear eye protection when working overhead. Bring only tools the manufacturer’s instructions name for that adapter. Many adapters release by hand; do not assume every design needs a screwdriver.
🎯 What Should You Do If You Cannot Confirm That the Track Light Is Disconnected from Power?
Stop the removal attempt. Do not touch the fixture or adapter to decide if it is energized. Have a qualified electrician confirm the circuit is safely isolated.
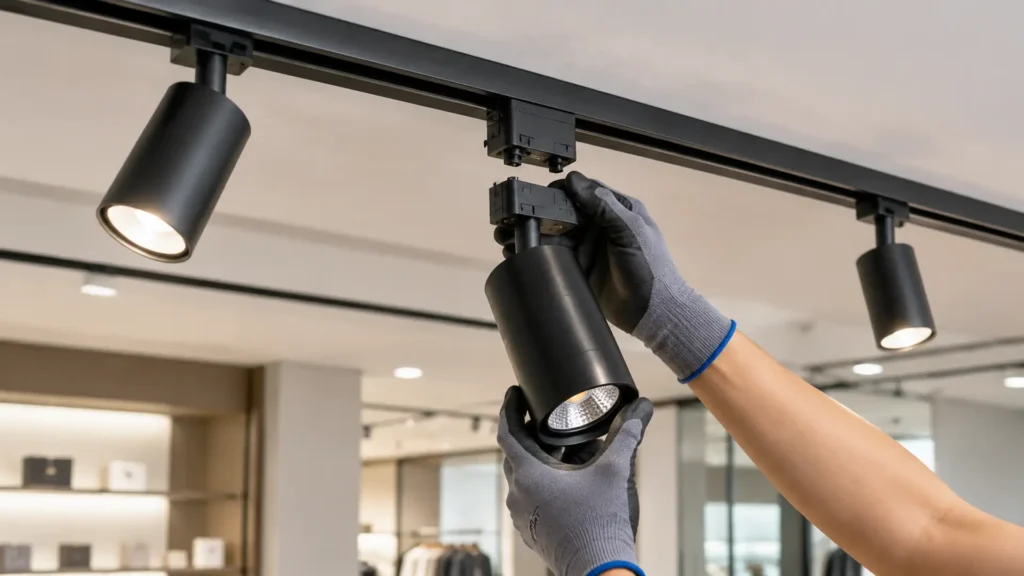
How Can You Identify the Track Head’s Release Mechanism?
Find the lock on your exact adapter before you twist or pull—release designs are not interchangeable across brands.
Where Is the Locking Mechanism on a Track Light Adapter?
Start with the adapter body that enters the track, then check adjacent faces of the housing. Look for a recessed button, a spring tab, a knurled knob, a pull lever or a printed rotation arrow. Match those features to the labeled parts on the product sheet or install diagram for that model. Photograph the adapter in place if needed so you can compare it side-by-side with the diagram before you move anything. Do not invent a procedure from another brand’s photo.
How Can You Recognize a Release Button or Locking Tab?
A release button is a distinct control you press or push while removing the adapter. The release button may be located on different parts of the adapter housing. Check the product diagram or manufacturer’s instructions to identify the correct control. A locking tab may be a spring finger that seats in the track channel—treat it as a release control only when the manufacturer names that action. A locking knob is a turnable fastener that must be loosened before the adapter can leave the rail. Product families differ; use the labeled parts on your unit, not a generic diagram.
How Can You Tell Whether Your Track Head Uses a Twist-Lock Mechanism?
Twist-lock adapters typically show a rotation arrow, a stop mark or a keyed foot that seats in a track slot and then turns into the locked position. Confirm with the manufacturer documentation for that series. Do not decide “it must be twist-lock” only because the track is labeled H, J or L type.
🎯 Do All Track Light Adapters Use the Same Release Mechanism?
No. Different manufacturers and track systems use different locking and release designs. Identify the exact adapter and check its manufacturer’s instructions before removal.
How Do You Remove a Twist-Lock Track Light Head?
This section covers twist-lock designs that unlock by rotation without a separate release button or locking knob operated first. Start with orientation and the documented unlock direction—not force.
If your install sheet shows a lock lever or locking tab that must move before rotation—as on many commercial adapters such as HALO 830S or Juno LyteSpan heads—use the release-then-rotate sequence in the next section. Those are model-specific procedures, not a universal twist-only method.
How Do You Position the Adapter Before Unlocking It?
Support the fixture with one hand. Note the adapter’s installation face, polarity key and any positioning slot relative to the track. Align yourself so you can rotate within the range the instructions allow without twisting the supply cable (if any external lead is present).
Which Direction Should You Turn a Twist-Lock Track Adapter?
Turn only in the unlock direction shown for that system. The permitted angle is product-specific—do not assume every adapter unlocks with a 90-degree turn or the same clockwise/counterclockwise sense. If resistance rises sharply before the documented stop, stop and reassess rather than forcing past the mark.
How Do You Lift the Track Head Out After Releasing the Lock?
When the lock is fully disengaged, keep supporting the head and lift the adapter straight out of the rail along the path the instructions describe. Do not yank on lamp wires, driver leads or contact blades. Set the head down on a clean surface so contacts stay clear of grit.
🎯 Do Different Track Systems Use Different Twist-Lock Removal Mechanisms?
Yes. Adapter structures, locking arrangements, rotation directions and removal steps can differ. Do not infer the procedure from H, J or L names alone—follow the instructions for the exact product.
How Do You Remove a Track Head with a Release Button or Locking Tab?
Cover adapters that need a separate release action before you turn or lift. Not every locking tab is an independent release control.
Two published commercial examples show why “button vs twist” is not enough on its own—both need a lock release and a rotation step. Use them only for the named models; other series may differ.
Example A — HALO 830S (Cooper Lighting Solutions instruction sheet): pull the adapter locking lever downward, rotate the adapter about 90°, then remove the luminaire from the track. See the HALO 830S track luminaire instruction sheet. Wrong-direction force can damage contact assemblies on that design—stop if the motion does not match the sheet.
Example B — Juno LyteSpan LWWJ20 / LWWJ40 (Signify / Juno install instructions): pull the locking tab downward, rotate the adapter counterclockwise, then remove the fixture. See the Juno BoldFlood adapter install instructions. Do not apply these counterclockwise or tab steps to unrelated adapters.
How Do You Locate and Operate the Release Button?
Find the button the manufacturer identifies on the adapter or housing. Operate it in the direction the instructions show (press, push or hold) while supporting the head. Keep the button fully actuated through the unlock step if the sheet requires continuous pressure.
How Do You Operate a Locking Tab to Release a Track Head?
Only when the manufacturer lists that tab as the release control: move it in the documented direction until the adapter is free to leave the rail—or free to rotate into the unlock position, as on the Juno example above. If the tab is only a seating finger with no named release action, do not pry it—switch to the procedure written for that model.
How Can You Tell When the Release Mechanism Is Fully Disengaged?
You should feel or see the adapter free to rotate or withdraw as the instructions describe, without fighting the lock. On the HALO 830S sequence, that means the locking lever has been pulled and the adapter has reached the documented rotate-out position before you lift. On the Juno LyteSpan sequence, the locking tab stays released through the counterclockwise turn until the head is free. If resistance remains, stop. Do not invent a generic “should feel loose” test that the sheet does not support.
🎯 What Should You Do If the Release Button or Locking Tab Does Not Move?
Confirm you have the correct release component and the correct operating direction per the manufacturer’s instructions. If it stays stuck, stop. Do not force the button or tab.
What Should You Do If a Track Light Head Won’t Come Off?
Stuck usually means a missed step or a second lock—not a cue to pull harder.
What Should You Check If the Track Adapter Will Not Unlock?
Stay on three checks only: (1) you identified the release part named on the sheet for this model, (2) you followed the order of steps (for example tab/lever before rotate when required), and (3) the button, tab or lever completed its full travel. Do not reopen a general “how buttons look” discussion—go back to the diagram for this SKU if the control is still unclear.
Why Does a Track Light Head Stay Attached After Turning the Adapter?
Confirm the adapter reached the manufacturer’s release position. Look for a second lock (button, tab or collar) that must still be released. Some models require an extra release action after a partial turn—return to the product sheet rather than guessing.
When Could a Stuck Track Head Indicate Mechanical Damage?
Stop if you see a deformed lock, cracked housing, bent track slot or other clear distortion while the head is still on the rail. Continuing to force a damaged interface risks breaking contacts or widening the slot. Leave the head in place and arrange professional assessment.
🎯 Should You Apply More Force If a Track Light Head Remains Stuck After Unlocking?
No. Recheck the release position and any additional locking structures. Do not force the adapter or pull the head off.
How Can You Avoid Damaging the Track or Adapter During Removal?
Protect the rail geometry and contact faces—tools are not a shortcut past a stuck lock.
Why Should You Avoid Forcing a Track Head Out of the Rail?
Excessive pulling or twisting can damage the adapter’s locking components, electrical contacts or the track structure. If the fixture does not release as instructed, stop rather than applying additional force.
How Can You Protect the Track’s Electrical Contacts During Removal?
Keep metal tools away from electrical contacts and conductive components inside the track. Lift along the designed path so contacts do not scrape the rail edge. Do not wipe contacts with abrasive pads or leave fingerprints and debris on the contact faces if the manufacturer warns against it.
Can You Use Pliers or Other Tools to Remove a Stuck Track Head?
Decide tools in this order: (1) read whether the manufacturer names any tool for that adapter, (2) if none is named, keep the removal hand-only, (3) if the head is stuck after the correct release sequence, stop—do not improvise pliers or screwdrivers as pry bars. Gripping plastic housings with pliers can crush locks and leave debris in the track.
Do You Need to Remove the Track Head or Just the Bulb?
Decide whether the lamp is replaceable in situ before you open the adapter interface.
How Can You Tell Whether a Track Light Has a Replaceable Bulb?
Fixtures with GU10 or MR16 (and similar) lamp holders usually allow lamp changes at the head. Integrated LED track lights often have no user lamp—service is a module or complete head per the maker. Read the fixture label and instructions.
How Do You Remove a Replaceable Bulb Without Removing the Track Head?
With power isolated and the head cool, follow the fixture manufacturer’s lamp procedure (twist, push-and-twist or retainer clip as specified). Support the head so the adapter is not leveraged out of the track while you change the lamp.
When Do You Need to Remove the Entire Track Light Head?
Remove the complete head when you must service or replace the adapter, driver, or whole assembly, or when the lamp path is not user-serviceable. Plan a compatible replacement before you take the old head down.
🎯 Can You Replace an Integrated LED Light Source Without Removing the Entire Track Head?
It depends on the fixture design. Some integrated LED fixtures have replaceable LED modules; others require complete fixture replacement or a manufacturer-specified service procedure.
What Should You Inspect After Removing a Track Light Head?
Inspect before reuse—visual checks only, with power still isolated.
How Do You Check the Track Adapter for Physical Damage?
Inspect in a fixed order: outer housing for cracks or crushed corners; locking lever, tab or knob for bends or missing travel; positioning keys or feet for chips; rotation collar or stem for looseness that was not present when new. Any damage that changes how the lock seats is a reason to hold the part out of service.
What Should You Look for on the Electrical Contacts?
Look for bent, burnt, oxidized or missing contact material. Do not file, bend back or re-energize damaged contacts yourself—electrical repairs belong to a qualified electrician.
How Can You Tell If the Track Rail Was Damaged During Removal?
Check track slots, visible conductor edges and mounting clips for deformation, gouges or loosened fixings. Do not perform live electrical tests as part of this visual check.
🎯 Should You Reuse a Track Light Head with a Damaged Adapter?
Inspect the housing, locking structure and contacts. If damage affects retention or electrical connection, do not reinstall or energize the fixture. Have a qualified professional decide whether to repair or replace the adapter or complete assembly.
Can You Reinstall a Track Light Head After Removing It?
Reuse is conditional—condition, compatibility and a full lock come before power. After removing the track light head, only reinstall parts that passed inspection.
Can a Removed Track Head Be Reused on the Same Track?
Yes only when the adapter is intact, the lock works, contacts are undamaged and the head remains compatible with that track series. Cross-brand reuse is a separate compatibility decision—not a removal shortcut.
How Do You Align the Adapter Before Reinstalling the Track Head?
Match polarity keys, positioning slots and any arrows to the track orientation shown in the installation diagram. Seat the adapter fully before engaging the lock; do not force a misaligned foot into the channel.
How Can You Confirm That the Track Head Is Properly Locked?
Check that the locking mechanism has reached the secured position specified by the manufacturer. Confirm that the adapter is fully seated and locked according to the installation instructions before restoring power.
🎯 Does a Track Head Need to Be Tested After Being Reinstalled?
Yes. Confirm compatibility, mechanical locking and secure attachment before restoring power per the manufacturer’s instructions, then check that the fixture operates normally.
When Should You Stop and Call an Electrician?
Burn marks, fixed wiring work and unsafe removals are stop points—not DIY stretch goals.
What Should You Do If the Track or Adapter Has Burn Marks?
Stop. Do not reinstall or energize. Photograph the condition if needed for the service call and isolate the circuit until a qualified person assesses the system.
When Does Removing a Track Light Head Require Electrical Work?
Hand removal of a designed-to-release head is different from work on fixed wiring, terminal blocks, drivers or internal circuits. Opening supply junctions or repairing contacts is electrical work for a qualified electrician.
What Should You Do If the Track Head Cannot Be Removed Safely?
Stop when the release mechanism is unidentified, the adapter is damaged, the working height is unsafe or site conditions are unsuitable. Secure the area and call the right professional rather than improvising tools.
🎯 Who Should Inspect a Track System with Damaged Electrical Connections?
A qualified electrician should inspect and repair fixed wiring, terminals and power connections. Contact the manufacturer or its service team for product-specific adapter or fixture defects.
Conclusion: How do you remove a track light head without damage?
Removing a track light head safely starts with isolation and cool-down, then exact adapter identification. Follow that product’s unlock path, never force a stuck lock, inspect before reuse and call an electrician when power status, burn damage or fixed wiring is involved.
If you need help matching replacement heads or adapter families to an existing commercial track, see our custom lighting solutions or contact the XHLUX team.
Explore our related blog posts:
- How Does Tunable White Track Lighting Work?
- When to Use Narrow Beam Track Lights in Commercial Spaces