XHLUX
After a retail or gallery install, track heads can look sharp on the merchandise and still feel harsh from the aisle. Glare from track-mounted spotlights is usually a light-path problem: the bright source enters the observer’s field of view, or light reflects from glass into their eyes. It is not always a matter of excessive brightness or too many lumens.
If you searched for “track mounted spotlights glare,” start by identifying that path—direct or reflected—before you only dim the scene.
This guide stays on post-install troubleshooting: identify direct versus reflected glare, adjust position and aiming, tame glass reflections, decide when honeycomb louvers or snoots help, understand why dimming may still feel harsh, judge when ambient support helps, and verify that comfort improved without erasing the accent effect. For fixture-level anti-glare claims and product selection, see Does an Anti-Glare Spotlight Really Reduce Glare? rather than repeating that buying brief here.
We help project teams match LED track light heads and optical kits to the scene on site—because a compatible accessory only helps when it fits the exact model.
TL;DR
- Separate direct glare (source in view) from reflected glare (bounce from glass or gloss).
- Reposition or re-aim before you only dim—path often beats brightness alone.
- Treat glass cabinets as a reflection geometry problem, not a wattage problem.
- Honeycomb louvers and snoots are different shields; neither erases every glare path.
- Diffusers change distribution; they are not a guaranteed glass-glare fix.
- Verify from the same customer positions you used to diagnose.
Table of Contents
- How Do You Identify the Source of Glare from Track Spotlights?
- How Can You Reduce Glare by Adjusting Track Spotlight Positions?
- How Do You Reduce Reflections from Track Spotlights on Glass Displays?
- Which Optical Accessories Can Help Reduce Track Spotlight Glare?
- Why Do Track Spotlights Still Cause Glare at the Lowest Dimmer Setting?
- When Is Additional Ambient Lighting Needed to Reduce Glare?
- How Do You Verify That Track Spotlight Glare Has Been Reduced?
How Do You Identify the Source of Glare from Track Spotlights?
Name the glare path first—direct from the source, or reflected from a surface—before you move hardware.
Direct glare occurs when a bright light source in the observer’s field of view causes visual discomfort or impairs visibility. Reflected glare occurs when light reflected from glass, polished counters or glossy finishes creates discomfort or makes the illuminated object harder to see. Stand where customers stand, then take one step left or right and watch whether the discomfort follows the LED aperture or a moving highlight on the glass. That quick position change usually tells you which path to fix first.
Do not treat facial shadows on mannequins or faces as “glare.” Shadow shape and visual discomfort are different issues; this page stays on glare paths.
Check Glare from Different Viewing Positions
Normal customer positions matter more than a single view from the installation position. Check standing and walking sightlines along the aisle, and seated positions where the project has them. Add staff working positions if cashiers or consultants face the track often. Note whether the LED source is directly visible, and whether discomfort appears only from certain angles. Record the positions that feel worst before you move any head—those same spots become your verification route later.
🎯 What should you look for when checking a track spotlight from different viewing positions?
Note whether discomfort tracks the LED aperture or a moving highlight on glass or gloss, and record the angles where it appears before you adjust anything.
How Can You Reduce Glare by Adjusting Track Spotlight Positions?
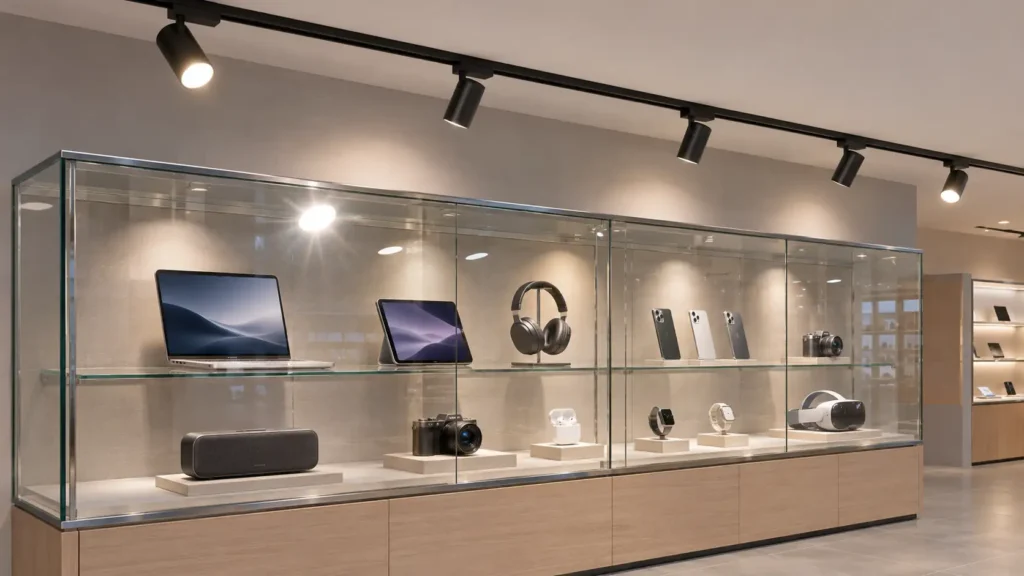
When the system allows, sliding or re-aiming an installed head often reduces glare more than dimming alone.
Check the Position of Track Spotlights
Check whether the head sits directly above the normal viewing zone so the aperture opens into faces as people walk the aisle. Consider the relative positions of the fixture, illuminated target and observer. Where the track system allows, slide the adapter along the rail to shift that relationship before you change lamps or accessories. A new position can remove the source from sightlines or break a reflection path—something brightness reduction cannot do by itself. Facial shadows that appear after a move are a separate lighting-quality check, not proof that glare remains.
Adjust the Direction of Track Spotlights
Aim the beam onto the merchandise or display, not into customer faces. Tilt and rotate so common sightlines miss the bright aperture. After each move, check the glass and glossy surfaces from customer viewing positions and watch the reflected highlight. Confirm the target still receives the accent you intended—glare work that empties the display of light has failed the commercial job. Keep beam-angle shopping and uneven-coverage repair for their own guides; here the task is aiming the installed head.
🎯 When should you slide a track head along the rail instead of only changing its tilt?
When the aperture still sits in the main sightline or feeds a glass bounce after aiming alone—if the system allows, move the head first, then recheck comfort and accent.
How Do You Reduce Reflections from Track Spotlights on Glass Displays?
Glass cabinets turn a well-aimed spot into a bright mirror for anyone standing at the wrong angle.
Identify and Reduce Glare on Glass Display Cabinets
Cabinet glass, door glass and glossy counters reflect spotlight beams when the source, surface and observer line up. From the customer’s normal viewing position, locate the bright reflection on the glass. Move slightly to either side and observe how the reflection changes. Then adjust the spotlight’s position or aiming direction and check whether the reflection moves away from the main viewing area. Sliding the head, changing tilt or both can swing the reflected path off the eye while the merchandise still reads clearly. Repeat the check on polished counters and glossy packaging—same geometry, different surface.
Practical check: view from several customer positions, change aiming once, compare the reflection, then confirm the goods still look adequately lit. Keep this section on glass and gloss reflections; do not restart the full position tutorial from the previous chapter.
🎯 How do you tell whether a glass reflection is driven more by fixture position or by aiming?
From the customer stance, move sideways to see how the highlight shifts; then change only position or only tilt and compare which change clears the main viewing area first.
Which Optical Accessories Can Help Reduce Track Spotlight Glare?
Use accessories when repositioning and re-aiming are not enough—and only kits built for that exact spotlight model.
Compare Honeycomb Louvers and Snoots
A honeycomb louver uses a grid structure to limit light visible from certain viewing directions. A snoot adds a projecting shield around the front of the optic to restrict off-axis light. Their actual shielding effects depend on the fixture’s optical design and accessory configuration. Neither accessory automatically eliminates every direct or reflected glare path. Confirm mounting hardware, depth clearance and any maker limits on stacking accessories before you order.
Accessory compatibility and diffuser lenses
- Confirm the accessory is listed for the exact spotlight model—not a “looks similar” kit.
- Check mounting method, diameter/depth and any install limits on the sheet.
- Read whether the manufacturer allows combining louvers, snoots, filters or lenses.
- Separate glare-control accessories from diffusion lenses: a diffuser changes beam distribution and can soften appearance; it does not automatically fix direct glare or glass reflections.
- If photometry matters for the project, ask whether the modified optic stack still has matching photometric or IES data for that configuration.
Use maker documentation for the series you stock as a compatibility checklist, not as a universal glare-performance claim. For example, the Bruck MOTO-PRO 130 track spot specification lists honeycomb, snoot and shroud-snoot options and states accessory limits for that product. Signify glare-accessory install sheets such as the Accent Track D65 installation instructions show model-specific mounting parts (for example a dedicated honeycomb ring). Those documents support structure and fit checks—not a claim that every snoot outperforms every honeycomb.
🎯 What should you confirm before ordering a honeycomb or snoot for an installed track head?
Confirm the accessory is listed for that exact model, check mounting limits and stacking rules on the sheet, and treat any diffuser as a distribution change—not an automatic glare cure.
Why Do Track Spotlights Still Cause Glare at the Lowest Dimmer Setting?
Lower output does not erase a bright aperture in the eye or a bright bounce on glass.
Check Why Track Lights Still Look Too Bright When Dimmed
Dimming reduces flux; it does not hide a source that still sits in the field of view. Check whether the LED aperture remains directly visible at the lowest available dimmer setting. Check whether glass or gloss reflections are still present. Decide whether the complaint is raw brightness, direct glare, reflected glare—or a mix. When the light path is the problem, re-aiming or adding suitable shielding may be more effective than further dimming. Also confirm the real dimmer and fixture operating range on site; not every control stack reaches the same minimum or behaves the same at the bottom of the slider.
When does dimming help?
Dimming helps when overall level is simply too high for the task and the aperture is already well shielded from normal views. It helps less when the discomfort is a direct view of the source or a sharp reflection. Optical and positioning problems need optical and positioning fixes. Always judge the final scene at the actual operating level the store will run—not only at full and minimum extremes.
🎯 If the dimmer is already near minimum, what should you check next for track spotlight glare?
Check whether the LED aperture or a glass bounce is still in the main view; then re-aim or add model-matched shielding instead of chasing a lower setting that may not exist.
When Is Additional Ambient Lighting Needed to Reduce Glare?
A dark surround can make an otherwise normal accent feel harsher by contrast.
When the aisle or wall around a bright display is much darker than the accented merchandise, the spotlight can feel more aggressive even if aiming is acceptable. Compare surround brightness to the display: if the room falls off into deep shadow next to a hot accent, note it. Supplementary ambient light—wall wash, soft general light or another soft layer—may raise the surround enough that the accent no longer punches the eye as hard. Place that support where people look past the display, not as a second hard spot into faces. Balance ambient so the merchandise still owns the visual emphasis.
Additional ambient lighting may improve perceived visual comfort by reducing excessive brightness contrast, but it does not remove a directly visible light source or eliminate a reflection on glass. Those issues still require adjustments to the fixture position, aiming direction or optical shielding.
Compare the scene before and after any ambient addition from the same customer positions. Keep layered-lighting theory brief here; this page only asks whether a dark surround is amplifying discomfort.
🎯 When does adding ambient light help—and when does it not—for track spotlight glare?
It can ease contrast when the surround is much darker than the accent, but it will not clear a visible aperture or glass bounce; those still need position, aiming or shielding fixes.
How Do You Verify That Track Spotlight Glare Has Been Reduced?
Prove comfort improved at the same places you diagnosed—and that the commercial accent still works.
- Return to the original viewing positions you recorded.
- Compare before/after for both comfort and display appearance.
- Confirm direct glare and reflected glare are reduced on those paths.
- Check that merchandise or displays still receive the intended illumination.
- Watch for new dark patches or a flattened visual hierarchy.
- Confirm the final look under normal operating dimmer levels and normal store operating conditions.
- Record final head positions, aim notes and accessory SKUs for maintenance.
The goal is not merely a dimmer scene. The goal is better visual comfort while the intended commercial lighting effect remains intact.
🎯 What should you record after a glare fix so the result survives maintenance?
Record the verified viewing positions, final head locations, aim notes and accessory SKUs, and confirm the scene still works under normal store operating conditions.
Conclusion: How do you reduce glare from installed track spotlights?
Glare from installed track-mounted spotlights can usually be traced to a specific light path: the source itself is visible, or its reflection from glass or glossy surfaces enters the observer’s field of view. Move and aim first, then consider matched honeycomb or snoot kits, treat dimming and ambient as supporting tools, and verify from the same customer positions. Keep buying-guide anti-glare claims on their own pages; this page is for fixing the scene you already built.
If you need help matching track heads or optical accessories to a live retail or gallery layout, see our custom lighting solutions or contact the XHLUX team.
Explore our related blog posts:
- Why Glare Control Matters in Commercial Lighting Projects
- When to Use Narrow Beam Track Lights in Commercial Spaces
- What Is Anti Glare Dimmable Track Light: Best Guide 2025