 XHLUX
XHLUX
A triple downlight places three light sources inside one shared ceiling housing. It can create a clean, concentrated lighting feature, but it also fixes three heads, drivers and heat sources into one coordinated opening.
Use this page before the reflected ceiling plan and electrical schedule are frozen. The choice should follow real targets, ceiling space and maintenance access, not the appeal of having “three lights in one.”
Se o método de montagem ainda estiver disponível, comece aqui:
→ Métodos de instalação de luminárias LED embutidas: montagem em sobrepor vs. montagem ajustável
If the project is still comparing separate heads with paired housings, use:
→ Luminárias embutidas simples ou duplas: qual configuração funciona melhor?
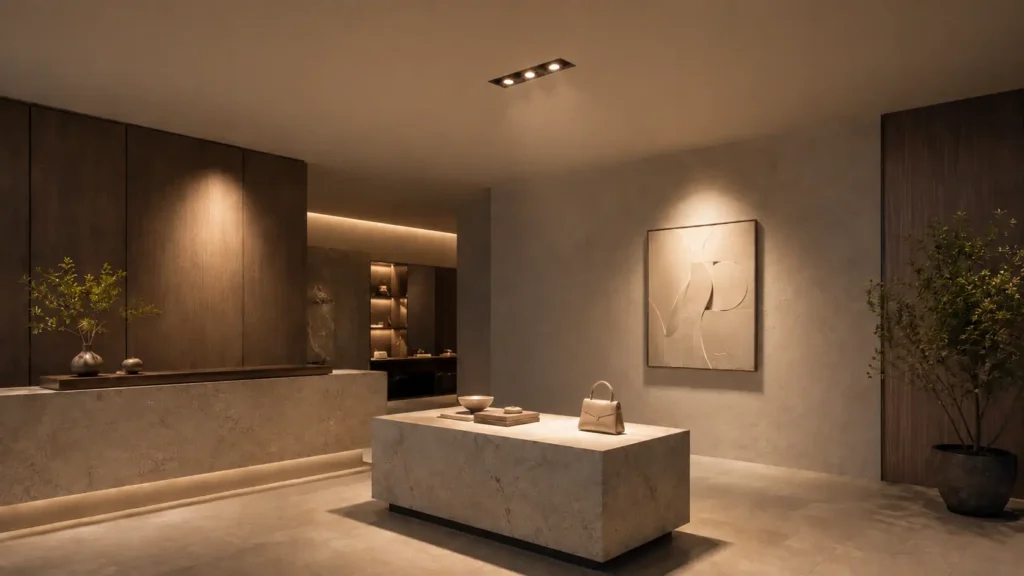
Resumindo: Specify a triple downlight only when three nearby lighting targets justify one shared housing. Confirm the complete cut-out, ceiling depth, aiming range, beam interaction, heat path, driver arrangement, control method and replacement plan before approving the fixture.
1. Check whether three heads belong in one position
A triple fitting works when three lighting tasks genuinely meet at one ceiling point. Examples include a reception counter with three display zones, a retail island, a feature wall with several nearby targets or a repeated architectural bay.
It is less convincing when the three beams must serve distant or unrelated objects. A shared housing fixes the optical centres at the manufacturer’s spacing, even when each head can tilt and rotate.
A multi-head downlight fixture therefore trades positional freedom for a stronger ceiling object. Before choosing it, mark three beam axes on the plan. If those axes cannot reach useful targets without extreme tilt or crossed beams, use separate fittings.
🎯 Does a triple housing replace three independent downlights?
It replaces three ceiling housings, not three separate design decisions; every head still needs a useful target, beam and aiming path.
2. Check the complete cut-out and ceiling void
A triple fitting needs more than a wider decorative opening. Confirm the complete body, springs or brackets, heat sink, drivers, connectors, cable bends and required separation above the ceiling.
A narrow trim can hide a much larger assembly. Draw the fitting in plan and section, then overlay joists, channels, ducts, pipes, sprinklers and access routes.
Record these dimensions from the exact model:
- Overall face and trim dimensions
- Required cut-out length and width
- Recessed body depth
- Driver dimensions and entry route
- Minimum ceiling thickness
- Required clearance and insulation conditions
- Space needed to remove the fitting later
Never scale the opening from a catalogue image. Rectangular cut-outs are less forgiving than small circular holes, and patching an incorrect opening is rarely the ceiling detail anyone hoped to specify.
🎯 Is the trim size enough to approve the opening?
No. Approval requires the manufacturer’s cut-out, body depth, mounting system, driver route and clearance instructions for the exact model.
3. Check each head’s real aiming range
Three adjustable heads are useful only when they can aim without striking the housing, exposing the source or blocking one another. Product labels such as “adjustable” do not describe the complete usable range.
For each head, confirm:
- Tilt range
- Rotation range
- Whether tilt changes the visible cut-off
- Whether adjacent heads restrict movement
- Whether cables twist during rotation
- Whether the beam clips the housing at steep angles
A triple spotlight ceiling fitting can look flexible in a front-view image while offering a much smaller working range after installation. Test the fitting from the same direction that customers or occupants will approach it.
For a deeper check of aiming limits, see:
→ What’s the Difference Between Adjustable and Fixed Downlights?
🎯 Can all three heads aim at the same feature?
They may be able to, but overlapping three intense beams can create a hotspot, so verify target illuminance and visual comfort with the real optics.
4. Check how the three beams interact
The fitting should be evaluated as three optical systems, not one combined wattage number. Record fixture lumens, beam angle, centre intensity, CCT and colour quality for each head.
The diagram is conceptual. It does not prescribe spacing, aiming angles or illuminance.
Beam overlap can be intentional when the design needs extra emphasis. It can also create a bright centre surrounded by weak edges. Conversely, aiming the heads too far apart can leave three disconnected spots with dark gaps between them.
Use model-specific photometry or an IES file to test the actual targets. A quick beam-diameter estimate can help with geometry, but it cannot predict maintained illuminance, surface reflectance or glare.
🎯 Should the three heads use the same beam angle?
Not always. Mixed optics can serve different nearby targets, but confirm that the manufacturer offers the combination and that the visual result remains coherent.
5. Check heat concentration and driver placement
Three LED sources inside one housing concentrate heat in a smaller ceiling zone. The design must move heat from each LED board through the heat sink and into the surrounding environment without overheating drivers or nearby materials.
Check whether the product uses one shared heat sink or separate thermal paths. Inspect the size and ventilation of the housing, rated ambient temperature and any installation restrictions around insulation.
Driver architecture matters as much as the visible metal. The fitting may use:
- One driver for all three sources
- Three independent drivers
- A multi-channel driver
- Remote drivers placed above or away from the housing
These arrangements change failure behaviour. A shared driver fault may darken all three heads, while separate drivers may leave two operating. Request the actual driver schedule rather than guessing from the trim.
🎯 Does a larger metal housing guarantee better cooling?
No. Thermal performance depends on the full heat path, material contact, surface area, driver position and tested operating conditions.
6. Check wiring, switching and dimming
A frase ganged downlight wiring can describe several different arrangements. Three sources may switch together, use separate channels or connect through one manufacturer-designed internal assembly.
Define the intended control before ordering:
| Required behaviour | Information to request |
|---|---|
| All three heads switch together | Complete input and driver wiring diagram |
| Heads controlled separately | Number of channels, conductors and driver outputs |
| All heads dim together | Driver protocol and approved control range |
| Separate dimming scenes | Channel addressing and control-system compatibility |
| Emergency function required | Exact emergency driver and test arrangement |
Do not infer the connection from the number of apertures. Confirm input voltage, total power, current, inrush, power factor, dimming protocol, protective device and local wiring requirements.
The expression three-way recessed lighting can also be misunderstood as three-way switching. In this article it refers only to a three-head recessed configuration; the project wiring diagram must define how the fitting is actually controlled.
🎯 Can an electrician wire any triple fitting the same way?
No. The exact driver and control architecture determine the connections, so the installer must follow the product diagram and applicable local rules.
7. Check replacement and maintenance access
A triple housing creates one large ceiling interface. That can simplify the visual layout, but it also makes future replacement dependent on the same cut-out, face dimensions and finish.
Before approving a large quantity, ask:
- Can one optical head be replaced separately?
- Can each driver be accessed through the cut-out?
- Does servicing require removing the complete housing?
- Are bezels, reflectors or lenses replaceable?
- Will the same cut-out format remain available?
- What happens to the other two heads after one driver fails?
- Does replacement affect an IP, fire or acoustic assembly?
Compare the cost per light source, not only the price per housing. Include ceiling preparation, drivers, controls, installation time, access and the likely scope of a future replacement.
Where appearance is critical, approve a physical sample against the real ceiling finish. “White” housings can differ enough to turn a clean three-head detail into a visible patch.
A final specification check
Approve the fitting only when the answer to each question is documented:
- Do three nearby targets justify one shared position?
- Does the complete assembly fit the ceiling void?
- Can every head reach its target without exposing glare?
- Do the three beams create the intended distribution?
- Is the thermal design suitable for the installation condition?
- Does the driver and control arrangement match the circuit schedule?
- Can the product be serviced or replaced without major ceiling work?
If any answer depends on an assumption, request the missing drawing, test report or sample before the order is released.
O que fazer a seguir
- Mark all three intended targets on the reflected ceiling plan.
- Obtain the exact cut-out, body and driver dimensions.
- Test the real aiming range and glare from normal viewpoints.
- Review the wiring and dimming diagram with the responsible electrical professional.
- Approve one sample bay before ordering the project quantity.
- Ask XHLUX or another project supplier to document optics, drivers, finishes and replacement parts for the exact configuration.
Perguntas frequentes
Notas e fontes
- IEC 60598-1 provides the general international safety framework for luminaires; the applicable product-specific parts, edition and regional adoption must be confirmed for the project.
- Manufacturer cut-out, clearance, driver and installation instructions remain controlling for the selected triple fitting.
- As autoridades externas são identificadas apenas em texto simples. Nenhum site externo recebe um link clicável.
![O que é uma luminária de trilho dimerizável de superfície: Guia completo [2025]](https://www.xhlux.com/wp-content/uploads/2025/06/Commercial-Surface-Track-Light-Solution-with-Adjustable-Dimming-560x560.webp "O que é uma luminária de trilho dimerizável de superfície: Guia completo [2025]")