XHLUX
XHLUX
A wide beam downlight is useful when one ceiling point must spread ambient light across a broad target area. It is not automatically the best choice for fewer fittings, wider spacing or a brighter room.
Use this page when comparing optics for offices, circulation areas, back-of-house rooms, low ceilings or other open spaces where coverage matters more than a concentrated accent.
If the mounting method is still open, start here:
→ LED Downlight Installation Methods: Recessed vs Surface Mount vs Adjustable
For the broader commercial specification sequence, use:
→ Commercial LED Downlights: Specification, Selection & OEM/ODM Guide for B2B Projects
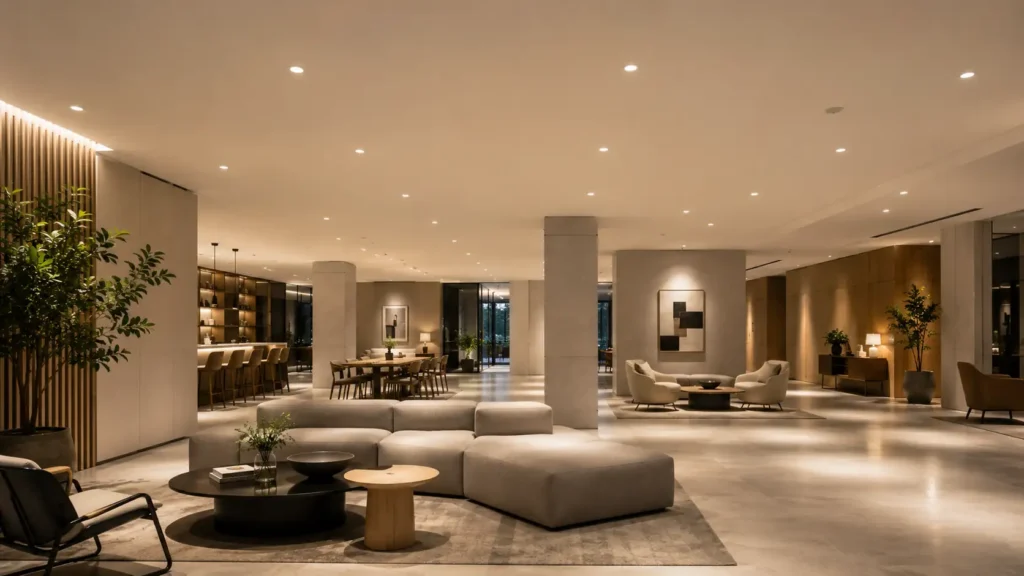
TL;DR: Use a wide beam for broad ambient coverage at modest mounting heights when the photometric file and sample confirm useful uniformity. Do not approve it from angle alone: verify target-plane illuminance, edge fall-off, glare, spill, surface reflectance and spacing with the exact luminaire.
1. Define “wide” from photometry, not a catalogue adjective
How should a project define a wide beam?
Define it from the measured luminous-intensity distribution of the exact optic, not from an unsupported product label.
CIE terminology defines beam angle as the full angle between the two directions where luminous intensity falls to 50% of the centre-beam intensity. That definition describes a photometric boundary. It does not promise equal brightness across the entire footprint.
There is also no universal angle at which every downlight becomes “wide.” A manufacturer may use 50°, 60° or another threshold for its range. Record the actual beam angle and compare the IES or LDT file instead of comparing adjectives.
The distribution outside the nominal beam matters too. Two 60° optics can have different centre intensity, edge fall-off, spill and field shape.
🎯 Does a 60° label describe the complete light pattern?
No; it identifies a nominal beam boundary, while the full photometric distribution shows intensity inside and outside that angle.
2. Use a wide beam for broad ambient targets at modest heights
When does a broad beam usually help?
It usually helps when the target is a large horizontal or circulation area and the mounting height is low enough to retain useful illuminance.
Suitable starting points include:
- Open office circulation and support areas
- Corridors with wide walking zones
- Back-of-house, cleaning and storage rooms
- Low-ceiling retail or hospitality support spaces
- General ambient layers over pale, moderately reflective finishes
A wide beam angle downlight can soften isolated pools and reduce dark gaps when the layout, output and room geometry support overlap. It is especially useful where every ceiling point serves the same broad task instead of a small object.
The qualifier is important. Dark walls, dark floors and high absorption can make a broad distribution feel weak. A wide beam cannot recover lumens absorbed by the room, and it does not replace vertical lighting where walls, shelves or faces matter.
🎯 Can a wider beam make a low ceiling feel more evenly lit?
Yes, when the optics overlap usefully and the room surfaces support the intended distribution without exposing occupants to glare.
3. Do not use beam width to solve an intensity problem
When is a wide beam the wrong optic?
It is usually wrong when the project needs high intensity at distance, sharp emphasis, controlled spill or strong contrast.
At a greater mounting height, the same lumens spread across a larger footprint. Average intensity falls, so a broad beam may reach the floor but fail to deliver enough light on the actual task.
Choose a medium or narrow distribution when the job is to emphasize merchandise, artwork, a dining table or a defined work zone. Consider asymmetric or wall-wash optics when the real target is vertical.
Wide beams also need caution near screens, mirrors, polished counters and sightlines into the aperture. The problem is not beam width alone; source luminance, shielding, position and view direction determine whether the installation becomes uncomfortable.
| Project condition | Wide beam starting point | Better direction to test |
|---|---|---|
| Low ceiling, broad ambient area | Often suitable | Verify overlap and glare |
| High ceiling, demanding task level | Often weak | Medium/narrow beam or higher output |
| Display, art or table emphasis | Usually too diffuse | Controlled medium/narrow beam |
| Wall or shelving target | May waste light | Wall-wash or asymmetric optic |
| Screens, mirrors or glossy surfaces | Spill risk | Shielded optic and revised position |
| Dark finishes | Coverage may look dull | Model reflectance and delivered light |
🎯 Does a wider beam deliver more lumens?
No; beam angle redistributes output, while delivered lumens depend on the complete luminaire and optic.
4. Calculate the nominal footprint before setting spacing
How can the first beam footprint be estimated?
Use target distance and full beam angle to calculate a nominal diameter, then treat the result as geometry rather than a finished lighting plan.
For a symmetrical beam aimed straight at a horizontal target:
Beam diameter ≈ 2 × distance to target × tan(beam angle ÷ 2)
At a 2.4 m distance and a 60° beam:
2 × 2.4 × tan(30°) ≈ 2.77 m
That 2.77 m value is the nominal diameter at the 50% intensity boundary. It is not the recommended fixture spacing, and it does not predict maintained illuminance, glare or uniformity.
The 90° footprint extends 4.8 m at the same distance. That looks efficient on paper, but the intensity is spread much more broadly. Only photometric calculation can show whether the target receives useful light.
🎯 Is nominal beam diameter the same as downlight spacing?
No; diameter describes one beam boundary, while spacing depends on overlap, illuminance, uniformity, glare and the room.
5. Set spacing from the target plane and performance criteria
How should wide-beam spacing be approved?
Approve it from calculated performance on the real target planes, then confirm critical areas with a representative sample.
The familiar “ceiling height divided by two” rule can produce a rough sketch, but it ignores beam distribution, output, reflectance, target height and the required uniformity. A desk, floor and countertop do not sit at the same distance from the optic.
Use this sequence for wide beam downlight spacing:
- Mark the horizontal and vertical target planes.
- Record the real luminaire-to-target distance.
- Import the exact IES or LDT file.
- Set initial positions from architecture and useful coverage.
- Review average, minimum and maximum illuminance.
- Check vertical light, spill and relevant viewing directions.
- Test one representative area before repeating the layout.
The correct spacing may be narrower than the nominal footprint because the edge receives less intensity than the centre. It may also vary near walls, workstations and transitions between materials.
🎯 What is wrong with using ceiling height alone?
Ceiling height omits the optic, target plane, lumen output, surface reflectance and performance criteria that determine the real layout.
6. Check the exact optic, not only the beam-angle row
What evidence should a buyer request before ordering?
Request the exact photometric file, output data, glare information, sample and schedule for the optic that will actually ship.
An IES file records luminous intensity by angle so lighting software can model the distribution. Confirm that its product code, wattage, optic, CCT and driver match the quotation.
Use this pre-order check:
| Evidence | What to confirm | Reject when |
|---|---|---|
| IES or LDT file | Exact SKU, output and optic | Generic family file only |
| Beam data | Full beam angle and intensity distribution | “Wide” appears without photometry |
| Output | Delivered lumens for scheduled configuration | LED-package lumens replace luminaire data |
| Glare control | Aperture, recess, shielding and relevant metric | “Anti-glare” is the only evidence |
| Driver | Dimming method, range and control compatibility | Driver differs from the tested sample |
| Sample | Real height, finishes and sightlines | Tabletop sample judged in isolation |
| Production schedule | Locked optic, finish, CCT and driver | Substitution allowed without reapproval |
CIE 117 treats observer position and viewing direction as relevant to discomfort glare. That is why a ceiling plan alone cannot approve a broad distribution.
🎯 Can one family photometric file represent every optic?
No; each optic and output combination needs matching data because its intensity distribution can differ materially.
7. Mix beam distributions when the room has more than one job
Should every downlight in a room use the same beam?
No; use each distribution for a defined target, then coordinate the layers so they work as one system.
A broad ambient layer can support circulation while medium beams serve work surfaces and narrow beams emphasize displays. Wall-wash or asymmetric optics can handle vertical targets more efficiently than forcing a symmetrical wide beam toward a wall.
This is not an argument for filling the ceiling with variants. Keep the optic schedule as simple as the room permits, but do not sacrifice the lighting hierarchy merely to reduce SKU count.
If a wide beam creates flatness, glare or uncontrolled spill, the fix may be fewer ambient points plus a separate task or accent layer—not another row of the same downlight.
🎯 What is the simplest useful mixed-beam strategy?
Use one controlled ambient distribution, then add only the task, accent or vertical-light optics that serve targets the ambient layer cannot.
What to do next
- Define the target planes, mounting height, reflectances and required lighting criteria.
- Use the installation-methods guide linked in the introduction to freeze the ceiling construction and aiming requirement.
- Use the commercial guide linked in the introduction to coordinate photometry, driver, sample and procurement evidence.
- Compare at least one medium and one wider optic from the same luminaire family in the calculation.
- Build a representative area at the real height and review it from normal working and circulation positions.
- Ask XHLUX or another shortlisted supplier to lock the approved optic, output, CCT, driver and finish before production.
FAQ
Notes & Sources
- International Commission on Illumination — CIE S 017:2020, International Lighting Vocabulary: beam-angle definition at 50% of centre-beam intensity.
- International Commission on Illumination — CIE TN 010:2019, Determination of Optical Beam Axis, Centre Beam Intensity and Beam Angle for Directional Luminaires: measurement of beam axis, centre intensity and beam angles.
- Illuminating Engineering Society — Learn About IES Files: luminous-intensity distribution by angle and the use of photometric files in lighting calculations.
- International Commission on Illumination — CIE 117:1995, Discomfort Glare in Interior Lighting: observer position, viewing direction and glare evaluation.
- International Commission on Illumination — CIE 232:2019, Discomfort Caused by Glare from Luminaires with a Non-Uniform Source Luminance: LED source-luminance non-uniformity and glare evaluation.
- International Organization for Standardization and International Commission on Illumination — ISO/CIE 8995-1:2025, Light and Lighting—Lighting of Work Places—Part 1: Indoor: quantity and quality of indoor lighting, including glare and colour considerations.
- Final approval still requires the exact room geometry, target planes, maintenance assumptions, photometric data, control gear and representative sample.