XHLUX
XHLUX
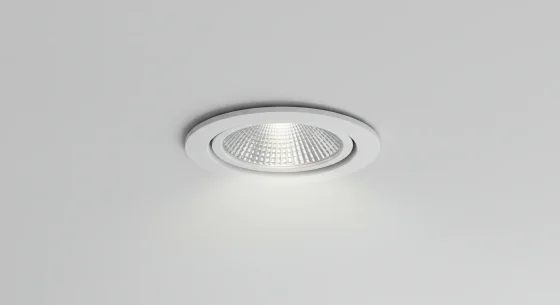
A micro downlight is a tiny-aperture head for shelves, cabinets, and display volumes — not a scaled-down lobby ambient fixture.
Use this page when you need cut-out, beam, and spacing for cabinet or case work.
Skip it if you need a general mini ceiling downlight, a shallow-void ceiling pack, or a large high-ceiling head — those are separate jobs (mini / shallow unwritten; large-downlight draft — not linked until live).
If recessed vs surface vs adjustable for the room ceiling is still open, start here:
→ LED Downlight Installation Methods: Recessed vs Surface Mount vs Adjustable

TL;DR: Lock micro downlight cut-out size and driver location first, pick micro downlight beam angle for the shelf depth, then space from the lit plane — not from a ceiling-grid rule of thumb.
When micro belongs in the brief
A compact micro downlight application fits millwork, niches, and vitrines where a standard recessed head looks oversized and overheats the task.
A cabinet lighting micro fixture lights the work plane or merchandise inside the box — glare to the standing viewer is a fail even if lux looks fine on paper.
A display case micro downlight must also respect heat, UV/blue concerns for sensitive goods, and service access through the case lid or plenum.
🎯 When should you specify a micro downlight?
When the lit volume is a cabinet, shelf, or case — and a normal ceiling aperture would dominate the joinery.
Cut-out and trim (millimetres matter)
Write the micro downlight cut-out size on the millwork drawing with tolerance — cabinet doors and glass lids punish “close enough.”
Many packs use a mini aperture recessed trim language for the visible opening; confirm whether that dimension is cut-out or bezel.
Remote drivers are common: reserve cavity and cable path before the carpenter closes the box.
| Check | Pass | Fail |
|---|---|---|
| Cut-out | Exact Ø / L×W + tolerance | “Small hole” on the quote |
| Trim / bezel | Matches finish schedule | Mixed colours on one run |
| Driver | Named location + access | Encased with no service path |
Beam angle before spacing
micro downlight beam angle is chosen for shelf depth and object height — a wide flood inside a shallow case washes the glass and the viewer’s eyes.
Narrower beams pick merchandise; wider beams even a long shelf only if centres and aim allow it.
A micro led downlight with high package lumens still fails if the beam hits polished stone or mirror backs unchecked.
Bars for shelf accent density, display-case evenness, wide-beam wash risk, and tight cut-out tolerance.
Planning emphasis (relative)
Shelf accent — tighter centres / narrower beam
Display-case evenness — overlap on the deck
Wide beam in shallow case — glare risk
Cut-out tolerance — millwork critical
Spacing inside the cabinet or case
Treat this as a micro downlight spacing guide for the lit plane (shelf or deck), not the room ceiling height.
Sequence:
- Lock mounting height inside the volume to the merchandise plane.
- Pull useful beam width at that plane from the SKU plot (or a mock-up).
- Set centres so pools meet your evenness goal without glass flare.
- Aim once with sample goods before the run is glued shut.
Illustrative first pass (replace with your optic): shelf depth 350 mm, head 80 mm above deck, medium beam — start near 250–350 mm centres, then adjust for hot spots and viewer glare. This is a method sketch, not a joinery code.
🎯 How far apart should micro downlights be in a cabinet?
As far as the beam still covers the shelf evenly without flaring the glass — prove it on a mock-up, not a ceiling-grid slogan.
Spec checklist before millwork closes
- Confirm the job is cabinet / display — not a mini ceiling ambient substitute.
- Freeze cut-out, trim finish, and driver access on the joinery drawing.
- Attach beam evidence for the exact micro led downlight code.
- Write centres and aim notes for the shelf or case deck.
- Check heat near timber, acrylic, and sensitive goods.
- Reject quotes that only say “small LED” with no cut-out or beam data.
What to do next
- If the room ceiling mount path is still open, use the installation methods overview linked in the intro.
- Keep mini-ceiling, shallow-void, and large high-ceiling decisions on their own guides.
- Put cut-out, beam, and centres on the millwork RCP before procurement.
- Mock up one bay with real finishes before volume cut-outs.
- Prefer suppliers that publish micro cut-out drawings and beam data for commercial millwork — XHLUX can support compact micro families on suitable codes; still verify each file against the shipped model.
Notes & Sources
- Spacing example (250–350 mm centres) is an illustrative first pass for a shallow shelf geometry — always re-check with the SKU beam and a physical mock-up.
- Live companion: installation methods overview.
- Exact Serper PAA for this keyword pool was empty; no FAQ section.