
Lighting plays a pivotal role in enhancing both residential and commercial spaces. Track lighting offers exceptional versatility, allowing users to highlight specific areas, create dynamic visual interest, and adjust lighting angles as needed. However, installing track lighting on a concrete ceiling presents unique challenges that require a specific set of tools, techniques, and expertise.
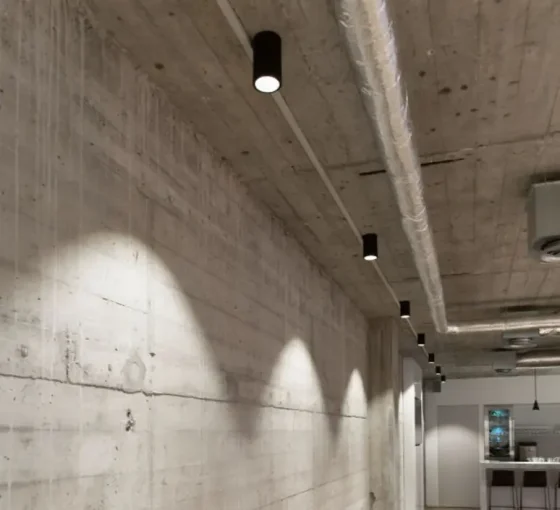
Why Choose Track Lighting for Concrete Ceilings?
- Flexibility: Adjust, rotate, and reposition lights with ease.
- Modern Aesthetic: Sleek and stylish, ideal for contemporary interiors.
- Energy Efficiency: Especially when paired with adjustable LED track spotlights.
- Zoning Capabilities: Perfect for open-plan living spaces or commercial zones.
According to a 2025 report by Allied Market Research, the global track lighting market is expected to reach $4.2 billion by 2029, growing at a CAGR of 5.4%, fueled by demand for modern track lighting solutions (source ).
Tools and Materials Needed
| Tool/Material | Purpose |
|---|---|
| Hammer Drill with Masonry Bits | Drilling into concrete |
| Concrete Anchors | Securing track to the ceiling |
| Screws (Concrete Rated) | Fixing mounting plates |
| Screwdriver/Impact Driver | Driving screws |
| Track Lighting Kit | Light fixture setup |
| Electrical Conduit (if surface-mounted) | Protecting wiring |
| Wire Nuts, Electrical Tape | Safe wiring connections |
| Stud Finder (with deep scan mode) | Locating embedded conduits or rebar |
| Safety Gear (Goggles, Gloves) | Personal protection |
Step-By-Step Guide: How to Install Track Lighting on Concrete Ceiling
Step 1: Plan Your Layout
Start by deciding the orientation and length of your track lighting.
Measure and mark the ceiling using a chalk line for straight installation.
Design Tip: Position track heads towards focal points like art, dining tables, or architectural features for maximum impact.
Step 2: Locate Obstacles
Use a stud finder capable of detecting metal and electrical wires embedded in the concrete.
Avoid drilling into rebar or existing conduits to maintain the structural integrity and safety of the ceiling.
Step 3: Drill Pilot Holes
Equip your hammer drill with a carbide-tipped masonry bit matching the size of your anchors.
Drill pilot holes at the marked mounting points, typically:
- 4–6 inches from each end
- Every 24 inches along the track
Pro Tip: Start drilling at a low speed to prevent the bit from “walking” before switching to hammer mode.
Step 4: Insert Anchors
Insert plastic or metal concrete anchors into the holes.
Gently tap them flush with a hammer if necessary.
| Anchor Type | Recommended Use |
|---|---|
| Plastic Sleeve Anchors | Light to medium loads |
| Metal Expansion Anchors | Heavy-duty commercial installations |
For track lighting for commercial spaces, opt for heavy-duty metal anchors for maximum support.
Step 5: Wire the Track
- Turn off power at the breaker.
- Run wiring through approved conduit if the installation is surface-mounted.
- Connect wires: black to black (live), white to white (neutral), and green to ground.
- Secure wire connections using wire nuts and electrical tape.
If you’re installing modern adjustable track lighting fixtures, ensure smart components (like dimmers or app controllers) are integrated at this stage.
Step 6: Mount the Track
Align the track with pre-drilled holes and secure it using concrete-rated screws.
Adjustable track spotlights or residential track spotlights can be easily snapped into the mounted track afterward.
Step 7: Attach and Adjust Light Heads
Install your adjustable LED track spotlights onto the track rail.
Position and angle them as desired to highlight different zones or objects.
Lighting Design Tip: Use a mix of flood and spot beams to create layered illumination, enhancing depth and warmth in the space.
Step 8: Final Test and Adjustments
Restore power at the breaker and test the system:
- Check all connections.
- Adjust spotlight angles for optimal coverage.
- Confirm smart control features if applicable.
Common Challenges and Solutions
| Challenge | Solution |
|---|---|
| Concrete too hard to drill | Use higher quality masonry bits and a more powerful hammer drill |
| Misaligned track | Use a laser level for precise alignment |
| Electrical code compliance | Consult local codes or hire a licensed electrician |
Best Track Lighting Choices for Concrete Ceilings
When installing on a concrete surface, durability and adjustability are key.
| Product Type | Best For |
|---|---|
| Modern track lighting solutions | Homes, galleries, retail stores |
| Energy-efficient track lighting | Offices, commercial buildings |
| Adjustable LED track spotlights | Showrooms, art displays |
| Residential track spotlights | Living rooms, kitchens, bedrooms |
Choosing energy-efficient track lighting ensures not only lower electricity bills but also a smaller carbon footprint.
Expert Insights
According to Lighting Design & Application Magazine, integrating modern adjustable track lighting fixtures into concrete ceilings has surged by 20% year-on-year due to the rise in industrial chic and minimalist design trends.
Additionally, combining track systems with adjustable LED track spotlights allows spaces to evolve without major renovations—simply reposition or swap heads as needs change.
Final Thoughts
Installing track lighting on a concrete ceiling is a rewarding project that requires planning, the right tools, and careful execution.
Whether you’re transforming a home interior, setting up an art gallery, or upgrading an office, track lighting provides unparalleled flexibility and style.
By following this comprehensive guide, you’ll achieve professional-quality results and create dynamic, beautifully lit environments.
✨ Ready to elevate your interiors? Explore the latest in smart track lighting innovations and energy-saving lighting options to continue upgrading your space!