Table of contents
- 1. What Are Friction Clips for Recessed Lights?
- 2. Tools and Materials You Will Need
- 3. Step-by-Step Guide to Installing Recessed Lights with Friction Clips
- 4. Benefits of Using Friction Clips for Recessed Lighting
- 5. Troubleshooting Common Installation Issues
- 6. Conclusion
- 7. FAQ on how to install recessed lights with friction clips
Recessed lighting is a modern, stylish way to illuminate a room while preserving a clean and minimalist aesthetic. Whether you’re upgrading your kitchen, living room, or any other space, friction clips offer a simple and cost-effective way to install recessed lights without the need for additional tools or professional help. In this comprehensive guide, we’ll take you through everything you need to know about installing recessed lights with friction clips, including materials, tools, the step-by-step process, and helpful tips. Whether you’re a DIY enthusiast or just looking to save on labor costs, this article will help you achieve a professional result with minimal hassle.
1. What Are Friction Clips for Recessed Lights?
Before we dive into the installation process, let’s briefly explain what friction clips are and why they are so popular for installing recessed lighting.
📌 What Are Friction Clips?
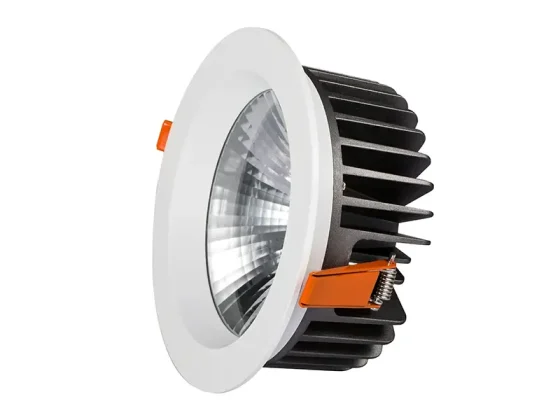
Friction clips are small, metal or plastic clips that are designed to hold the recessed light housing securely in place during installation. They work by creating a tight, friction-based grip against the ceiling material (typically drywall). The clip’s pressure ensures that the housing remains stationary without the need for additional fasteners or screws.
📌 Why Use Friction Clips?
Friction clips are widely favored for recessed lighting installations because they:
- Simplify the Installation Process: Unlike traditional mounting brackets that require screws or nails, friction clips are designed for quick, hassle-free installation.
- Save Time and Money: With no need for additional fasteners or specialized tools, friction clips reduce both the time spent on installation and the associated costs.
- Minimize Ceiling Damage: The grip provided by friction clips minimizes the need to make large holes or adjustments to the ceiling structure, reducing the likelihood of damage.
2. Tools and Materials You Will Need
Before you begin installing your recessed lights with friction clips, gather the necessary tools and materials. Here’s a list of everything you will need:
🔧 Tools Required:
- Drill with appropriate bits for ceiling holes (usually 4-inch or 6-inch)
- Screwdriver
- Tape Measure to ensure proper spacing and alignment
- Wire Strippers for electrical connections
- Level to ensure that your lights are installed evenly
- Pencil for marking hole locations
- Ladder for high-ceiling installations
🧰 Materials Needed:
- Recessed light housing (with built-in friction clips)
- Recessed light bulbs (LEDs are the most popular option for energy efficiency)
- Electrical wiring E connectors
- Junction boxes (if required by local codes)
- Wire nuts for connecting the electrical wires
- Safety gloves and goggles for protection during the installation
3. Step-by-Step Guide to Installing Recessed Lights with Friction Clips
Now that you’re equipped with the right tools and materials, let’s walk through the process of installing recessed lighting with friction clips.
📏 Step 1: Plan and Mark the Location
Before cutting into your ceiling, you need to carefully plan where the lights will go. Follow these steps to determine the perfect spot for your recessed lights:
- Measure and Mark: Use a tape measure to ensure that your recessed lights are evenly spaced. For the best lighting coverage, aim for 4 to 6 feet between each light.
- Use a Pencil: Lightly mark the ceiling where each recessed light will be installed. Double-check measurements and spacing before proceeding.
🔩 Step 2: Cut the Holes in the Ceiling
Once the locations are marked, it’s time to cut the holes for the light housings.
- Use a Hole Cutter or Jigsaw: If you are installing 4-inch recessed lights, use a hole cutter designed for this purpose. For larger fixtures, use a jigsaw or keyhole saw.
- Cut Carefully: Cut along the marked outlines, being careful to stay within the lines. If your ceiling has insulation, make sure to remove it from the area before cutting the hole.
🏠 Step 3: Insert the Friction Clip Light Housing
With the holes cut, you’re ready to insert the recessed light housing with friction clips.
- Insert the Housing: Gently insert the light housing into the hole. The friction clips will naturally press against the edges of the ceiling and hold the housing in place.
- Check for Stability: Gently tug on the housing to ensure it is securely held in place. The clips should create enough friction to hold the housing firmly without needing additional fasteners.
⚡ Step 4: Wire the Recessed Lights
Now that the housing is secured, you can move on to wiring the recessed lights.
- Connect the Wiring: Use wire nuts to connect the electrical wires to the light’s terminals. Ensure that all connections are tight and secure. If your recessed light fixture has a ground wire, be sure to connect it to the ground wire in your electrical box.
- Use a Junction Box (if required): In some cases, especially in older homes, you may need a junction box to protect the electrical connections. Be sure to follow local building codes for proper wiring and connections.
🛠 Step 5: Attach the Trim and Light Bulb
After the wiring is complete, the final step is to install the trim and light bulb.
- Install the Trim: Attach the trim ring (or bezel) around the light housing. Depending on the design, the trim may either click into place or screw in.
- Insert the Bulb: If your recessed light housing doesn’t come with a bulb, screw in the appropriate light bulb, typically an LED or incandescent bulb depending on your choice.
🔌 Step 6: Test the Lights
Once everything is installed, it’s time to test your new recessed lights.
- Turn On the Power: Flip the light switch to test whether the lights turn on. If the lights don’t work, check the wiring connections and ensure everything is securely in place.
- Adjust as Needed: If your recessed lights have adjustable features, you can now adjust the angle of the beam or dimming options (if applicable).
4. Benefits of Using Friction Clips for Recessed Lighting
Using friction clips to install recessed lights offers a number of advantages over traditional mounting methods. Here’s why friction clips are a great choice:
| Advantages of Friction Clips | Benefits |
|---|---|
| Easy Installation | No need for screws, nails, or additional fasteners |
| Quick and Efficient | Reduces installation time by up to 50% |
| Secure Hold | Friction clips create a firm grip, reducing ceiling damage |
| Cost-Effective | Eliminates the need for specialized tools or additional hardware |
| Minimal Ceiling Modifications | Leaves less damage to the ceiling structure |
5. Troubleshooting Common Installation Issues
While installing recessed lights with friction clips is relatively straightforward, there may be some issues you encounter. Here’s how to troubleshoot the most common problems:
🔌 Problem 1: The Housing Doesn’t Fit
- Solution: Double-check the diameter of the hole you cut and compare it to the size of the recessed light housing. If the hole is too small, enlarge it with a jigsaw or hole cutter.
⚡ Problem 2: The Clips Don’t Hold the Housing Securely
- Solution: Ensure the ceiling material is in good condition and thick enough to grip the friction clips properly. If the clips still don’t work, consider switching to a different type of recessed light housing or using additional mounting methods.
💡 Problem 3: Lights Don’t Turn On
- Solution: Check all wiring connections, ensuring they are secure. If using a dimmer switch, ensure it’s compatible with the type of bulb you’ve installed.
6. Conclusion
Installing recessed lights with friction clips is a simple and efficient method for enhancing the lighting in your home or office. With the right materials, tools, and careful attention to detail, you can achieve professional-quality results without the need for a costly electrician. Whether you’re tackling a DIY project or simply upgrading your home’s lighting, friction clips provide an easy-to-install and secure solution for recessed lighting installation.