![So tauschen Sie eine Einbauleuchte aus: Die beste Schritt-für-Schritt-Anleitung [2025]](https://xhlux.com/wp-content/uploads/2024/05/news.webp)
Inhaltsverzeichnis
- First, A Critical Question: Are You Replacing the Bulb or the Entire Fixture?
- Part 1: How to Replace a Downlight Bulb (e.g., GU10 LED)
- Part 2: How to Replace the Entire Downlight Fixture
- What to Consider When Choosing a Replacement Downlight Fixture
- Upgrading from Old Technology: The Benefits
- Final Word: Making the Right Replacement Choice
- FAQ About How To Replace A Downlight
Whether one of your old recessed lights has finally given up, or you’re looking to modernize your home’s lighting with a sleek LED upgrade, the task of replacing a downlight can seem either incredibly simple or surprisingly complex. The truth is, it can be both.
It all depends on one critical question: are you just changing a light bulb, or are you replacing the entire fixture?
Don’t worry if you’re not sure. This is the definitive guide to help you identify your situation and walk you through the correct, safe process for each scenario. We’ll cover the quick and easy bulb swap as well as the more involved full fixture replacement, explaining the professional techniques, critical safety checks, and what you need to consider before you begin.
First, A Critical Question: Are You Replacing the Bulb or the Entire Fixture?
Before you start, look closely at your existing downlight.
- It’s a Bulb Replacement if: You can see a distinct, separate bulb held inside the fixture by a small wire clip. The bulb will have a visible face and can be removed from a socket. This is typical for GU10 systems.
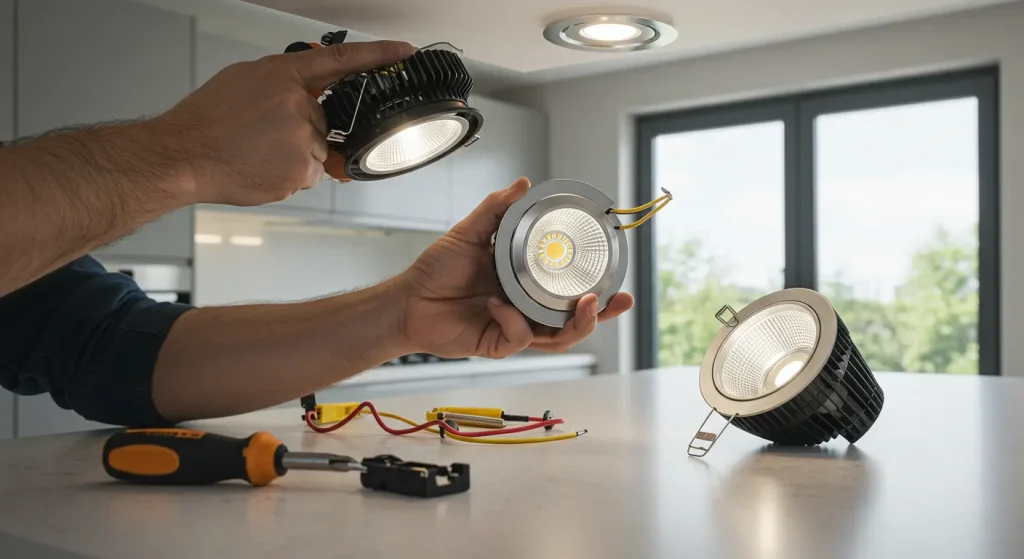
- It’s a Fixture Replacement if: The light source appears to be a seamless, flat, or integrated part of the fixture itself. There is no visible bulb to remove or any retaining clip. This is an Integrated LED-Einbauleuchte. If this is what you have, or if you want to replace an old housing entirely, you’ll be following the full fixture replacement guide.
Let’s break down each process.
Part 1: How to Replace a Downlight Bulb (e.g., GU10 LED)
This is the most common and user-friendly scenario. If you’ve identified that you have a replaceable bulb, follow these steps.
A) Safety First: Power Off at the Breaker
Even for a simple bulb change, this is the safest practice. Go to your main electrical panel and turn off the circuit breaker that controls the lights for that room. Flick the wall switch to “on” to confirm the power is fully disconnected.
B) The Step-by-Step Bulb Change
- Position Your Ladder Safely: Place a sturdy stepladder on level ground, allowing you to work comfortably without overreaching.
- Release the Retaining Clip: This is the key step. Using your fingertips, gently squeeze the two ends of the thin wire clip that presses against the bulb. This will release its tension, allowing you to work the clip out of its groove and let it hang down.
- Remove the Old Bulb: With the clip released, grip the bulb, push it gently upwards into the socket, and twist it about a quarter turn counter-clockwise. The bulb will disengage from the socket.
- Install the New Bulb: Align the two pins of your new GU10 bulb with the holes in the socket, push up gently, and twist clockwise until it locks securely in place.
- Secure the Clip and Test: Squeeze the retaining clip again and reseat it in its groove so it presses against the new bulb. Restore power at the breaker and test your new light.
C) Choosing the Right Replacement Bulb
This is your chance to upgrade. Look for a GU10 LED bulb with:
- High CRI (90+): For vibrant, natural colors.
- The Right Color Temperature (CCT): 2700K-3000K is ideal for a warm, inviting feel in most homes.
- Dimmable Functionality: Ensure the packaging says “Dimmable” if it’s on a dimmer circuit.
Part 2: How to Replace the Entire Downlight Fixture
This is a more involved project that includes wiring. It’s necessary if you have a failed integrated LED fixture or want to upgrade an old, inefficient housing.
A) An Unskippable Safety Warning: When to Call a Professional
CRITICAL SAFETY WARNING: Replacing a light fixture involves direct handling of mains voltage wiring (e.g., 120V/230V). This work is dangerous and should only be performed by a qualified, licensed, and insured electrician who understands all local and national electrical codes. The following steps describe the professional process for educational purposes and are NOT a DIY guide for unqualified individuals.
B) The Professional Process for Full Fixture Replacement
Step 1: Isolate the Power Completely
An electrician will always begin by shutting off the power at the circuit breaker, locking it out, and verifying with a voltage tester that the circuit is dead.
Step 2: Remove the Old Fixture
- Remove the Bulb/Trim: The process starts by removing the old bulb and bezel/trim to get access to the housing.
- Release the Housing: The main downlight “can” is held in the ceiling by two or three powerful spring clips. The electrician will carefully pull the fixture down from the ceiling, reaching inside to release the tension on these clips to avoid damaging the drywall.
- Disconnect the Wiring: Once the fixture is hanging freely, the electrician will open its junction box and safely disconnect the live, neutral, and earth wires from the building’s electrical cable.
Step 3: Prepare the New Fixture
The electrician will unpack the new downlight fixture and open its junction box, preparing it for connection. They will ensure the new fixture is the correct type (Remodel vs. New Construction) and has the necessary safety ratings (IC-Rated for contact with insulation).
Step 4: Connect the New Wiring
Following the manufacturer’s instructions and local code, the electrician will connect the building’s wiring to the new fixture:
- Earth to Earth: The green or bare copper wire is connected to the green ground screw or wire.
- Neutral to Neutral: The white wire is connected to the white wire.
- Live to Live: The black wire is connected to the black wire.
All connections are made securely using appropriate wire connectors (e.g., Wago clips or wire nuts).
Step 5: Fit the New Fixture into the Ceiling
- The electrician pushes the wired junction box up into the ceiling cavity.
- They then push the new downlight housing up into the hole until its trim is flush with the ceiling. The fixture’s spring clips will engage on the top side of the drywall, snapping into place and pulling the fixture up securely.
Step 6: Install Bulb (if applicable) and Test
If it’s a GU10 system, the new bulb is installed. The electrician then restores power at the breaker and thoroughly tests the new fixture and any associated dimmer switch.
What to Consider When Choosing a Replacement Downlight Fixture
If you’re doing a full replacement, you’re making a long-term decision. Here’s what to consider.
1. Match the Cut-Out Size!
This is the most important practical consideration. Measure the diameter of the hole in your ceiling from the old fixture. You must choose a new downlight that is designed to fit that exact cut-out size. Trying to fit a 4-inch downlight into a 6-inch hole will leave an unsightly gap.
2. Upgrading to Modern Safety Standards
If your old downlights were Non-IC, this is the perfect opportunity to upgrade to modern IC-Rated (Insulation Contact) fixtures. This is essential for safety and energy efficiency in any insulated ceiling. Look for ICAT (Insulation Contact Airtight) rated fixtures for the best performance.
3. The Big Choice: GU10 System vs. Integrated LED
- Choose a GU10 System if: You prioritize long-term flexibility, serviceability, and the ability to upgrade your lighting technology just by changing a bulb.
- Choose an Integrated LED System if: You want the sleekest possible profile and a simple, all-in-one solution, and you accept that the entire fixture will need to be replaced if it ever fails.
Upgrading from Old Technology: The Benefits
Replacing an old fixture is a chance to reap the massive benefits of modern LED technology.
| Old Technology | Modern LED Replacement | Key Benefits of Upgrading |
|---|---|---|
| 50W Halogen GU10 | 5W-7W LED GU10 | ~85% energy savings; 10-20x longer lifespan; runs significantly cooler. |
| 26W PLC Fluorescent | 9W-12W LED Retrofit Kit | ~60% energy savings; 3-5x longer lifespan; instant-on with no flicker; no hazardous mercury. |
| 75W Incandescent R-Bulb | 10W-15W LED Downlight | ~80% energy savings; 20-25x longer lifespan; vastly superior light quality and beam control. |
Final Word: Making the Right Replacement Choice
How to replace a downlight is a question with two distinct answers. For a simple bulb swap, it’s a safe and satisfying DIY task that can be done in minutes. For a full fixture replacement, it’s a project that involves electrical wiring and is best left to a qualified professional.
Understanding which situation applies to you is the key to a successful outcome. By prioritizing safety and making informed choices about your replacement products, you can ensure your home’s lighting is not only functional but also efficient, beautiful, and safe for years to come.
Need help selecting the right replacement fixtures or bulbs for your upgrade project?
The options can be overwhelming. Our team of lighting specialists can help you navigate the choices, ensuring you find the perfect, compatible products that meet modern safety and performance standards.
Contact us today for a professional consultation and let’s plan your lighting upgrade together.