 XHLUX
XHLUX
A linear profile light in ceiling is an aluminium channel, LED strip and diffuser assembled into the ceiling plane—not a finished luminaire just because the line looks continuous in a rendering.
Cutting the board before you freeze channel depth, trim, plaster sequence and driver access turns a slim slot into cracked finish, visible LED dots or a driver you cannot reach.
Use this page when the drawing already says “profile in the ceiling” and you need a pass-fail checklist before anyone opens the surface.
För grundläggande linjära former och terminologi, börja här:
→ Vad är kommersiell linjär pendelbelysning: Nybörjarguide
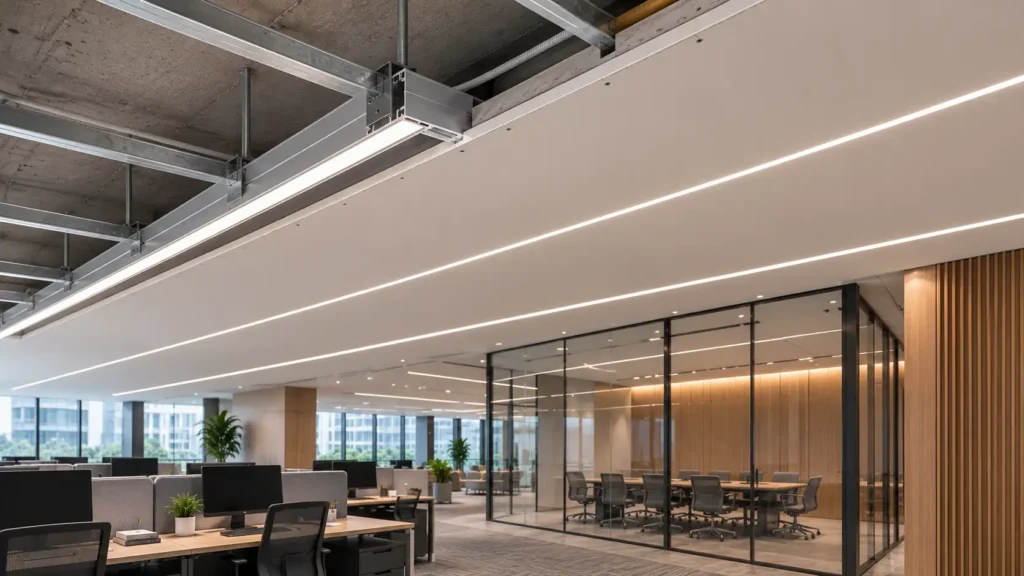
TL;DR: Confirm the product is a profile system, not a generic linear bar. Then lock void depth, plaster-in versus trim, driver access, heat path and joiners on a coordinated ceiling section—before the first cut.
1. Confirm you are installing a profile, not a generic linear bar
“Linear lighting” is a shape. A profile is a build: metal housing, strip, diffuser and the way that assembly meets the ceiling.
A complete linear luminaire may look similar from below, yet it already includes a tested housing, driver arrangement, joins and mounting kit.
A profile kit can still be only a channel waiting for a strip, current setting and remote driver that have not been approved together.
If the schedule still says “linear light” without naming the channel, strip width, diffuser, driver location and ceiling interface, stop. You do not yet have an installable product.
För det som räknas som en komplett produktgräns – hölje, driver, optik och skarvar – använd guide till definition av linjär armatur.
Do not copy a pendant bar into a plaster slot. The optic, heat path and service route change when the same glowing line is built into the ceiling.
🎯 Is a long glowing line already a profile system?
No. Approve the channel, strip, diffuser, driver location and ceiling interface as one documented assembly.
2. Check that the ceiling can take a recessed linear profile channel
A recessed linear profile channel needs a coordinated opening, support and void—not just a pretty aperture width on the reflected ceiling plan.
Record before cutting:
- Profile width, flange width and overall depth from the datasheet
- Extra depth for cable bend, connectors and any in-line joiner
- Board thickness versus flange or plaster-in wing
- Framing, ducts, sprinklers and insulation that cross the run
- A support path that does not hang the channel from finish plaster alone
A slim visible slot can hide a deeper body. Do not infer void from the luminous opening.
If you have not yet decided whether the ceiling should be suspended or recessed at all, stop.
Använda Ska du hänga upp eller sätta in en linjär lampa?. This page assumes the interface is already a ceiling-plane profile.
Fire, acoustic and airtight ceiling assemblies need the complete build reviewed—not only the aluminium extrusion.
🎯 Does a narrow slot prove the channel will fit?
No. Housing depth, cable bend, connectors and clearances are often deeper than the visible opening.
3. Freeze plaster-in versus trim before anyone cuts
plaster-in linear lighting hides the flange under compound so only the luminous slot remains. A trimmed channel keeps a visible frame. Those are different ceiling details, not two finishes of the same opening.
| Kontrollera | Plaster-in / trimless | Visible trim |
|---|---|---|
| Ceiling finish | Compound and paint must meet the slot | Frame covers the cut edge |
| Tolerance | Waves and cracks read along the whole run | Trim can hide small edge errors |
| Sequence | Channel in before finishing coats | Channel can follow a cleaner opening |
| Service | Opening the slot may damage the finish | Trim may allow later removal |
| Best when | Architecture needs a flush light line | Retrofit, grid, or looser finish control |
linear light trim options also include flange colour, slot width and whether the diffuser sits flush, proud or set back. Freeze those with the paint schedule—not after the first coat.
Do not plaster over a temporary diffuser and hope it survives. Protect the channel; fit the final lens after finishing.
🎯 Should trim wait until after plaster?
No. Plaster-in versus trim changes the opening, sequence and how you will service the run later.
4. Plan the ceiling profile light installation sequence
ceiling profile light installation is vulnerable at trade hand-off, not only at the first screw.
Agree one sequence on the drawing:
- Set a laser centreline and support points along the full run.
- Fix the channel to structure, not to unsupported board.
- Confirm joins, corners and feed positions while the void is still open.
- Protect the internal surfaces during plaster and paint.
- Install the strip and final diffuser only after finishing is stable.
- Leave a documented route to the driver.
Different trades cannot each “do their bit” against an unmarked slot. A 2 m catalogue length that is butted without a planned join will read as a dark seam from the floor.
Corners, T-junctions and door-head breaks need a drawn detail. Mitre cuts can work; they are not a substitute for a specified corner piece when the sightline is long.
🎯 Can electricians and plasterers work in any order?
No. Fix the channel and joins first, protect the slot through finishing, then fit strip and diffuser.
5. Locate drivers, heat path and access before the ceiling closes
Aluminium in a profile is a heat path as well as a housing. Strip width, current, diffuser and surrounding insulation all change operating temperature.
Kontrollera:
- Maximum strip width the channel actually accepts
- Driver location: remote, in-line, or in an accessible void
- Clearance around the channel if insulation will pack the cavity
- Whether a failed driver can be swapped without demolishing the slot
- Control wiring, emergency modules and test points on the same drawing
IEC 60598-1:2024 covers luminaire construction, marking and electrical safety for the finished assembly. A bare strip plus an unnamed driver is not evidence for that assembly.
A remote driver is not automatically serviceable. If the finished ceiling, ducts or fire barriers block the hatch, you have specified a trapped component.
ISO/CIE 8995-1:2025 still expects usable light on the task after the ceiling is closed. A bench sample does not prove the finished workplace.
🎯 Is a remote driver automatically accessible?
No. The finished ceiling section must show a safe, unobstructed route to that exact driver location.
6. Lock length, joins and diffuser before the run is painted
Catalogue lengths are starting modules. The scheduled run is the sum of cuts, joiners, feeds, blank sections and end caps.
Document:
- Module lengths and permitted field cuts
- How adjacent channels align optically, not only electrically
- Diffuser type: opal, frosted or clear—and how it hides LED pitch
- End-cap thickness and any dark ends at walls
- Expansion, access breaks and where the line is allowed to stop
Deeper channels and denser strips reduce spotting, but only when the diffuser and current match. A shallow channel with a sparse strip will still show dots at night.
Do not paint, then discover the diffuser is shorter than the channel. Dry-fit a representative joined length first.
🎯 Can you join profiles after painting?
Not as a first plan. Dry-fit length, joins and the diffuser while the void is still open and unfinished.
7. Approve a joined ceiling mock-up before the first cut
The last check is a sample of the real interface—not a short offcut on a desk.
The mock-up should include the nominated board, channel, plaster or trim, paint, diffuser, feed and the intended driver location.
View it at full output and at the specified minimum dim level, from normal room positions.
Use this release order:
- Freeze profile versus complete luminaire.
- Confirm void, structure and fire/acoustic notes.
- Select plaster-in or trim.
- Draw the install sequence and access route.
- Check heat, strip width and driver model.
- Dry-fit length, joins and diffuser.
- Cut only after the sample and drawings agree.
If any row in the table below fails, do not open the ceiling.
| Pre-cut check | Passera | Misslyckas |
|---|---|---|
| Product boundary | Channel, strip, diffuser and driver named | “Linear profile” with no build |
| Void and support | Depth and structure match datasheet | Slot drawn without a section |
| Finish interface | Plaster-in or trim frozen | Opening size guessed on site |
| Tillträde | Driver route drawn | “Accessible from above” with no hatch |
| Optical join | Sample shows continuous line | Dark seam or visible dots |
🎯 Should you cut before the mock-up agrees?
No. Cut only after the joined sample, ceiling section and scheduled build match on the same detail.
The chart below ranks what usually decides the cut—not a product score.
| Prioritet (hög → lägre) | Pre-cut check |
|---|---|
| 1 | Channel vs void depth |
| 2 | Plaster-in vs trim |
| 3 | Driver access route |
| 4 | Heat path / insulation |
| 5 | Joins, length, diffuser |
Vanliga frågor
Vad man ska göra härnäst
Freeze the ceiling section: channel, strip, diffuser, plaster-in or trim, driver location and access hatch. Dry-fit a joined sample at full output and at the specified minimum dim level before anyone cuts.
If suspend versus recess is still open, use the interface guide linked earlier in this article. If the product is actually a complete luminaire rather than a profile kit, use the luminaire definition guide linked there.
For project-based linear profile runs, XHLUX can review channel depth, trim or plaster-in detail, driver access and joiners against the ceiling section before the opening is released.
Anteckningar och källor
- IEC 60598-1:2024, Luminaires, Part 1: General requirements and tests — used for the point that a strip plus unnamed driver is not evidence for the finished assembly.
- ISO/CIE 8995-1:2025, Light and lighting, Lighting of work places, Part 1: Indoor — used for the point that task lighting must still be checked after the ceiling is closed.
- Användargodkända skärmdumpar av Google PAA för
linear profile light in ceiling(2026-08-20) — FAQ questions selected from on-theme results under that query. - Project Serper organic, PAA and related searches for the same keyword — live SERPs mix catalogues, AI Overview definitions and a profile-versus-linear explainer; they do not replace a project ceiling section.
- Project-specific electrical, structural, fire and acoustic rules remain applicable. Confirm local requirements before cutting.
![Vad är en dimbar skenlampa med smal strålning: Bästa guiden [2025]](https://www.xhlux.com/wp-content/uploads/2025/06/Tight-Beam-Track-Light-Fixture-for-High-Contrast-Visual-Impact-560x560.webp "Vad är en dimbar skenlampa med smal strålning: Bästa guiden [2025]")

![Vad är en dimbar skenlampa för vardagsrummet: Bästa guiden [2025]](https://www.xhlux.com/wp-content/uploads/2025/06/Adjustable-Track-Spotlight-for-Living-Rooms-560x560.webp "Vad är en dimbar skenlampa för vardagsrummet: Bästa guiden [2025]")