XHLUX
XHLUX
A dining room downlight is in the wrong place when it follows an empty ceiling grid instead of the table, seats and actual sightlines below it.
The usual symptoms are familiar: bright patches on the floor, glare above diners’ heads, a dark centre on the table or a layout that stops working as soon as the table moves.
If you first need to choose recessed, surface-mounted or adjustable construction, start here:
→ Installationsmetoder för LED-downlight: Infälld vs. ytmonterad vs. justerbar
For the same sightline problem in sleeping spaces, compare the bedroom layout guide:
→ Var man ska placera downlights i ett sovrum (och var man inte ska)
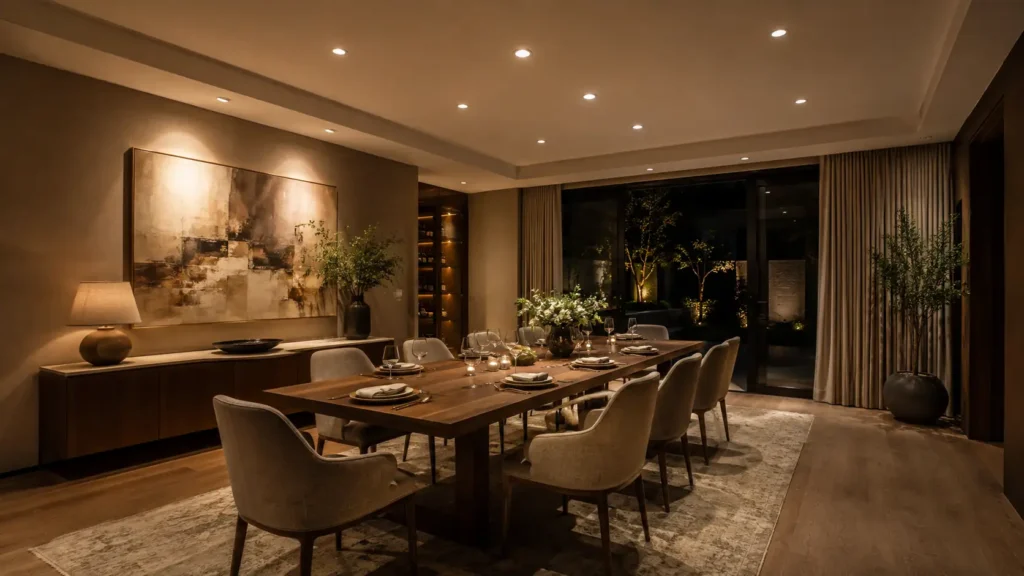
TL;DR: Fix the dining table and seating plan before placing ceiling lights. Aim beams at the table surface and useful surrounding zones, keep bright apertures away from seated sightlines, then verify beam overlap, dimming and furniture flexibility with a real sample.
1. The ceiling grid came before the dining table
The most common mistake is dividing the ceiling into equal rectangles and placing a downlight at every neat intersection. The grid looks ordered on a reflected ceiling plan, but diners do not sit on that drawing.
Start with the table footprint. Mark its centreline, edges, permanent extensions, chairs and main approach routes. Then identify what needs light:
- Food and table settings
- Faces without harsh overhead shadows
- Serving surfaces and circulation
- Artwork, joinery or architectural details
- A softer ambient layer around the dining zone
A good restaurant ceiling lighting layout may look less symmetrical than the ceiling grid because it follows tables, booths, counters and circulation. That is not a defect. It is task-based coordination.
🎯 Should dining downlights form an even ceiling grid?
Not automatically. The layout should first serve tables, seats and circulation; ceiling symmetry is useful only when it supports those tasks.
2. Bright apertures sit directly above diners’ heads
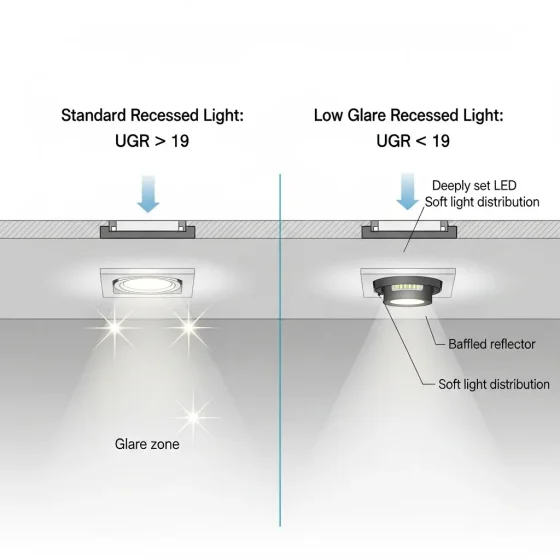
A fitting placed above a chair can enter the diner’s upper field of view and create hard facial shadows. The problem becomes worse with shallow sources, wide exposed diffusers or high-output narrow beams.
Move the beam toward the table surface rather than the chair centre. Deeper-recessed optics, controlled cut-off and adjustable heads can help, but none of them excuses a poor ceiling position.
Check the room from seated eye height. Look across the table, toward entrances and toward reflective surfaces. A fitting that appears discreet while standing can dominate the view after someone sits down.
Mirrors, glossy cabinets and dark television screens can return the source into a diner’s sightline. Trace reflected glare, not only direct glare.
🎯 Is a downlight directly above a chair always wrong?
It is a warning position, not an automatic failure; approve it only after checking source visibility, cut-off, facial shadows and reflected glare from seated viewpoints.
3. The beam misses the table or creates isolated hotspots
Ceiling position does not equal illuminated position. The beam axis, mounting height, tilt angle and beam width decide where the useful light lands.
Uppskatta den initiala stråldiametern med:
stråldiameter ≈ 2 × avstånd till mål × tan(strålvinkel ÷ 2)
For example, at 2.0 m from fitting to tabletop, a 30° beam creates an approximate 1.07 m diameter. A 50° beam creates about 1.87 m. These are geometry checks, not guarantees of illuminance or uniformity.
Narrow beams can give a table more visual emphasis, but poor spacing creates bright circles and dark gaps. Wide beams overlap more easily, yet may spill onto diners or surrounding floors.
Use photometry for the exact optic and test one representative table. Surface colour matters too: pale linen and glossy crockery reflect light differently from dark timber and matte finishes.
🎯 How should beam angle affect dining-table placement?
Choose beam angle from the table area and mounting distance, then position fittings so useful beam overlap reaches the tabletop without exposing diners to glare.
4. The layout ignores table shape and furniture movement
A round table, long rectangular table and extendable table should not inherit the same ceiling pattern. Their useful lighting zones differ in length, width and likely seating positions.
The diagram is a planning prompt, not a universal four-light prescription.
For a long table, a row or paired arrangement may support the table length. For a round table, fewer well-controlled beams around or toward the centre may produce a calmer result.
Extendable tables need another decision. Either light the permanent everyday position and accept a temporary compromise, or design enough flexibility for the extended layout. Adjustable downlights, track lighting or a separate pendant layer can help.
🎯 Should the downlights stay centred if the table can move?
Only if the table position is reliable; otherwise use a more flexible optical or layered solution instead of pretending the furniture will never change.
5. Downlights are trying to provide every lighting layer
Dining spaces need more than horizontal light on the table. They also need enough ambient light for orientation, vertical light for faces and walls, and controlled accents for artwork, joinery or displays.
Använda dining area accent lighting to create hierarchy rather than raising every downlight to the same brightness. A highlighted table can feel intimate only when the surrounding room remains legible and comfortable.
In hospitality projects, separate the lighting jobs:
| Lighting job | Typical role | Vanligt misstag |
|---|---|---|
| Table light | Food, menus and table setting | Bright beam centred over a diner |
| Ambient light | Circulation and orientation | Relying on spill from accent lights |
| Vertical light | Faces, walls and materials | Lighting only the floor plane |
| Decorative light | Identity and atmosphere | Expecting a pendant to meet every task |
Do not judge the layout from a single plan view. Review vertical surfaces, seated faces and the relationship between decorative fittings and recessed lights.
🎯 Can a pendant replace dining-room downlights?
Sometimes for the main table, but circulation, serving areas, walls and room flexibility may still need separate lighting layers.
6. The colour and dimming plan was treated as an afterthought
A warm dimmable dining light should preserve comfortable colour and stable output throughout the required control range. “Dimmable” on a catalogue page does not prove smooth low-end behaviour with the project’s selected control.
Bekräfta:
- CCT at full and low output
- CRI and colour consistency for food and finishes
- Driver and dimmer compatibility
- Minimum stable dimming level
- Flicker behaviour across the dimming range
- Whether different lighting layers dim separately
- Scene recovery after power interruption
Warm light is common in dining spaces, but there is no universal CCT for every interior. Materials, daylight, brand identity and adjacent spaces affect the decision.
For output planning before dimming scenes are set, use:
→ Hur ljusstarka bör LED-downlights vara? En lumenguide per rum
🎯 Should every dining light dim on one channel?
Not necessarily. Separate table, ambient, vertical and decorative layers when the space needs different scenes for service, cleaning and atmosphere.
7. Spacing was copied from a generic rule
There is no reliable universal downlight spacing over table rule without the table dimensions, mounting height, beam angle, lumen output, aiming and target illuminance.
Use this sequence instead:
- Fix the table and seating plan.
- Mark the tabletop area that needs useful light.
- Record the fitting-to-table distance.
- Choose a beam family and estimate initial coverage.
- Place fittings to achieve controlled overlap.
- Check seated glare and facial shadows.
- Test the dimming scenes with real finishes.
For restaurants, repeat the check on several table types. A two-seat table at the perimeter, a four-seat table in the centre and a booth against a wall may need different beam and aiming solutions.
A sample bay is worth more than a perfect-looking grid. Install the intended fitting at the real height, dress the table and view it during the expected day and evening conditions.
Vad man ska göra härnäst
- Freeze the everyday and extended table positions.
- Mark chair centres as glare-sensitive zones.
- Aim useful light at table surfaces and serving areas.
- Add ambient and vertical layers instead of increasing every downlight.
- Verify the exact beam, driver and dimming combination in one sample zone.
- Ask XHLUX or another project supplier for photometry, driver data and a representative sample before the ceiling layout is released.
- Använda Guider för LED-downlights efter rum och användningsområde when the same project also includes bedrooms, entrances or other room types.
Anteckningar och källor
- The beam-diameter formula is an initial geometric estimate only; it does not replace model-specific photometry or a maintained-light calculation.
- Product photometric files, driver instructions and dimmer compatibility data should match the exact ordered configuration.
- Externa auktoriteter identifieras endast som vanlig text när det behövs. Ingen extern webbplats får en klickbar länk.