
Índice
- The Immediate Answer: A Quick-Start Spacing Guide
- Beyond the Basics: The 4 Core Factors of a Perfect Lighting Layout
- The Professional Method: Calculating Your Fixture Needs
- Room-by-Room Layout Strategies & Common Mistakes
- The Future is Now: Smart Lighting and Trends for 2025
- Final Checklist: Your Path to Perfect Lighting
Figuring out the perfect lighting for a room can feel like navigating a complex maze. You know that a well-lit space is transformative, but the central question—”How many recessed lights do I need per square foot?”—often leads to a confusing spiral of conflicting advice and overly technical jargon. Get it wrong, and you’re left with a ceiling that resembles an airport runway or a room full of gloomy, uninviting corners.
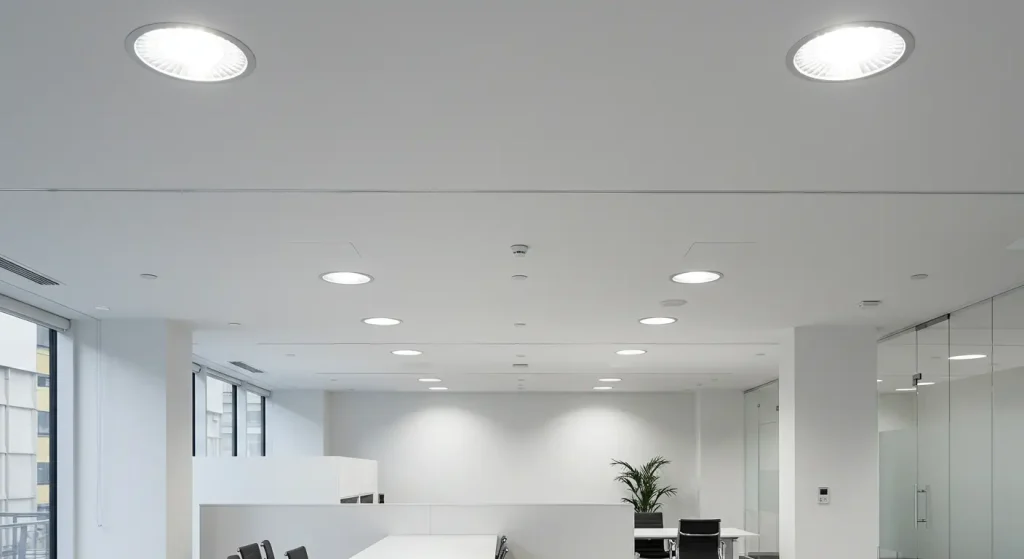
Forget the guesswork. This is your definitive 2025 guide to creating a flawless iluminação embutida plan. We will move from quick, actionable answers to expert-level details, ensuring you have the confidence to design a lighting scheme that is not only functional but truly enhances your space. We’ll address the critical factors the pros use, provide clear formulas, and give you room-by-room blueprints for success.
The Immediate Answer: A Quick-Start Spacing Guide
For those who need a reliable starting point right now, here is the most common rule of thumb used in the industry. This method is based on ceiling height, which is the single most important factor in spacing.
The Golden Rule of Spacing: Ceiling Height / 2
For general ambient lighting in a standard room, a simple and effective formula is to divide your ceiling height by two to determine the distance between each light.
| Ceiling Height | Recommended Spacing Between Lights | Distance from Walls |
|---|---|---|
| 8 ft | 4 ft Apart | 2-3 ft |
| 9 ft | 4.5 ft Apart | 3-4 ft |
| 10 ft | 5 ft Apart | 3-4 ft |
| 12 ft | 6 ft Apart | 4-5 ft |
Example: For a living room with an 8-foot ceiling, you should place your recessed lights approximately 4 feet away from each other. The lights in the first row should be about 2 to 3 feet from the walls to provide a pleasant “wall wash” and avoid creating dark perimeters.
While this rule is an excellent starting point, it’s just that—a start. To achieve a truly professional result, we need to delve deeper into the why behind the numbers.
Beyond the Basics: The 4 Core Factors of a Perfect Lighting Layout
To graduate from a basic layout to a sophisticated lighting design, you must consider the interplay of four crucial elements: Room Function (Foot-Candles), Lumen Output, Beam Angle, and Room Characteristics.
1. Room Function: How Bright Do You Really Need It? (Foot-Candles Explained)
Not all rooms require the same level of brightness. A workshop needs intense, clear light, while a bedroom benefits from a softer, more relaxed glow. This measure of brightness on a surface is called a foot-candle. One foot-candle is the illuminance cast on a one-square-foot surface by a single candle one foot away.
O Sociedade de Engenharia de Iluminação (IES) is the authoritative body that sets recommended foot-candle levels for various environments. Using these recommendations is a hallmark of professional lighting design.
| Room / Area | Activity | Recommended Foot-Candles (FC) | Tipo de iluminação |
|---|---|---|---|
| Kitchen | General & Movement | 30-50 FC | Ambiente |
| Food Prep & Counters | 70-100 FC | Tarefa | |
| Living Room | General & Relaxation | 10-20 FC | Ambiente |
| Reading | 50-70 FC | Tarefa | |
| Bedroom | General & Relaxation | 10-20 FC | Ambiente |
| Reading in Bed | 30-50 FC | Tarefa | |
| Bathroom | General & Movement | 20-30 FC | Ambiente |
| Vanity (Grooming) | 50-80 FC | Tarefa | |
| Home Office | General & Computer Work | 30-50 FC | Ambiente |
| Paperwork & Detailed Tasks | 60-80 FC | Tarefa | |
| Hallway | General Movement | 5-10 FC | Ambiente |
| Workshop/Garage | General & Detailed Work | 80-100+ FC | Tarefa |
As you can see, the key is layered lighting. You use a base level of ambient light and then add more concentrated task lighting where specific activities occur.
2. Lumen Output: The True Measure of Brightness
For decades, we bought light bulbs based on watts, which is a measure of energy consumption. With the dominance of ultra-efficient LEDs, lumens are the only metric that matters. Lumens (lm) measure the total amount of visible light emitted by a source.
A standard 6-inch LED recessed downlight in 2025 typically produces between 650 and 1200 lumens, while using only 8 to 15 watts. The specific lumen output of your chosen fixture is a critical variable in our calculation.
3. Beam Angle & Trim Style: Shaping the Light
O ângulo do feixe determines how wide or narrow the cone of light is as it leaves the fixture. It has a profound impact on whether your lighting feels focused and dramatic or soft and diffuse.
- Narrow Beams (15°- 40°): Ideal for accent lighting (highlighting artwork) or task lighting over a small area like a kitchen island. They create distinct pools of light.
- Wide Beams (60°- 120°): Perfect for general ambient lighting. The wider spread allows for greater spacing between fixtures and creates a more even, overlapping wash of light.
O trim style also plays a role. Baffle trims absorb stray light and reduce glare, while reflector trims maximize light output. A wall-washer trim is specifically designed with a scoop to direct light asymmetrically onto an adjacent wall.
4. Room Characteristics: Color, Furniture, and Finishes
Your room isn’t an empty white box. The colors of your walls, floor, and even your furniture will significantly affect your lighting needs. This is measured by Light Reflectance Value (LRV), a scale from 0 (absolute black) to 100 (pure white).
- High LRV (Light Colors): Walls painted in whites, beiges, and light grays reflect more light back into the room. You may be able to use fewer fixtures or lower-lumen bulbs.
- Low LRV (Dark Colors): Walls in navy, charcoal, or deep greens absorb light. You will need more lumens (either more fixtures or higher-output ones) to achieve the same level of brightness. As a rule of thumb, a dark room might require 10-20% more lumens than a light-colored one.
The Professional Method: Calculating Your Fixture Needs
Now, let’s put these factors together into a reliable formula that a lighting designer would use.
The Lumen Method Formula
This calculation will give you a highly accurate estimate of the number of recessed light fixtures you need.

Let’s walk through an example:
Imagine a 12 ft x 15 ft kitchen com 9-foot ceilings.
Calculate Square Footage:
- 12 ft × 15 ft = 180 sq ft
Determine Desired Foot-Candles:
- For kitchen food prep areas, the IES recommends 70-100 FC. Let’s aim for 80 FC over the main workspace.
Choose Your Fixture’s Lumen Output:
- You’ve selected a 4-inch LED downlight that produces 800 lumens.
Calculate the Number of Fixtures:
- Number of Fixtures = (180 sq ft × 80 FC) / 800 lumens
- Number of Fixtures = 14,400 / 800
- Number of Fixtures = 18
This number seems high because it’s calculated to light the entire room to a high task-lighting level. In reality, you would use a layered approach: provide general ambient light at ~40 FC and then add a higher concentration of lights specifically over the countertops and island.
Refined Approach for the Kitchen Example:
- General Lighting (40 FC): (180 × 40) / 800 = 9 fixtures for ambient light.
- Task Lighting: Instead of adding more, you ensure the placement of those 9 fixtures prioritizes the work areas. You might place 5-6 of them along the perimeter, 2-3 feet out from the cabinets, to perfectly illuminate the counters. The remaining 3-4 could be centered in the open floor space.
Room-by-Room Layout Strategies & Common Mistakes
Theory is one thing; practical application is everything. Here are specific layout strategies and pitfalls to avoid.
Kitchen Lighting: The Workhorse
- Goal: High-function task lighting with comfortable ambient light.
- Layout: Place a row of lights centered over the edge of your countertops, typically 24-30 inches from the wall. This illuminates your workspace without you casting a shadow over it. Add another row over the island or peninsula. Use a wider spacing for general ambient lights in the center of the room.
- Mistake to Avoid: Placing lights in a single grid in the center of the ceiling. This forces you to work in your own shadow at the counters.
Living Room Lighting: The Flexible Space
- Goal: Create a comfortable, versatile atmosphere. Layering is essential.
- Layout: Start with a grid of ambient lighting using the “Ceiling Height / 2” rule. Then, add dedicated accent lights (with a narrower beam) to highlight a fireplace, bookcase, or art. Install everything on dimmers.
- Mistake to Avoid: The “runway” look—two straight rows of lights that feel rigid and uninviting. Staggering your layout or using a square pattern is often more pleasing.
Bedroom Lighting: The Sanctuary
- Goal: Soft, relaxing ambient light.
- Layout: Use fewer lights than in a living room. A simple square of four fixtures in a small-to-medium room is often sufficient. Avoid placing a light directly over the bed, which can be jarring. Place them around the room’s perimeter, 3-4 feet from the walls.
- Mistake to Avoid: Using “cool white” (4000K-5000K) bulbs. Stick to “warm white” (2700K) or “soft white” (3000K) for a calming feel. Better yet, use “Warm Dim” or “Tunable White” LEDs.
Bathroom Lighting: Clarity and Safety
- Goal: Bright, shadow-free task lighting at the vanity and safe general lighting.
- Layout: The most critical lights are at the vanity. Instead of one fixture directly overhead (which creates shadows), place two smaller fixtures on either side of the mirror, about 30-36 inches apart, to provide even light on your face. Add a single, wet-rated light in the shower/tub enclosure.
- Mistake to Avoid: Not using UL “Wet-Rated” or “Damp-Rated” fixtures where required by code. A fixture directly in a shower needs to be Wet-Rated.
The Future is Now: Smart Lighting and Trends for 2025
The world of recessed lighting is evolving rapidly. As of 2025, simply installing a grid of lights on a dimmer switch is no longer the state of the art.
The global smart lighting market is projected to experience explosive growth, with a compound annual growth rate (CAGR) of over 22% from 2025 to 2034, according to a report by Precedence Research. This growth is driven by the demand for energy efficiency and IoT-integrated home systems.
Key trends shaping your choices include:
- Tunable White Lighting: This technology allows you to adjust the color temperature of your lights throughout the day, from a crisp, cool white (4000K) that mimics daylight for focus to a warm, amber glow (2200K) in the evening to help you wind down. This is a wellness feature that’s becoming a new standard.
- Human-Centric Lighting: Designs are increasingly focused on supporting our natural circadian rhythm. The ability to automate color temperature and intensity changes throughout the day is no longer a luxury feature.
- Seamless Integration: Modern fixtures are designed to connect effortlessly with smart home ecosystems like Google Home and Amazon Alexa, allowing for voice control, scheduling, and sophisticated scene-setting.
When planning your project, consider investing in a system with these capabilities. The added cost is marginal compared to the significant improvement in lifestyle and functionality it provides.
Final Checklist: Your Path to Perfect Lighting
Choosing the right number of recessed lights is a process of informed decisions, not just a single calculation. Before you cut a single hole in your ceiling, run through this final checklist.
- Define the Room’s Purpose: What activities will happen here? (Reference the Foot-Candle chart).
- Measure and Calculate: Get your square footage and ceiling height.
- Choose a Preliminary Spacing: Start with the “Ceiling Height / 2” rule.
- Perform the Lumen Method Calculation: Use the formula to get a more precise fixture count based on your needs and chosen fixtures.
- Create a Layered Plan: How will you combine ambient, task, and accent lighting?
- Draw it Out: Sketch your layout on paper, marking joist locations, furniture, and swing-doors.
- Consider the Details: Factor in wall color, beam angle, and trim style.
- Embrace Smart Technology: Use dimmers on everything. Strongly consider a tunable white system for key areas like the kitchen and living room.
By following this comprehensive guide, you can move forward with your project, confident that you have the expertise to create a lighting design that is efficient, beautiful, and perfectly tailored to your home.