XHLUX
XHLUX
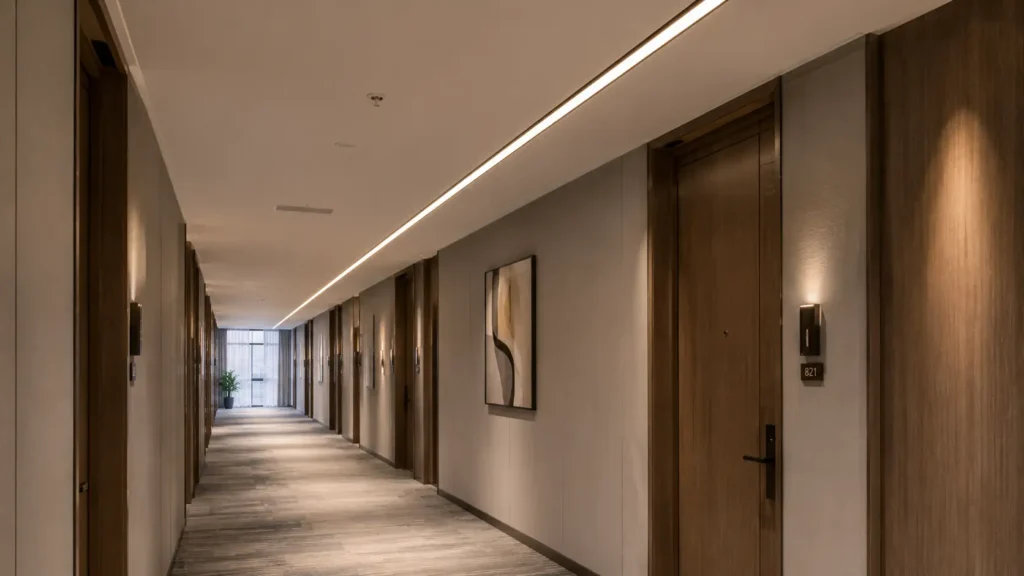
Walk a hotel corridor or office wing at night and you feel the difference immediately: either a calm, even line of light that helps you find doors, or a string of bright dots that leave dark patches between them.
Ceiling mounted linear light fixtures are one of the cleanest ways to fix that on the ceiling plane—especially when the corridor is long, the void is shallow, or you want a continuous architectural line rather than a grid of cans.
This page is a practical pre-order guide for hallways and corridors. It is not a wall up-down guide and not a brand shortlist.
For the wider suspend / surface / recess map, start with Hoe kies je lineaire ledverlichting: hangend, opbouw of inbouw?. If the corridor job is really on the wall face, use the linear up-down guide for walls and corridors instead.
Kort samengevat: Work through five checks before you buy: ceiling path, flush or surface fit, spacing along the run, continuous-row joins, and walking glare. Use the starter spacing formula below, then confirm on a mock-up bay.
Inhoudsopgave
- 🔧 1. Pick the ceiling path—not a wall or pendant job
- 🏢 2. Choose flush mount vs a proud surface bar
- 📏 3. Set ceiling linear light spacing for the corridor
- 🔗 4. Build continuous row ceiling fixtures as a system
- 👀 5. Walk the glare, finish and service checks
- ✅ Five checks at a glance
- Wat moet ik nu doen?
- 🏁 Conclusion
- Veelgestelde vragen
🔧 1. Pick the ceiling path—not a wall or pendant job
Hallway lighting goes wrong when one schedule line tries to do three jobs: ceiling linear, wall wash, and a decorative pendant.
Voor linear lighting for hallways on the ceiling, ask first:
- Should the light sit on or in the corridor ceiling plane?
- Or should the walls carry the rhythm (up-down / grazing)?
- Or is the volume tall enough that a suspended bar in the middle of the width feels right?
Ceiling-mounted linear fits when you want wayfinding and even floor light from above, with a slim visible or flush line. Wall up-down fits when faces and edges matter more than the ceiling plane. Suspension fits when the corridor is tall and open—not when head clearance is already tight.
Put one plain note on the drawing: “Corridor ceiling linear—surface/flush path.” That keeps cans and wall bars from quietly replacing the brief mid-tender.
🎯 Is a corridor always a ceiling-linear job?
Not always—if the brief is about wall faces and edges, start with the wall layer, then add ceiling linear only if the floor path still feels uneven.
🏢 2. Choose flush mount vs a proud surface bar
A flush mount linear fixture sits as close as practical to the finished ceiling so the housing reads quieter. A proud surface bar stays clearly on the face—faster on many retrofits, but every joint and shadow line shows.
| Corridor condition | Lean toward | Waarom |
|---|---|---|
| Shallow or no void; concrete soffit | Surface / near-flush bar | Avoids a continuous cut |
| Plaster ceiling with coordinated recess | Recessed or true flush channel | Cleaner plane when depth exists |
| Fast programme, landlord bans cuts | Surface bar | Keeps the board closed |
| Long sightline, finish-critical hotel | Flush or carefully finished surface | Less visual bulk |
“Flush” in a catalogue is not the same as “invisible.” Look at a real section: housing depth, end caps, cable exit and paint line. If the whole ceiling must stay uncut, the no-recess surface guide on this site goes deeper on that constraint—use it when recess is already off the table for the project, not only for one hallway.
🎯 Does flush mount always need a recess?
No. Some kits sit nearly flush on the face; others need a channel. Trust the section detail, not the brochure adjective.
📏 3. Set ceiling linear light spacing for the corridor
Ceiling linear light spacing is not copied from a lobby desk grid. Corridors are long, narrow, and full of doors, niches and equipment.
For discrete modules along a corridor (separate bars, not one unbroken diffuser), start with the same rule of thumb we use for downlight layouts on this site:
Starter formula: Spacing (m) ≈ ceiling height (m) ÷ 2
| Finished ceiling height | Starter centre-to-centre spacing |
|---|---|
| 2.4 m | ≈ 1.2 m |
| 2.7 m | ≈ 1.35 m |
| 3.0 m | ≈ 1.5 m |
Keep about 0.5–0.8 m from the end wall or bulkhead to the first module centre so the run does not crush the wall line. Those starter figures come from the live downlight spacing guide on this site (height ÷ 2; 0.5–0.8 m from the wall).
Then adjust for corridors:
- Door recesses and niches often need the line to continue past the opening, not stop short and leave a dark pocket
- Wide corridors may need a centreline run plus a second parallel line—do not stretch one row until dark edges appear
- A true continuous diffuser row is a joined system: module length and joiners matter more than “spacing between cans”
Dark patches between modules usually mean the run was treated like a few bars down the middle. Hot spots on shiny floors usually mean too much direct punch for the finish. After the starter numbers, confirm one typical bay with the manufacturer’s optic and a mock-up—photometry still wins over any rule of thumb.
🎯 Can you reuse office desk spacing in a hallway?
Usually no—the geometry and viewing angles differ. Start from height ÷ 2, then tune to doors, width and the optic on a corridor mock-up.
🔗 4. Build continuous row ceiling fixtures as a system
Continuous row ceiling fixtures look simple in a rendering and fail on site when joiners, feeds and diffuser gaps are left to luck.
Put these on the bill of materials:
- Named joiner parts for that housing family
- Feed points that do not create dark mid-run gaps
- Corner or L pieces if the corridor turns
- Diffuser treatment at every seam
- End caps that match the finish schedule
A butt joint that “looks close” is not a continuous row. Dry-fit two modules and one corner before you count modules for a whole wing.
Long hotel or hospital corridors also need control zoning: night setback, cleaning override, emergency maintained points. A continuous look is not the same as one big circuit.
🎯 When is a continuous row ready to buy?
When joiners, feeds, corners and control breaks are named on the submittal—not when the length total alone looks right.
👀 5. Walk the glare, finish and service checks
People walk corridors looking ahead, not down at a desk. A bright diffuser at eye height feels harsher than the same package over an open office.
Before you order, walk the path in your head (or on a mock-up):
- Standing sightlines along the full wing
- Reflections on polished floors or glass doors
- Colour temperature and finish against wall paint
- Driver and joiner access without tearing the corridor finish
- Emergency and night modes that still feel safe
Discomfort-glare practice for interior lighting (CIE 117-1995 and CIE 232:2019 for non-uniform sources) is a useful reminder: long luminous lines need the same honesty about glare as any other occupied interior. Judge the view from walking eye height, not only from a bird’s-eye render.
🎯 Is more output always better in a hallway?
No. Even light and controlled brightness along the path beat a few over-bright modules that leave dark door recesses.
✅ Five checks at a glance
| # | Check before you order | You are ready when… |
|---|---|---|
| 1 | Ceiling path | The job is ceiling-plane linear—not wall up-down or pendant by default |
| 2 | Flush / surface fit | A section shows housing depth, cable exit and finish line |
| 3 | Afstand | Height ÷ 2 starter applied, then tuned on a corridor bay |
| 4 | Continuous row | Joiners, feeds, corners and zones are named |
| 5 | Glare & service | Walking sightlines and access feel right |
Wat moet ik nu doen?
Mark the five checks on one typical corridor section. Lay out a joined bay with real door spacing, then release module lengths and finish.
For project hallway and corridor ceiling linear runs, XHLUX can review mount sections, continuous-row joiners and spacing notes before production.
🏁 Conclusion: Are hallway ceiling linears ready to order?
They are ready when the corridor is treated as its own ceiling system: path clear, flush or surface fit agreed, spacing started from a real formula and checked on a bay, continuous-row hardware named, and walking glare walked through. Skip those five checks and even a good catalogue bar will feel like a compromise in a long wing.
Explore our related blog posts:
- Opbouwbare lineaire plafondlampen zonder inbouwmontage
- Wat is een LED-lineaire armatuur en hoe wordt deze geïnstalleerd?
- Hoe kies je lineaire LED-armaturen voor kantoor- en winkelplafonds?
Noten en bronnen
- CIE 117-1995, Discomfort glare in interior lighting — used when walking sightlines are checked under corridor linear rows (plain-text citation; no outbound link).
- CIE 232:2019, Discomfort caused by glare from luminaires with a non-uniform source luminance — used with CIE 117 for long luminous lines (plain-text citation; no outbound link).
- XHLUX downlight spacing guide (live) — source of starter Spacing ≈ height ÷ 2 and 0.5–0.8 m from wall; applied here as a discrete-module corridor starting point, then adjusted for doors, width and continuous rows (linked once in §3).
- Project Serper PAA voor
ceiling mounted linear light fixtures(2026-07-08) — chandelier PAA skipped; secondaries 0 PAA; five editorial FAQs. - Project-specific electrical, fire, accessibility and emergency-lighting rules remain applicable. Confirm local requirements before installation.