XHLUX
XHLUX
Buying 2m LED track lighting looks simple: one rail, a few spotlights, done. The trouble usually starts on site.
The power point sits in the wrong place for the feed connector, a connector or end cap is missing, or the heads do not fit the rail.
Some 2m kits also arrive as two 1m sections that need joining, which surprises installers expecting one continuous rail.
The short answer: a 2m track works well when four things match the specific system. Those are the components, the power feed, the head configuration for the actual lighting task, and the installation and load limits.
This guide follows the real order of work: understand the system, choose components, plan the lighting, check installation conditions, install and adjust, then maintain and expand.
For how track systems fit together overall, see our track and rail lighting systems guide.
In breve: Ask for a full bill of materials before ordering, not just “a 2m kit”. Settle whether the rail is one piece or two 1m sections, where the power feed enters, and whether your ceiling power point matches it. Choose heads by lighting task, beam angle and distance, not wattage alone. Treat cutting, joining and centre feeding as manufacturer-specific, never as general practice.
Sommario
- 1. What a 2m system includes
- 2. Choosing the right system
- 3. How many lights you need
- 4. One 2m rail or two 1m rails
- 5. Cutting a 2m track
- 6. Centre ceiling power points
- 7. Installation and positioning
- 8. Adjusting the lighting
- 9. Adding or replacing lights
- 10. Troubleshooting
- 11. Different spaces
- 12. Pre-purchase checklist
- FAQ
- Conclusione
📦 1. What Is Included in a 2m LED Track Lighting System?
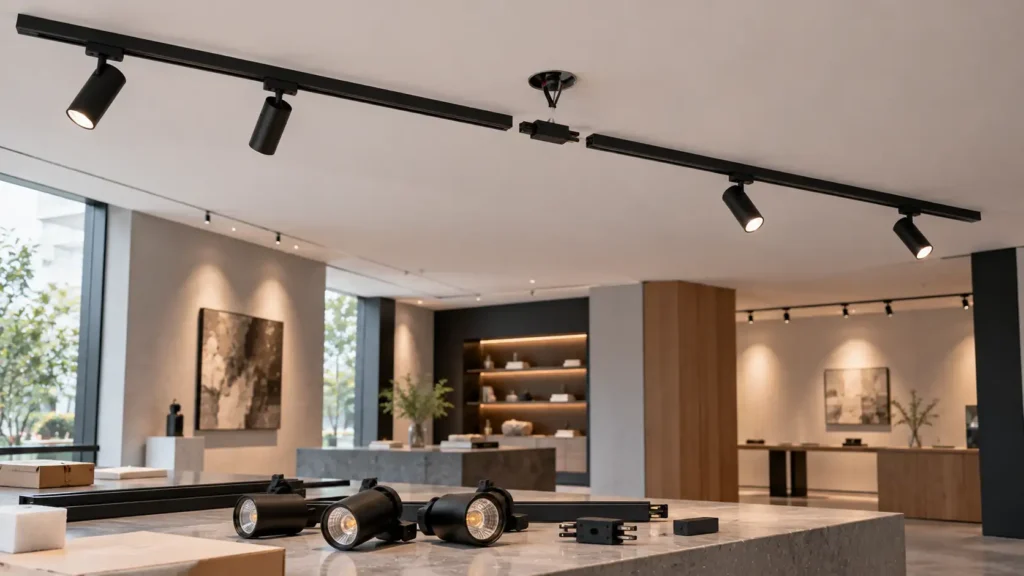
A working 2m system is more than a rail and spotlights: it needs a feed connector, end caps, fixings, the right adapters and, on low-voltage systems, a power supply.
The Main Components You Need
| Componente | Cosa fa | What to check before ordering |
|---|---|---|
| Track rail | Carries power to the heads and supports them | One 2m piece or two 1m pieces; profile; circuits |
| Faretti a LED | Produce and direct the light | Output, beam angle, colour quality, fit to the rail |
| Track adapters | Connect each head to the track | Same profile and circuit system as the rail |
| Power-feed connector | Brings supply into the track | End or centre feed; fits your ceiling power point |
| Tappi terminali | Close and protect open rail ends | Included for every open end |
| Straight connector | Joins two rail sections | Mechanical only or also electrical |
| Mounting accessories | Fix the rail to the ceiling or suspend it | Clip spacing, suspension kits, ceiling type |
| LED driver or low-voltage power supply | Converts supply for the LEDs | In each head (mains) or a separate supply (24V/48V) |
| Dimming or control parts | Dim, group or schedule the lights | Compatible with the drivers and track |
Does a 2m Track Kit Always Contain One 2m Rail?
No. Some kits supply one continuous 2m rail. Others supply two 1m rails and a straight connector, which ships more easily but adds a joint to install.
Kit contents differ between manufacturers. The product title rarely tells you which version you will receive, so check the packing list.
Why Some 2m Track Lighting Kits Are Not Complete
Three different things are sold under similar names:
- Track only: the rail, sometimes with end caps, but no heads or feed.
- Track lighting kit: rail, feed, end caps and a set number of heads, with fixings that may or may not suit your ceiling.
- Configured system: components chosen for a specific layout, supply and control method.
Ask for a detailed bill of materials. It should list every part with quantities, so missing connectors, wrong end caps or an absent power supply show up before the delivery, not on the ladder.
Before installation can begin, you should have the rail sections, a feed connector that suits your power point, end caps, any joint connector, fixings for your ceiling, heads with matching adapters and, for low-voltage track, the power supply.
🎯 Is a “2m kit” always ready to install?
Not always. Check the packing list for the feed, end caps, connectors, fixings and any power supply.
🧩 2. How to Choose the Right 2m Track Lighting System
Choose the electrical system first, single or three-circuit, mains or low voltage, then make sure every head and accessory belongs to that same system.
Single-Circuit vs Three-Circuit Track
On a single-circuit track, every head is on one switched supply. One switch turns them all on or off together.
A three-circuit track carries three separate live conductors. Each adapter selects one circuit, so you can switch up to three groups of heads independently on one rail.
Take a 2m track above a retail display. Two heads light the shelves all day, one highlights a promotion that changes weekly, and one lights a window display that switches off after closing. Three circuits let those groups switch separately.
Three circuits do not automatically give individual dimming. Each circuit dims as a group only if its dimmer and the drivers are compatible. Per-head dimming needs addressable drivers, such as DALI, or wireless control.
Mains-Voltage vs Low-Voltage Track
A mains track carries the building supply, and each head contains its own driver. A low-voltage track, usually 24V or 48V DC, is fed by a separate power supply that must be placed, sized and accessible.
The two are not interchangeable: a low-voltage head cannot go on a mains track, or the reverse. If you are considering a low-voltage track light system, include the power supply and its location in the order.
How to Check Track and Adapter Compatibility
Before buying a rail and heads separately, check six points:
- Track profile: the adapter must fit the exact rail shape.
- Adapter structure: locking method and fixing direction.
- Electrical contacts: positions and conductor layout.
- voltaggio: the head’s rated input matches the track supply.
- Circuit configuration: single-circuit adapters on single-circuit track, or circuit selection on multi-circuit track.
- Compatibilità dei controlli: dimming method or protocol supported by both heads and controls.
The safest route is buying rail and heads from the same system, or asking for a written compatibility list.
Our guide Will This Track Lamp Fit Your Rail? covers these checks in detail, and magnetic systems are covered in What Lights Fit a 10mm Magnetic Track?.
🎯 Does a three-circuit rail let you dim each head separately?
No. It switches up to three groups; per-head dimming needs addressable or wireless drivers.
💡 3. How Many LED Track Lights Do You Need on a 2m Track?
Decide the number of heads from the lighting task, the beam and the distance to the target; the rail length only sets the space available.
Start with the Lighting Task
| Compito | What the light must do | Typical head choice |
|---|---|---|
| Illuminazione generale | Even light across an area | Wider beams, more even spacing |
| Illuminazione d'accento | Make chosen objects stand out | Narrower beams aimed at targets |
| Illuminazione di lavoro | Light a work surface without shadows | Medium or wide beams in front of the user |
| Illuminazione per display | Show products with good colour and contrast | Mixed beams, high colour rendering |
| Wall illumination | Light a vertical surface evenly | Wide floods aimed down the wall |
Why Wattage Alone Is Not Enough
Wattage tells you power use, not where light lands. Compare lumens for output, then think about the lux you need on the target.
Lux depends on the beam angle, mounting height and distance to the target. A narrow beam concentrates the same lumens on a smaller area.
Under the inverse-square approximation, increasing the distance from 2 m to 3 m reduces illuminance to about 44% of its original value, assuming the same luminaire, beam direction and suitable far-field conditions. Actual results depend on the luminaire’s photometric distribution and installation geometry.
Beam diameter is roughly 2 × distance × tan(half the beam angle):
| Trave | Diameter at 1.5 m | At 2 m | At 3 m |
|---|---|---|---|
| 15° Spot | ≈0.39 m | ≈0.53 m | ≈0.79 m |
| 24° Medium | ≈0.64 m | ≈0.85 m | ≈1.28 m |
| 38° Flood | ≈1.03 m | ≈1.38 m | ≈2.07 m |
| 60° Wide Flood | ≈1.73 m | ≈2.31 m | ≈3.46 m |
These are geometric estimates; real beams have soft edges and vary by optic. For choosing beams by space type, see Qual è l'angolo del fascio luminoso migliore per l'illuminazione a binario commerciale?.
A Practical 2m Track Lighting Configuration
Take a hypothetical retail wall: a 2m shelving unit, with the track running parallel to it and the shelves about 2 m from the heads along the beam.
- Two 24° Medium heads aim at the two main shelf zones, each covering roughly 0.85 m.
- One 15° Spot sits near the centre of the rail, aimed at a hero product on the middle shelf.
- One 38° Flood at one end washes the lower shelves and the floor display in front.
The heads are not evenly spaced. Each sits where its aiming angle to the target works best and where it does not cast the shopper’s shadow on the shelf. Equal spacing suits even general light; display lighting follows the merchandise.
Faretti a LED with different beams on one rail give this flexibility. For a worked head-count method on a shorter rail, see How Many Track Light Heads Do You Need for a 1.5m Track?.
Check the Track’s Load Capacity
The lighting plan decides how many heads you want. The electrical capacity decides how many the system can carry.
Add up the wattage of all heads and compare it with the track, connector and feed ratings, and, on low-voltage systems, with the power supply’s rated output and margin. If the plan exceeds them, change the plan or the system.
🎯 Can wattage tell you how many heads a shelf needs?
No. Beam angle, distance and target size decide that; wattage only shows power draw.
🔗 4. One 2m Track or Two Connected 1m Tracks?
One continuous rail looks cleaner and avoids a joint; two 1m rails are easier to ship and handle but depend on a correct connector and support at the joint.
Advantages of One Continuous 2m Track
- An uninterrupted line with no visible joint.
- No joint to align, support or connect electrically.
- Fewer parts that can be lost or installed wrong.
The downside is handling: a 2m rail needs longer packaging, careful transport and enough room to carry it through doors, stairs and lifts.
Advantages of Two Connected 1m Tracks
- Easier to ship, store and carry into tight sites.
- Modular: the same 1m sections can build other lengths with compatible connectors.
- A damaged section can be replaced on its own.
The trade-off is the joint. It must align the profile so heads slide across it, carry power where needed, and be supported so it does not sag.
Does a Straight Connector Carry Electrical Power?
It depends on the connector. Some straight connectors join the rail profile mechanically and also bridge the conductors. Others only join the profile, and power must be fed to each section separately.
Using the wrong type can leave the second section dead or, worse, poorly connected. Use only the connector the manufacturer specifies for that track, and check whether it is electrical, mechanical or both.
Which Arrangement Should You Choose?
| Fattore | One 2m rail | Two 1m rails |
|---|---|---|
| Visual appearance | Clean, continuous | Visible joint |
| Transportation | Long package | Compact package |
| Site access | Needs space to carry | Easier through tight access |
| Mechanical support | Fixings along one piece | Extra support near the joint |
| Connection requirements | None between sections | Approved connector, electrical continuity |
| Installation complexity | Simpler on site | More alignment work |
Choose one rail where appearance matters and access allows. Choose two 1m rails where access is tight or modularity matters, and plan the joint carefully.
What can go wrong when joining two rails: misaligned profiles that snag adapters, a mechanical-only connector where power was expected, a sagging joint without support, or mixed parts from different systems.
🎯 Why might the second 1m section stay dark?
The connector may join the profile without bridging the conductors, or it may not be seated fully.
📏 5. Can You Cut a 2m LED Track to Fit Your Ceiling?
Only if the manufacturer allows it for that track, and only by the method and with the parts they specify; many systems should be ordered to length instead.
When Cutting May Be Necessary
Picture a ceiling recess or bulkhead that leaves 1.85 m between walls. A standard 2m rail is 150 mm too long.
The options are to cut the rail, order a factory-made length, or combine shorter sections that fit. Which of these is possible depends on the track system.
What Determines Whether a Track Can Be Cut?
The track’s construction decides it. Some profiles are designed to be cut and come with matching end caps and instructions. Others have internal conductors, insulators or electronics that make field cutting unsafe or unsupported.
Low-voltage tracks with built-in electronics, and tracks with fixed conductor terminations, may not be cuttable at all. Treat the manufacturer’s instructions as the only authority.
What Must Be Checked After an Approved Cut?
When cutting is allowed and carried out as instructed, check:
- conductor insulation is intact at the cut end;
- no contacts are exposed;
- the profile is straight, clean and deburred;
- the end cap fits the cut end correctly;
- electrical safety of the installation;
- any inspection or testing the manufacturer or local rules require.
Can Cutting Affect the Warranty?
It can. A factory-prepared length is covered as supplied. A field modification may only be covered if the manufacturer authorises it and it is done exactly as instructed. Ask the supplier, in writing, before you buy.
To confirm before purchase: ask whether this rail can be cut, by what method, with which end caps, and whether cutting affects the warranty. If the answer is no, order the correct length.
🎯 Is cutting a 2m rail to 1.85 m always allowed?
No. It depends on the track’s construction and the manufacturer’s written instructions.
🔌 6. How to Connect a 2m Track to an Existing Ceiling Power Point
When the ceiling power point is in the middle of the planned run and the kit feeds from one end, the fix is choosing a system with a suitable feed arrangement or changing the rail position, never improvising the connection.
The Common Problem: Power in the Middle, Track Feed at the End
A typical retrofit: an old ceiling light sits in the centre of a room or above the middle of a display. The buyer wants a 2m track extending 1m each side of that point.
The kit arrives with an end-feed connector. It is designed to take power at one end of the rail, so with the rail centred on the power point, the feed connector ends up 1m away from the wiring.
This happens because many kits are designed for end feeding as the default. The kit is not faulty; it simply does not match the existing wiring position.
End Feeding vs Centre Feeding
An end feed connects the supply at one end of the rail, with an end cap at the other. A centre feed takes power in part-way along the run, through a dedicated feed connector or a feeding joint between two sections.
Centre-feed options exist in some track systems and not in others. Where they exist, they are specific parts for that system, approved for that purpose.
What If the Track Has No Centre-Feed Option?
You have three legitimate routes:
- Choose a compatible system that offers the feed arrangement you need, such as a centre-feed connector or a feeding straight connector between two 1m sections.
- Revise the rail position so one end of the rail sits at the power point, if the lighting layout still works with the rail running to one side.
- Have a qualified electrician assess an approved wiring solution, such as relocating the supply point to suit the rail, carried out to local wiring rules.
Do not extend wiring inside the track, open the rail to add a feed, or adapt connectors from other systems. These are unauthorised alterations and can create real shock and fire risks.
What to Confirm Before Ordering
- Ceiling power-point location relative to the planned rail, measured, not estimated.
- Feed connector type: end feed, centre feed or feeding joint available for this track.
- Connection enclosure: where the wiring connection sits and whether the feed’s canopy or cover suits the ceiling box.
- Mounting requirements: fixings near the feed and along the rail for your ceiling type.
- Cable routing: how the supply reaches the feed point without crossing the rail or leaving loose cable.
🎯 Can a centred 2m rail use an end-feed kit?
Yes, if a qualified installer can route the supply to the end feed using an approved wiring arrangement. Otherwise, consider a compatible centre-feed system or revise the track position.
🧰 7. How to Install and Position 2m LED Track Lighting
Fix the mounting method, the rail’s position relative to what it lights, and the fixings before installation; electrical work and testing belong to a qualified installer.
Choose the Mounting Method
- Montaggio a superficie: fixed directly to the ceiling with clips or screws. The simplest option, and a frequent choice for retrofits.
- Incassato: set into the ceiling in a plaster-in or recessed profile, so it must be planned before the ceiling is finished.
- Suspended: hung on wires or rods from the ceiling, useful in high spaces. It needs a suspension kit rated for the rail and heads.
Not every track system offers all three. Check that the version you want exists for your rail.
Position the Track Relative to the Lighting Target
Place the rail where heads can reach their targets at a comfortable aiming angle. Consider:
- distance from the surfaces you light: too close and walls get hot spots, too far and light spreads and weakens;
- ceiling height, which changes beam size and lux;
- aiming angles that avoid shining into eyes;
- shadows from people standing at shelves or worktops;
- glare into normal viewing positions;
- future display changes, so the rail still works when layouts move.
There is no single correct offset from the wall. It depends on ceiling height, target height and beam angle, so check the angle from rail to target for your layout.
Fixings and Mechanical Support
Use fixings suited to the ceiling structure: joists, concrete, or the right anchors for board ceilings. Follow the manufacturer’s fixing spacing and add support near any rail joint.
For suspended track, check the suspension kit’s load rating against the rail and all heads, including any heads you may add later.
Electrical Installation and Commissioning
Mains track connection is electrician’s work. Isolate the circuit before work. Use the feed parts specified for the track, and check the rail, heads, drivers and controls are a compatible set.
After installation, carry out the inspection and testing that local rules and the manufacturer require before handing the system over.
🎯 Is there a standard wall distance for a 2m track?
No. It depends on ceiling height, target height and beam angle in that room.
🔦 8. How to Adjust 2m Track Lighting for Better Illumination
Adjust for the surface people look at, from where they normally stand, before considering more heads.
Begin with the Surface, Not the Fixture
Decide what must be lit: a shelf, a painting, a worktop. Then check it from the positions people actually stand or walk, not from a ladder under the track.
Aim each head at its target and judge the result from those viewing positions.
Adjust Beam Overlap
- Dark gaps: beams do not meet; aim heads closer together or use a wider beam.
- Overlapping beams: two beams on one spot create a bright patch; spread the aiming.
- Excessively bright patches: a narrow beam too close to a surface; widen the beam or move the aim point.
- Deliberate contrast: for accent lighting, some contrast between a lit object and its surroundings is the goal, not a fault.
For a full method on correcting uneven results, see How to Fix Uneven Lighting with Adjustable Track Lights.
Reduce Unwanted Glare
Aim heads away from normal sight lines, especially from entrances and seating. Watch for reflected glare off glass, glossy products and polished counters.
Optical accessories such as snoots, honeycomb louvres and barn doors, where available, cut stray light. More on this in does an anti-glare spotlight really reduce glare.
What If Aiming Cannot Solve the Problem?
If careful aiming still leaves the result wrong, the limit lies elsewhere:
- Output: the heads do not produce enough light for the distance.
- Optical distribution: the beam angle is wrong for the target size.
- Mounting position: the rail is too far, too close or at the wrong angle to the target.
- Layout: one 2m section cannot cover the area, and another light source is needed.
🎯 Will more heads fix glare on a glossy counter?
Usually not. Re-aiming away from the reflection angle or adding shielding works better.
🔄 9. Can You Add or Replace LED Lights on a 2m Track?
Yes, without replacing the track, as long as new heads belong to the same system and the total load stays within its ratings.
Adding Another Track Head
Before adding a head, check:
- the track and connector current ratings against the new total load;
- the power supply’s rated output and margin on low-voltage systems;
- the circuit the new head will sit on, on multi-circuit track.
Replacing an Existing Head
A replacement must match the adapter profile, contact arrangement, voltage and control method. It should also match the original head’s beam, colour temperature and colour rendering, unless you want a deliberate change.
Changing Beam Angles Without Replacing the Whole Fixture
Some heads accept interchangeable reflectors or lenses. Others offer adjustable optics, such as zoomable LED track lights, that change the beam on site. Where neither is supported, changing the beam means changing the head.
Planning for Long-Term Replacement
- Record model numbers, adapter types, beams and colour temperatures for every head.
- Keep spare heads or optics for key displays.
- Check whether the range is likely to stay available, and what happens if it is discontinued.
- Keep a compatibility record of rail, adapters and controls.
- For OEM/ODM projects, agree spare parts and a supply period with the manufacturer at the start.
🎯 Can you change a beam without buying a new head?
Sometimes. Interchangeable reflectors, lenses or zoom optics allow it where the head supports them.
🩺 10. Common Problems with 2m LED Track Lighting and How to Fix Them
Separate adjustment problems from electrical faults: aiming and optics can be fixed by anyone, but anything involving supply, wiring, heat or loose contacts needs a qualified person.
| Problem | Possible causes | Appropriate next step |
|---|---|---|
| All lights do not turn on | Supply, feed, protective device, driver or control issue | Professional electrical diagnosis |
| One head does not illuminate | Head, adapter, contacts or circuit-selection problem | Check compatibility and system condition |
| LED heads flicker | Driver/dimmer incompatibility, supply or control issue | Verify approved control combinations |
| Some low-voltage modules work unevenly | Voltage drop, feed arrangement or connection problems | Check against manufacturer specifications |
| Track head feels loose | Incompatible or damaged adapter, incomplete engagement | Stop using until assessed |
| Lighting is uneven | Beam angle, aiming, mounting position or output | Reassess optics and layout |
| Connected track section fails | Joint or connector issue | Verify correct approved connector arrangement |
Why Do Only Some Track Lights Work?
On multi-circuit track, heads set to a circuit that is switched off stay dark, while others work. Check the circuit selector on each adapter and the switching for each circuit.
Other common causes are a head not fully engaged in the rail, a section beyond a mechanical-only joint without its own feed, or a faulty head. Where the manufacturer permits head removal and refitting, a qualified person can test a compatible luminaire in another position after following the required isolation procedure. This can help distinguish a luminaire fault from a track or circuit fault.
Why Do LED Track Lights Flicker?
Flicker usually comes from the driver and control combination, not the track. Common causes are a dimmer not matched to the drivers, a load below the dimmer’s minimum, mixed driver types on one dimmer, or an unstable supply.
Check that the dimmer and heads appear on each other’s compatibility lists before blaming the rail.
When Should You Stop Using the System?
Switch off and get a qualified electrician if you notice:
- a loose head or adapter that does not lock;
- exposed contacts or damaged insulation;
- overheating, discoloured plastic or scorch marks;
- arcing, sparks or crackling;
- a burning or hot-plastic smell;
- a protective device that trips repeatedly.
These are not lighting-adjustment problems. They point to possible electrical faults.
🎯 Is a flickering head a sign the track is faulty?
Not necessarily. Check the dimmer and driver match first, then the head’s contact with the rail.
🏬 11. Choosing 2m Track Lighting for Different Spaces
The same 2m rail serves very different spaces; what changes is the beam mix, the aiming, the colour quality and what other lighting supports it.
Negozi al dettaglio
Merchandise needs light that follows changing displays. Mix medium beams for shelf zones with spots for featured products, and choose adapters that move easily along the rail. A three-circuit track helps when display zones switch at different times.
Jewellery and Boutique Displays
Small, reflective products need focused accent light with high colour rendering. Narrow beams create sparkle and contrast, while careful aiming avoids reflections in glass counters. See when to use narrow beam track lights in commercial spaces for beam choices.
Galleries and Exhibition Spaces
Aiming accuracy and optics matter most. Match beam angle to artwork size and viewing distance, and plan for re-aiming each time an exhibition changes. Heads with interchangeable optics or framing accessories suit changing shows.
Kitchens and Work Areas
The aim is shadow-free light on the worktop. Place the rail so heads light the surface from in front of the user, not from behind their head. Medium or wide beams usually work better than spots.
Corridors and Small Commercial Interiors
A single 2m rail covers a limited area. In corridors, it can light artwork or features while other fittings provide general light. Ceiling height changes beam spread, so check coverage before relying on one section alone.
🎯 Do jewellery counters and worktops need the same beams?
No. Jewellery needs narrow, high-CRI accent beams; worktops need wider, shadow-free light.
✅ 12. Before You Buy: 2m LED Track Lighting Checklist
Use this checklist with your supplier; every line should have an answer before the order is placed.
| # | Controllo | What to settle |
|---|---|---|
| 1 | Track system and manufacturer | Exact range and model |
| 2 | Rail format | One continuous 2m rail or connected sections |
| 3 | Tensione di funzionamento | Mains or 24V/48V low voltage |
| 4 | circuiti | Single-circuit or multi-circuit |
| 5 | Power-feed location | Where supply enters the rail |
| 6 | Centre feed | Available if your power point needs it |
| 7 | Accessories and BOM | Every part listed with quantities |
| 8 | Luminaire quantity and output | Heads and lumens for the task |
| 9 | Beam angles and targets | Beam per target surface |
| 10 | Mounting method | Surface, recessed or suspended |
| 11 | Cutting permission | Allowed or order to length |
| 12 | Total system load | Within track, connector and supply ratings |
| 13 | Dimming and control | Compatible drivers, dimmers or protocol |
| 14 | Spares and replacement | Spare parts and supply continuity |
Before ordering, send your supplier a ceiling plan showing the power point and the planned rail, the ceiling height and type, what each head must light, the preferred mounting method, and the control requirements. Photos of the existing ceiling point help avoid feed surprises.
When we review a 2m track order, the first things we ask for are the power-point position and the ceiling type, because those two details decide the feed and fixings before anything else.
FAQ
🏁 Conclusion: How Should You Use 2m LED Track Lighting?
Using 2m LED track lighting well comes down to four decisions.
Select components that belong to one compatible system, plan the electrical feed against the real position of the ceiling power point, configure the heads for the actual lighting task, and respect the installation and load limits of that system.
Many problems on site trace back to one of those decisions being skipped: a missing connector, an end-feed kit under a central power point, heads chosen by wattage, or a joint without support.
Settle them on paper first, and the rail becomes the flexible tool it is meant to be.
Scopri gli articoli del blog correlati:
- What Is a Ceiling Magnetic Track Light?
- What Is a Zigbee Magnetic Track Light?
- Come si confronta la potenza di uscita di 20 W tra i diversi tipi di teste per faretti a binario
Note e fonti
- Beam diameter: D ≈ 2 × d × tan(θ/2); geometric estimate, real beams have soft edges and vary by optic.
- Illuminance with distance: inverse-square relation; (2/3)² ≈ 0.44, so moving a target from 2 m to 3 m leaves about 44% of the centre lux.
- Mains track systems in IEC markets: IEC 60570, electrical supply track systems for luminaires.
- Bathroom zones: IEC 60364-7-701 and national wiring rules derived from it; IP ratings per IEC 60529.
- Retail configuration, 1.85 m recess and centre power point are illustrative examples, not product data.
Find the Right 2m LED Track Lighting Solution for Your Project
XHLUX manufactures commercial LED track lighting systems. Through our OEM/ODM service, we can help with track lighting configuration, compatible LED spotlights, beam options, mounting and electrical requirements, and dimming or control requirements for your project.
Send us your ceiling plan, power-point position, ceiling height and lighting targets, and we will check which configuration our range can support before you order.