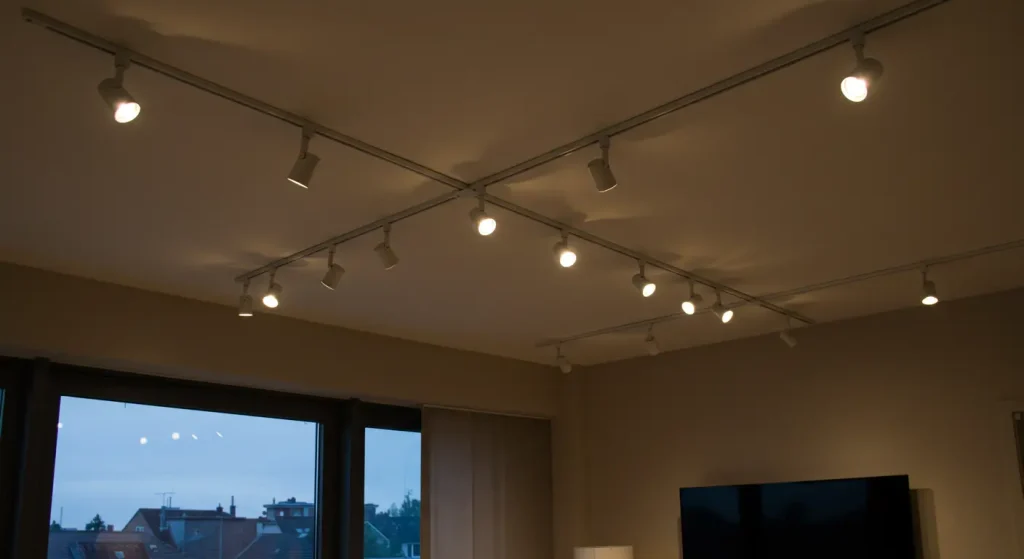
![How to Install Track Lighting on a Vaulted Ceiling [2025]- XHLUX](https://xhlux.com/wp-content/uploads/2024/05/news.webp)
Table of contents
- What Key Plans Need To be Made
- Why Track Lighting is the Premier Solution for Vaulted Ceilings
- Choosing Your System: The Three Paths to Success on a Slope
- Layout & Design Strategies for Vaulted Ceilings
- The Step-by-Step Installation Guide
- Advanced Considerations for a Professional-Level Finish
- Troubleshooting Common Problems
- Conclusion: Elevate Your Space with Confidence
- FAQ About Ceiling Track Lights
Vaulted ceilings are a hallmark of architectural ambition. They create a sense of spaciousness, grandeur, and light that is unmatched by conventional flat ceilings. Yet, this very feature presents a significant illumination challenge: How do you effectively and elegantly light a room with such dramatic, angled planes? For many designers, architects, and discerning homeowners, the answer is unequivocal: track lighting.
However, the prospect of attempting to install track lighting on a vaulted ceiling can be intimidating. Questions of angles, hardware, and proper placement can quickly overwhelm even a seasoned DIYer. This guide is designed to eliminate that uncertainty. We will demystify the entire process, from initial concept to final execution, providing you with the professional-grade knowledge to tackle this project with confidence.
This isn’t just a list of steps. This is a strategic blueprint that addresses the critical pain points—choosing the right system, designing a functional layout, and navigating the unique structural challenges of a sloped surface. Whether you are a homeowner aiming to elevate your living space or a design professional planning a sophisticated commercial track lighting for sloped ceilings project, this is your definitive resource for achieving flawless results.
What Key Plans Need To be Made
Success in this project is 90% planning. Rushing this stage is the single biggest mistake you can make. Before you touch a single tool, it’s crucial to understand your options and prepare your materials.
A Crucial Safety Warning
This project involves working with electricity and at heights. Safety is non-negotiable.
- Always turn off the power to the relevant circuit at your breaker box before handling any wiring.
- Verify the power is off using a non-contact voltage tester at the junction box.
- If you are even remotely unsure about the electrical wiring portion of this installation, do not hesitate to hire a licensed electrician. It is a small price to pay for your safety and peace of mind.
Why Track Lighting is the Premier Solution for Vaulted Ceilings
Track lighting’s dominance in these applications, from residential great rooms to high-end retail spaces, is no accident.
- Unmatched Directionality: It allows you to aim light precisely where it’s needed—washing a wall with light, accentuating artwork, illuminating a task area, or highlighting architectural features like a fireplace or ridge beam.
- Flexibility: Once the track is installed, the lighting scheme is not permanent. You can move, add, or change fixtures as the room’s function evolves.
- Problem Solving: It solves the issue of distance. A single power source can illuminate a vast area, bringing light down from heights that would render recessed cans ineffective.
Choosing Your System: The Three Paths to Success on a Slope
The fundamental challenge is mounting a straight track to an angled surface. The industry has developed three primary solutions to this problem.
| Installation Method | Description & Key Hardware | Best Suited For | Professional Considerations |
|---|---|---|---|
| Path A: Rigid Track with Adapters | Uses standard rigid track sections. Sloped ceiling adapters or standoff supports are used at mounting points to create a level plane for the track to attach to. | Most common DIY method; moderate slopes; when you want the track running parallel to the floor. | Ensure standoffs are long enough for the ceiling pitch. This method provides a clean, “floating” look. |
| Path B: Suspension Kit | The track is hung from the ceiling via aircraft cables or rigid pendants, allowing it to hang perfectly level regardless of the ceiling’s angle. | Very steep pitches; extremely high ceilings; industrial or modern aesthetics; commercial track lighting for sloped ceilings applications in atriums or lofts. | Requires secure anchor points in joists. Allows track to be positioned lower in the space for more effective illumination. |
| Path C: Flexible Monorail Track | Uses a hand-bendable track (monorail) that can be shaped to follow the ceiling’s contour or create custom curves. | Creative and architectural designs; running a track up a vaulted slope and across the peak; spaces where a fluid, organic line is desired. | Often low-voltage, requiring a transformer. Offers the most design freedom but can be more complex to plan and install. |
Comprehensive Tool & Material Checklist
Gather everything before you start to ensure a smooth workflow.
Core Tools & Safety Gear:
- Drill with assorted bits
- Stud finder
- Level (laser level is highly recommended)
- Chalk line
- Measuring tape
- Wire strippers/cutters
- Screwdrivers (Phillips and flathead)
- Sturdy ladder or scaffolding
- Safety glasses
- Non-contact voltage tester
System & Materials:
- Track lighting kit or individual components (track sections, power feed, track heads)
- Crucial: The correct mounting hardware for your chosen path (sloped ceiling adapters, suspension kit, or monorail standoffs)
- Mounting screws (the ones included in kits are often low quality; invest in better ones)
- Heavy-duty toggle bolts or drywall anchors (for mounting between joists, if unavoidable)
- Electrical wire and wire nuts (if extending power)
Layout & Design Strategies for Vaulted Ceilings
Where you place the track is as important as how you install it. A poor layout will fail to illuminate the space effectively.
- Parallel to the Ridge Beam: This is the most common and often most effective layout. Running one or two tracks along the length of the room, positioned a few feet down from the peak on either side, provides balanced, even illumination.
- Along the Peak: Mounting a single track directly on the ridge beam can create a dramatic centerline. This is best for providing general ambient light or for fixtures that will be aimed straight down or at steep angles.
- Perpendicular to the Slope: Running shorter tracks up the slope can be used to highlight a specific feature wall, like a tall fireplace surround. This is a more advanced technique that requires fixtures designed to handle steep angles without drooping.
- Washing the Walls (and Ceiling): Position the track 2-3 feet from a wall and aim the fixtures back at it. This technique makes the room feel larger, brighter, and more inviting by eliminating the “cave effect” of a dark, high ceiling.
- Expert B2B Insight: In commercial design, such as in a restaurant or retail store, architects use track lighting on vaulted ceilings as a key part of the environmental storytelling. Tracks can be laid out to guide the customer journey, create intimate “zones” in a large open space, or dramatically highlight high-margin merchandise. As noted by lighting specialists like XHLUX, the adaptability of track is key to creating these dynamic commercial environments.
The Step-by-Step Installation Guide
With your plan in place and materials gathered, it’s time for execution. We will proceed using Path A (Rigid Track with Adapters) as our primary example, as it is the most common.
Step 1: Mark Your Layout with Precision
Turn off the existing lights. Use a laser level to project a perfectly level line across the angled ceiling where you want your track. Alternatively, have a helper assist you with a bubble level and a pencil. Once you have your level reference points, snap a chalk line to create a crisp, visible guide.
Step 2: Locate the Ceiling Joists (The Most Important Step)
The track must be anchored into ceiling joists for a secure installation. Use a quality electronic stud finder to locate the joists that cross your chalk line. Mark the center of each joist with a pencil. Do not trust a stud finder alone. Confirm the location by driving a small finish nail just to the side of your mark; you should feel solid resistance. If you hit empty space, you missed the joist.
Step 3: POWER DOWN & Prepare the Power Source
Go to your circuit breaker panel and shut off the power to the room. Post a note on the panel so no one turns it back on. Return to the room and use your voltage tester on the wires in the junction box to confirm the power is off. Carefully remove the old light fixture if one is present.
Step 4: Install the Power Feed Canopy
Your track will be powered by a “live-end feed” or a “floating canopy” that connects to the junction box. Following the manufacturer’s instructions, connect the house wiring to the power feed wiring: black to black (hot), white to white (neutral), and the bare copper or green wire to the green grounding screw. Secure the connections with wire nuts and gently tuck them into the box. Mount the canopy plate to the junction box.
Step 5: Mount the Track to the Ceiling
This is where your planning pays off.
- Hold a section of track up to your chalk line.
- At each marked joist location, attach a sloped ceiling adapter or standoff to the ceiling using a long screw driven firmly into the center of the joist.
- Now, attach the track itself to these adapters. The adapters create the level mounting surface the track needs, allowing it to “float” off the angled ceiling.
- For any mounting points that fall between joists, you must use a high-quality toggle bolt or drywall anchor rated to hold at least twice the weight of the system. Use these sparingly; joists are always the first choice.
Step 6: Join Track Sections (If Necessary)
If your layout requires multiple track sections, connect them using the “I” connectors or mini-couplers provided with your system. Ensure they click into place securely to maintain electrical conductivity.
Step 7: Power Up & Test
Go back to the breaker panel and restore power to the circuit. Use your voltage tester on the copper conductors inside the track to verify that it is live. This crucial step ensures the connections are sound before you go through the effort of installing all the track heads. Once confirmed, turn the power back off for the final step.
Step 8: Install and Aim Your Track Heads
With the power off, insert the track heads into the track channel. Align the contacts, push up, and turn the base 90 degrees until it locks into place. Once all heads are installed, turn the power back on. Now for the fun part: aim each light to achieve your desired effect. A good rule of thumb is to illuminate an object or a surface, not open air, to prevent glare.
Advanced Considerations for a Professional-Level Finish
- Voltage Drop: For long runs (typically over 30 feet) or systems with a high load, voltage drop can cause lights at the end of the track to appear dimmer. Professionals solve this by using multiple power feeds or specifying a heavy-duty, architectural-grade track system. This is a key consideration in large commercial track lighting projects.
- Smart Controls & Dimming: A simple toggle switch is no longer the standard of excellence. Integrating your track lighting with a quality dimmer (ensure it’s compatible with your LED fixtures) is essential. For a truly modern system, consider networked controls like DALI or smart home platforms, which allow for scene-setting and automated control.
- Fixture Selection: For very steep angles, choose “gimbal” style track heads, which offer a wider range of motion than standard pivot heads. Look for fixtures with built-in glare control features like honeycomb louvers or snoots, especially for high ceilings.
Troubleshooting Common Problems
- Problem: The track feels flimsy between the joists.
- Solution: You’ve used an inadequate drywall anchor. Replace it with a heavy-duty toggle bolt that clamps onto the back of the drywall.
- Problem: One of the track heads won’t turn on.
- Solution: Power down. Remove the head and inspect its contacts; they may be bent or not making a clean connection with the track’s conductors. Gently clean them and re-insert. If it still doesn’t work, the head itself may be faulty.
- Problem: The lights are creating harsh glare.
- Solution: The light is aimed too directly into the room’s line of sight. Re-aim the fixture so its beam terminates on a wall, piece of art, or surface. Think of it as “bouncing” light into the space rather than pointing it.
Conclusion: Elevate Your Space with Confidence
Installing track lighting on a vaulted ceiling is more than a simple DIY task; it’s a transformative architectural upgrade. It’s a project that demands careful planning, respect for safety, and the right hardware. By understanding the distinct methods for tackling the slope, designing a thoughtful layout, and following a meticulous installation process, you can overcome the challenges of a high, angled ceiling and replace them with a stunning, functional, and flexible lighting solution.
With this expert guide, you are now equipped with the knowledge to move forward confidently, turning a daunting architectural feature into the beautifully illuminated centerpiece of your home or business.