
Table des matières
- Part 1: The Uncompromising Safety Briefing
- Part 2: Is It Really the Transformer? Diagnosis & Troubleshooting
- Part 3: Sourcing the Right Replacement – The Technology Deep Dive
- Part 4: The Main Event: A Step-by-Step Replacement Guide
- Part 5: Is It Time for a Full Upgrade? A Strategic View
- Conclusion: A Job Done Right
- FAQ About Downlight Transformer
There are few home maintenance issues more quietly infuriating than a flickering or dead downlight. It’s a small problem that casts a disproportionately large shadow, disrupting the clean aesthetic of your ceiling. Your first instinct is to change the bulb. But when a fresh bulb does nothing, the culprit is often a small, hidden box of electronics: the downlight transformer.
The question of how to change a downlight transformer opens a Pandora’s box of concerns for many homeowners. Is it safe? What kind do I need to buy? Can I do this myself?
You have come to the right place for clarity.
To address this topic with the depth it deserves, we’ve assembled a roundtable of three distinct experts. You won’t get a single, flat opinion. Instead, you’ll get a multi-faceted view, ensuring every angle—from uncompromising safety to cutting-edge technology—is covered.
Meet Your Team for Today:
- John Carter, Master Electrician: With 30 years in the field, John is our voice of safety and compliance. He’s seen it all, and his primary mission is to ensure you finish any project with all ten fingers and your home’s wiring intact.
- Sarah Jenkins, The DIY Mentor: Sarah runs a popular home renovation workshop and believes in empowering homeowners with the skills to tackle projects safely and effectively. She is our guide for the practical, step-by-step process.
- Alex Chen, Lighting Technology Consultant: Alex lives on the cutting edge of lighting. He understands the nuances of LED drivers, dimming protocols, and electronic compatibility. He’s here to ensure you buy the right component for a flawless, future-proof result.
Let’s begin, starting with the most important voice first.
Part 1: The Uncompromising Safety Briefing
A Critical Warning from John Carter, Master Electrician
“Before we even think about tools, let’s talk about respect. Respect for electricity is the number one tool in any electrical job. I’ve been called to homes to fix DIY jobs that have gone wrong, and the consequences range from melted fixtures to house fires. So, listen closely.
This task is NOT for everyone. If you feel any hesitation, if you don’t own the proper tools, or if your home has old, brittle, or aluminum wiring, stop now. Call a licensed electrician. The cost of a professional is a tiny fraction of the cost of a mistake.
For those who are confident and competent to proceed, these are not suggestions; they are unbreakable rules:
- Kill the Power at the Source: Do not rely on the wall switch. Go to your consumer unit (breaker box) and switch off the circuit that powers the spots encastrés. If your circuits aren’t clearly labeled, turn off the main power switch.
- Verify a Dead Circuit: This is the step people skip, and it’s the most dangerous. Use a non-contact voltage tester to confirm there is ZERO power at the switch and at the light fixture itself. Wave it around the wires. It must remain silent and unlit. Test the tester on a known live circuit first (like a different room’s outlet) to ensure it’s working.
- Understand Your Environment: Are you on a sturdy stepladder? Is the area dry? Do you have clear, bright lighting to work by (use a headlamp or work light powered by a different circuit).
If you can follow these three rules without compromise, you have established a safe foundation. If not, my professional advice is to pick up the phone and call a pro. Your safety is not negotiable.”
Part 2: Is It Really the Transformer? Diagnosis & Troubleshooting
An Insight from Alex Chen, Lighting Technology Consultant
“A common mistake is assuming the transformer is the culprit as soon as the bulb is ruled out. Wasted money and time often follow. Let’s diagnose this like an engineer before we start operating.
A transformer’s job is simple: it takes your home’s high mains voltage (e.g., 230V in the UK/EU, 120V in North America) and ‘steps it down’ to a low voltage (typically 12V) that older halogen bulbs required. For modern LED, a similar device called a ‘driver’ serves this function, often with more complexity.
Here’s a quick diagnostic flowchart:
- The Obvious First: Replace the bulb with a new one that you know works. It sounds simple, but it solves the problem 50% of the time.
- The Audible Clue: Get close to the fixture (with the power on, carefully) and listen. An aging magnetic transformer will often emit a noticeable, low-frequency buzz or hum. If that sound has gotten louder over time, it’s a sign the internal windings are failing.
- The Visual Inspection: (After turning the power off and verifying with a tester!) Carefully remove the downlight fixture from the ceiling. Inspect the transformer. Do you see any scorch marks, black soot, or a bulging or cracked plastic casing? These are clear signs of overheating and failure. The unit needs immediate replacement.
- The Flicker Test: Does the light flicker randomly? This is often a classic symptom of a failing electronic transformer or an incompatibility with a dimmer switch.
- The Advanced Test (for experienced users): If you have a multimeter, you can test the output side of the transformer (with the power on and bulb removed). It should be reading a steady voltage close to its rating (e.g., ~12V AC). If it’s reading zero or the voltage is fluctuating wildly, the transformer is dead.
Only after confirming one or more of these symptoms should you proceed with sourcing a replacement.”
Part 3: Sourcing the Right Replacement – The Technology Deep Dive
Analysis by Alex Chen, Lighting Technology Consultant
“Here is where most DIY attempts go wrong. You cannot just buy any ’12V transformer.’ Mismatching the technology will lead to flickering, buzzing, or immediate failure. You need to be a detective.
First, identify what you have. There are two main legacy types:
| Transformer Type | Magnetic (MLV) | Electronic (ELV) |
|---|---|---|
| Appearance | Heavy, boxy, often black laminated iron core. | Lightweight, smaller, typically in a plastic casing. |
| Technologie | Simple: two coils of wire wrapped around an iron core. Very robust. | Complex: uses electronic circuitry (capacitors, transistors) to convert voltage. |
| Avantages | Extremely durable, long lifespan, compatible with older dimmer switches. | More energy-efficient, smaller, lighter. |
| Cons | Bulky, heavy, can produce an audible hum, less efficient. | Shorter lifespan, more sensitive to heat, requires specific ELV-compatible dimmers. |
| Best Use Case | Driving legacy 12V halogen bulbs. Phasing out of the market. | Was common for halogen, but now mostly relevant in the context of LED compatibility. |
The Critical Shift: Transformers vs. LED Drivers
This is the most important concept for 2025. If you have modern, integrated LED downlights (where the bulb is part of the fixture), you don’t have a transformer. You have an LED Driver. While they look similar, they function differently.
- Transformers provide a Constant Voltage (e.g., 12V AC).
- LED Drivers typically provide a Constant Current (e.g., 350mA, 700mA DC).
Connecting an LED that requires constant current to a constant voltage transformer will destroy the LED almost instantly.
Your Replacement Checklist:
Before you buy anything, look at the label on your old transformer/driver and write down these four critical values:
- Input Voltage: This must match your country’s mains supply (e.g., 220-240V or 110-120V).
- Output Voltage & Type: Does it say 12V AC? That’s a transformer. Does it say something like ‘DC 24-40V’? That’s a constant current driver. The numbers must match.
- Output Current (for LED Drivers): If it’s a driver, it will have a milliamp (mA) rating (e.g., 350mA, 500mA, 700mA). This is a non-negotiable match.
- Wattage (W) / VA Rating: The new transformer must have a maximum wattage rating equal to or, ideally, greater than the old one.
- The 80% Rule: To ensure longevity, only load a transformer to 80% of its maximum capacity. For example, if you are driving a 50W bulb, choose a transformer with at least a 60W rating (50 is ~83% of 60).
- Dimming Compatibility: If your light is on a dimmer switch, you must buy a “dimmable” transformer/driver. Crucially, you must match the type: an MLV transformer needs a leading-edge dimmer, while an ELV transformer needs a trailing-edge (ELV) dimmer. Mismatching these is the number one cause of flickering and buzzing.”
Part 4: The Main Event: A Step-by-Step Replacement Guide
Your Practical Walkthrough with Sarah Jenkins, The DIY Mentor
“Alright, you’ve done your safety checks with John and you’ve got the correct replacement part thanks to Alex. Now for the hands-on part. Let’s do this cleanly and methodically.
Tools You’ll Need:
- A sturdy stepladder
- A non-contact voltage tester
- A headlamp (to see what you’re doing)
- Screwdrivers (Phillips and flat-head)
- Wire strippers/cutters
- A camera phone
Step 1: Power Down and Double-Check
As John said, turn the power off at the breaker. Post a note on the box so nobody turns it back on. Then, use your voltage tester to confirm the circuit is dead at the fixture.
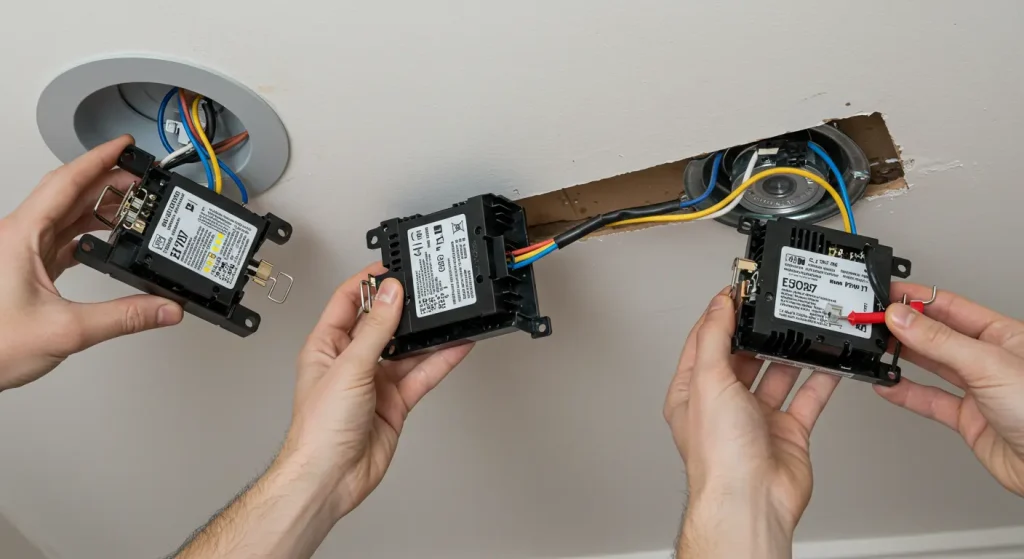
Step 2: Access the Fixture
Most downlights are held in by two spring-loaded clips. Carefully pull the fixture down from the ceiling. Be gentle to avoid damaging the plasterboard. The transformer should be lying in the ceiling void, connected by a short wire. Pull it through the hole.
Step 3: Document and Disconnect (The Pro Tip)
Before you disconnect a single wire, take a clear photo with your phone. This is your foolproof map. It eliminates any guesswork later.
You will see two sides to the transformer:
- Primary/Input Side: The wires coming from your home’s mains supply. Usually a black (or brown) Live wire and a white (or blue) Neutral wire.
- Secondary/Output Side: The low-voltage wires going to the light fixture itself.
Carefully unscrew the terminal covers and loosen the screws holding the wires. Gently pull the wires out.
Step 4: Prepare and Connect the New Transformer
Your new transformer will have the same two sides.
- If the ends of your existing wires are frayed, snip them off and use your wire stripper to expose about 1cm (3/8 inch) of fresh copper.
- Referring to your photo, connect the mains wires to the Input side of the new transformer. The terminals will be marked L (Live) and N (Neutral). Insert the wires into the correct terminals and tighten the screws firmly. A loose connection here can cause arcing and is a fire hazard.
- Connect the low-voltage wires from the light fixture to the Output side.
Step 5: A Temporary Test
Before you push everything back into the ceiling, perform a quick test. Ensure no bare wires are touching each other or any metal surfaces. Go back to the breaker box, turn the power on, and see if the light works.
Step 6: Power Down Again and Reassemble
Turn the power back off at the breaker and verify it’s dead one last time. Now, carefully push the new transformer and wiring back into the ceiling void. Push the downlight fixture back into place until the spring clips engage and it sits flush.
Step 7: Final Power-Up and Celebration
Turn the power back on at the breaker. Your downlight should now be working perfectly. Well done.
Part 5: Is It Time for a Full Upgrade? A Strategic View
A Final Thought from Alex Chen
“You’ve just successfully completed the repair. But allow me to pose a strategic question. The very existence of a separate 12V transformer often points to an older halogen-based system. While you’ve fixed the immediate problem, you are still running on dated, inefficient technology.
Consider this: instead of spending $20-$40 replacing a single transformer, you could invest $30-$60 in a modern, integrated LED downlight.
The Benefits of a Full Fixture Upgrade:
- Efficacité: An integrated 10W LED fixture produces the same light as a 50W halogen bulb, using 80% less energy.
- Longevity: The entire unit is designed to last 25,000-50,000 hours. You won’t be changing bulbs or drivers again for a decade or more.
- Superior Light Quality: Modern LED offer vastly better CRI and a wider choice of color temperatures.
- Simplicity: There is no separate transformer to worry about. The driver is built-in and perfectly matched to the LED chip. The entire unit wires directly to your mains supply.
If you have multiple downlights and one transformer has failed, it’s likely the others are not far behind. A full upgrade can be a smart, long-term investment that saves you money and eliminates future maintenance headaches.”
Conclusion: A Job Done Right
Replacing a downlight transformer is a task that sits at the intersection of skill, knowledge, and caution. As you’ve seen, it’s about more than just matching a couple of wires. It’s about respecting the power you’re working with, understanding the technology you’re installing, and following a clear, methodical process.
You now have the comprehensive knowledge to either tackle this job with the confidence it requires or to make the informed decision to call a professional. Either way, you’ve moved from uncertainty to empowerment. And that’s the true goal of any successful project.