XHLUX
XHLUX
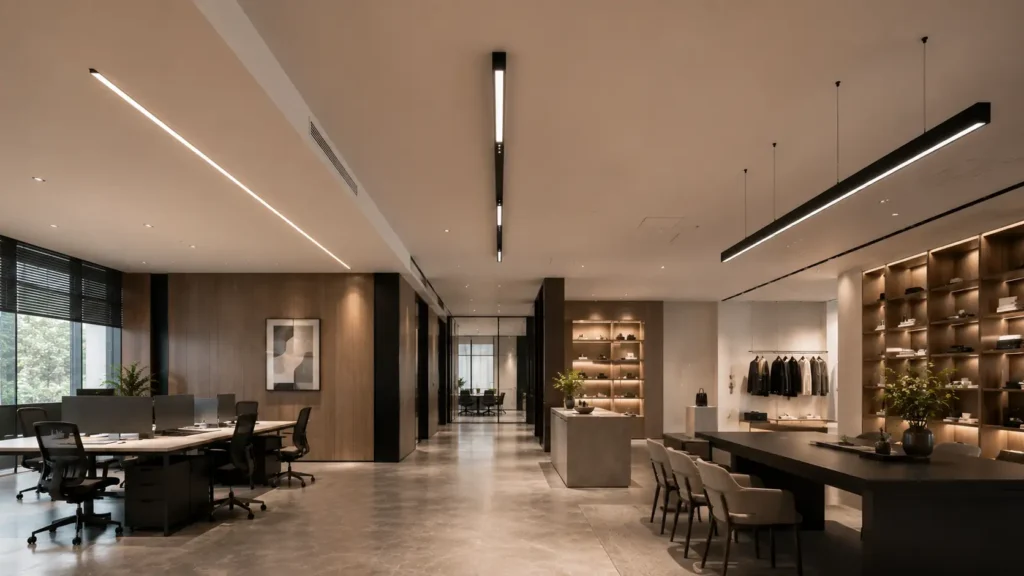
The ceiling layout already shows linear lights in ceiling runs. Three supplier quotes land on the desk—and the recess depth column jumps by several centimetres between lines that all claim the same mount family. The specifier is not sure whether mount type really changes the depth you must allow, or whether someone copied the wrong housing row.
Yes—recess, surface and suspended mounts define “depth” differently. Recess needs a slot plus housing envelope; surface needs profile height below the finished plane; suspended depth is drop below the ceiling underside—not a slot at all. That mismatch is why quote columns look inconsistent until you align mount type first.
This page is an installation-parameter checklist for linear lights already chosen for a ceiling. It does not diagnose where one continuous run should break, covered in How Long Is Too Long for One Ceiling Linear Light Run?, and it does not cover false-ceiling board and void specifics in What to Know Before Installing Linear Lights in a False Ceiling.
For the wider suspend / surface / recess map, start with ¿Cómo elegir iluminación LED lineal: suspendida, de superficie o empotrada?—then return here to align recess options, spacing, continuous-run choice and mounting depth on one submittal.
TL;DR: Match recess depth to the mount type you set—recess, surface or suspended each measure depth on a different plane. Set spacing from beam angle and ceiling height, decide at spec stage whether the run should be one continuous system or discrete bars, and check mounting depth against MEP and structure before PO. Do all four on one checklist—not depth alone.
Tabla de contenido
- 📏 1. Match recess depth to the mount type you chose
- 📐 2. Set spacing based on beam angle and ceiling height
- 🔗 3. Decide whether this run should be continuous
- 🛠️ 4. Check mounting depth clears MEP and structure
- ✅ Four parameters by mount type at a glance
- ¿Qué hacer a continuación?
- 🏁 Conclusion
- Preguntas frecuentes
📏 1. Match recess depth to the mount type you chose
Linear ceiling recess options are not one universal millimetre row on a quote—they follow how the bar meets the ceiling plane.
| Mount type | What “depth” means on the submittal | Recess / interface note |
|---|---|---|
| Empotrado | Slot depth + housing height + trim or plaster reveal | Needs void tall enough for the full envelope—not lip height alone |
| Superficie | Profile height below the finished ceiling face | No slot; depth is how far the bar projects downward |
| Suspendido | Drop below the ceiling underside | No ceiling slot; depth is hang geometry, not a recess cut |
On recess jobs, compare the maker’s minimum void o recess depth line to structure, ducts and insulation—not to a neighbour’s surface bar on another quote line. Surface and suspended rows on the same bid set should show N/A for slot depth or a drop range—not a recess millimetre copied from a channel family.
Pull three fields from each datasheet before you mark depths on the drawing:
- Recess: slot length, slot width, minimum void above the housing
- Surface: housing height below the fixing plane and bracket stand-off
- Suspended: minimum drop, maximum drop and canopy / gripper stack
If two quotes list different recess depths for the same mount label, check whether one line includes trim, driver pocket or fire-rated enclosure and the other does not—same mount type, different accessory stack.
🎯 Do recess and surface mounts need the same ceiling depth?
No. Recess depth is slot plus housing in the void; surface depth is profile height below the plane; suspended depth is drop below the underside—not a slot depth at all.
📐 2. Set spacing based on beam angle and ceiling height
Linear light ceiling spacing follows optics and room geometry—not only the catalogue’s default row spacing.
Spacing ties to:
- Beam angle and optic — wide beams overlap sooner; narrow beams need tighter centres or higher mounting to avoid dark bands
- Ceiling height and workplane — the same fixture spacing reads different on a 2.7 m office plate versus a 4.5 m atrium edge
- Mount type — recessed slots often follow axis lines; surface bars may step to structure; suspended rows may shift with drop and glare limits
Start from the lighting calc, then sanity-check on a reflected ceiling plan: does the rhythm still read even when the mount type fixes the bar to an axis or grid?
Do not copy spacing from a recess schedule onto a suspended run without re-running the footprint—drop changes the pool of light on the floor.
🎯 Can spacing stay on the datasheet when ceiling height changes?
Usually not without a review. Taller rooms spread the beam; shorter rooms concentrate it—re-check centres when floor-to-ceiling or optic changes on the revision.
🔗 3. Decide whether this run should be continuous
Continuous linear ceiling runs at this stage mean one luminous system on the PO—not how many metres one shipment may span.
Choose continuous when:
- The design intent is one uninterrupted line along an axis
- The series offers joiners or modules rated for optical continuity on that family
- Access and drivers can live at ends or rated pockets along the run
Choose discrete bars when:
- Maintenance needs removable segments between zones
- Mixed control or emergency splits break the axis anyway
- The catalogue’s continuous family cannot meet the finish or void you already accepted
That choice is separate from where a long axis must break for span, feed or install limits. Once you know you want a continuous look, use the run-length diagnostic linked in the boundary for breakpoint logic—not repeated here.
🎯 Is a continuous run always one line item on the PO?
No. Continuous appearance can be joined modules under one system family; discrete bars are a different spec path—pick that before you debate slot depth on the wrong SKU.
🛠️ 4. Check mounting depth clears MEP and structure
Linear light mounting depth is the full envelope the ceiling must accept—housing, driver zone, brackets and service clearance—regardless of mount type.
Check clashes for:
- Ducts, cable trays and sprinklers in the void above recess slots
- Structure depth and fixings for surface bars on concrete or metal deck
- Hang points, feeds and canopies for suspended rows under the slab or grid
Recessed linear lights fail first when the void is drawn too shallow on the section while the RCP still shows a slot—surface and suspended paths fail when drop or profile height hits duct banks or door heads.
Walk one typical bay on the section: mark housing envelope, then MEP, then finished ceiling. If the envelope crosses a hard object, change axis, mount type or housing family before the board order—not after the cut.
🎯 Does a shallow void always force surface mount?
Not always—a slimmer housing or shifted run may still fit. When MEP still blocks the envelope after those moves, change mount path or axis before PO.
✅ Four parameters by mount type at a glance
| Parámetro | Recessed mount | Montaje en superficie | Suspended mount |
|---|---|---|---|
| Linear ceiling recess options | Slot + trim/plaster path; void must fit full housing | No slot; pick flange or trim on the face | No slot; pick canopy / gripper and cable kit |
| Linear light ceiling spacing | Often tied to slot centreline on axis | May follow structure or layout grid | Drop and glare limit rhythm; not same as recess row |
| Continuous linear ceiling runs | Join access usually at slot ends or rated pockets | End caps and joins on the visible face | Feed and driver often at ends or remote boxes |
| Linear light mounting depth | Void depth + service above slot | Profile height below ceiling plane | Drop below underside + hang stack |
No universal recess millimetre appears in this table—each cell should trace to the housing datasheet for the mount type you set.
¿Qué hacer a continuación?
- Set mount type per zone on the submittal—recess, surface or suspended—not “linear” alone.
- Pull depth, spacing, continuous-vs-discrete and clash notes from each maker’s sheet for that mount.
- Mark one typical bay on plan and section before you release the ceiling package.
- Align quote lines so recess depth columns are not mixed with surface or drop rows on the same SKU.
Triage:
- If you have not yet chosen suspend, surface or recess for the floor plate, use the pillar page linked above—or the suspended-versus-surface ceiling diagnostic (title linked in related posts below)—before you depth-check quotes.
- If the ceiling is a false-ceiling board and grid system, read the false-ceiling install checklist linked in the boundary for board, void and trim specifics.
- If continuous run is chosen but the axis length may force a break, use the run-length diagnostic linked in the boundary—not this page—for span and feed breakpoints.
If you want a second pass on quote depth rows against your sections, XHLUX can review the mount type and housing envelope you are comparing.
🏁 Conclusion: Do linear lights need different ceiling recess depths by mount type?
Back at those mismatched quote columns, the answer is yes—but only after you name mount type. Recess depth, surface profile height and suspended drop are three different measurements; spacing, continuous-run choice and MEP clearance still belong on the same pre-PO checklist.
Explora nuestras publicaciones de blog relacionadas:
- Qué comprobar antes de instalar una luminaria lineal de perfil en el techo.
- How to Tell if Your Ceiling Needs Suspended or Surface Linear Lighting
- One Module or Many? A Long Linear Light Fixture Guide for Extended Runs
Notas y fuentes
- No universal recess depth millimetres, spacing metres or void heights are invented in this draft. Slot depth, minimum void, drop ranges and spacing stay on maker datasheets and project sections.
- Run-length breakpoint logic, join limits and uniformity along a long axis stay on the ceiling run-length diagnostic linked in the boundary—not duplicated here.
- False-ceiling board type, grid module and plaster-in versus trim-out stay on the false-ceiling install checklist linked in the boundary.
- Profile-channel cutting and driver access in aluminium channels stay on the profile install checklist linked in related posts.
- Structural, electrical, fire and accessibility rules still apply. Check local codes and the installation sheet before install.