
Tabla de contenido
- What is Track Lighting—and why it’s still the MVP for projects in 2025
- Decide your system in 90 seconds
- Safety, compliance & listings (don’t skip)
- Tools & materials to have on the ladder
- Step‑by‑step installation (simple, correct, and code‑aware)
- Wiring scenarios you’ll actually encounter
- Dimmer & driver compatibility (avoid flicker the smart way)
- Lighting design that sells: aiming & footcandle targets
- Step‑by‑step: aiming & spacing cheat sheet
- Troubleshooting (fast fixes)
- B2B buyer’s box: specs that keep projects on track
- Market snapshot (why track is still growing)
- Reference install sheets (so you can compare instructions fast)
- Example: wall‑wash layout in a 9 ft retail bay (quick math)
- The human factor: color quality that makes products look right
- Install FAQ
- Notes & sources (selected)
If you’re here, chances are you want two things: (1) a clean, safe, code‑compliant installation you can actually complete, and (2) answers to the real headaches—compatibility, wiring choices, dimming without flicker, and picking the right track for retail or gallery use. This guide gets you from decision to done, with pro tips, standards, and references woven in—so you can trust the outcome and move fast.
What is Track Lighting—and why it’s still the MVP for projects in 2025
Track lighting is a system with an electrified power channel (the pista) plus removable luminaires (track heads) that you can reposition as displays or layouts change. That flexibility is why it dominates retail, galleries, hospitality, and remodels. The Illuminating Engineering Society (IES) defines it precisely as a powered track with attachable fittings/luminaires, not a generic rail or strip.
Compatibility warning up front: The common US “H/J/L” families do not interchange—heads and tracks must match the system type. A quick visual check: H has three conductors; J and L have two (with different spacing). Don’t mix them.
Decide your system in 90 seconds
Where are you installing?
- US residential/light commercial (120 V) → Usually H/J/L single‑circuit; 2‑circuit options exist.
- Larger commercial or mixed‑voltage projects (120/277 V) → Consider commercial track families rated for 120 V/277 V and multi‑circuit.
Do you need multiple on/off groups or digital control?
- Sí → 2‑ or 3‑circuit track, or DALI/0–10 V data‑bus track (often 6 conductors: power + data).
- No → Single‑circuit is fine.
Low‑profile, touch‑safe, or premium control?
- Consider magnetic/low‑voltage (e.g., 48 V DC) tracks. Under the 2023 NEC Article 411, low‑voltage lighting systems must not exceed 30 V AC or 60 V DC and must be listed as a complete system or assembled from listed parts. Many 48 V DC magnetic systems qualify under this limit. Always verify listing/instructions.
Export markets / EU specs?
- Look for compliance with IEC/EN 60570 for electrical supply track systems (and often DALI support).
Safety, compliance & listings (don’t skip)
- In North America, track lighting systems are evaluated under UL 1574; these are permanently connected systems meant for ordinary locations and specified branch‑circuit limits. Use listed systems and follow the installation sheet.
- El NEC (Article 410) governs luminaires on line‑voltage circuits; lighting track is permanently installed and connected, and only track fittings can be installed on lighting track (no general‑purpose receptacles).
- Load calculations (non‑dwelling): include 150 VA for every 2 ft (600 mm) of track (or fraction) per NEC 220.43(B) when sizing feeders/services.
Manufacturer distance & environment rules (typical):
Many instructions specify ≥ 5 ft above floor, keep ≥ 6 in from curtains/combustibles, dry locations only unless otherwise rated, and support points ≤ 4 ft apart. Always follow the brand’s sheet.
Tools & materials to have on the ladder
| Categoría | Items |
|---|---|
| Safety | Insulated screwdriver set, voltage tester, gloves, eye protection |
| Mounting | Stud finder, drill/driver, toggle bolts or wood screws, T‑bar clips for grid ceilings |
| Electrical | Wire stripper, UL‑listed wire connectors, electrical tape |
| Track parts | Track sections (cuttable), live end o floating feed, end cap, joiners (L/T/X/flex), track heads, dimmer(s) or control gear |
| Optional | Junction box cover/canopy, suspension kit for pendants, compatible driver (for low‑voltage or special heads) |
(See Juno/WAC/Lithonia install sheets for examples of required accessories and mounting spacing.) (pdf.lowes.com, WAC Lighting)
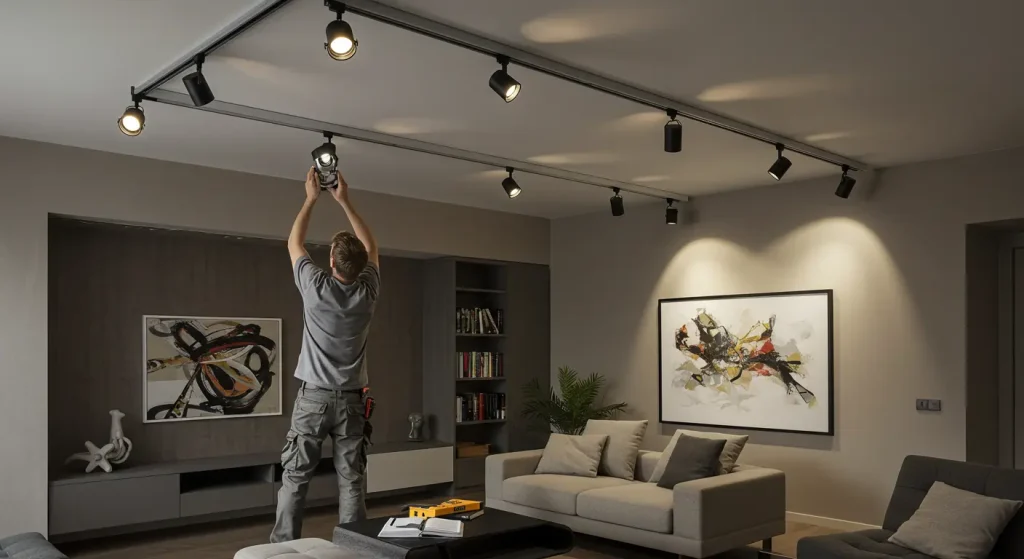
Step‑by‑step installation (simple, correct, and code‑aware)
Turn power off at the breaker and verify with a tester before anything else.
- Confirm track family & voltage
Match track head adapter to track type (H/J/L) or the specified 3‑circuit/DALI track. Check the product label for 120 V vs 277 V and the correct dimming method (ELV/TRIAC/0–10 V/DALI). - Plan your run
Sketch ceiling joists, junction box, and any corners. Decide on joiners (L/T/X/flexible) and feed location (live end, floating feed, or center feed). - Mark and pre‑drill
Hold the track to the ceiling, level it, mark holes, and pre‑drill. For drywall without studs, use toggle bolts. For T‑bar ceilings, use T‑bar clips. Support points no more than ~4 ft apart (typical). - Prepare the feed
Mount the live end o floating feed over the junction box with the correct canopy/cover. Pull supply conductors through. Observe polarity markings—many systems mark “P” or show an arrow to a polarity line on the track. - Make electrical connections
Connect hot (line) to feed “P” or “L”, neutral to “N”, and ground to the green or ground screw. For 0–10 V dimming, land the purple (+) y gray (–) low‑voltage control leads per driver/dimmer instructions. For DALI, connect the two data conductors per system diagram. Keep class 1 and class 2 conductors separate where required. - Secure the track
Fasten the track, ensuring straight runs and tight joins. Add end caps opposite the feed. If using a suspension kit, set equal drop lengths. - Add heads and aim preliminarily
Insert track heads by aligning contacts and twisting/locking to the energized bus. Keep heads clear of draperies or other combustibles. - Power on and test
Restore power, test switching, dimming, and verify no arcing or loose connections. - Fine‑tune the lighting
Para artwork, aim ~30° to minimize glare; for wall‑wash, position track typically 2–3 ft from the wall (9 ft ceiling) and space fixtures roughly equal to the offset; for taller ceilings, increase to 3–4 ft from wall. - Document
Note circuiting, dimmer model, driver specs, and any control addresses (DALI). This saves hours later.
Wiring scenarios you’ll actually encounter
| Scenario | What you use | Notas |
|---|---|---|
| Single‑circuit, 120 V | H/J/L track, live end, ELV/TRIAC dimmer if heads are compatible | Most remodel kits. Simple, cost‑effective. |
| Two‑circuit, 120/277 V | 2‑circuit track + dual feed/dimmer | Create A/B scenes (e.g., accent vs ambient). |
| 0–10 V dimming | Track + 0–10 V driver heads + 0–10 V dimmer | Stable, low‑flicker commercial control. Keep control pair intact. |
| DALI | 3‑circuit DALI track (6‑wire) + DALI drivers | Digital addressing and scenes; ideal for galleries/retail. |
| 48 V magnetic | Low‑voltage rail, DC driver (Class 2), magnetic heads | Check NEC 411 (< 60 V DC) and listing. Great for touch‑safe, minimal profiles. |
Dimmer & driver compatibility (avoid flicker the smart way)
- Match the control method printed on the head/driver: TRIAC/ELV (phase‑cut), 0–10 V, o DALI. Don’t mix methods on one circuit.
- 0–10 V is the safest default in commercial track: two low‑voltage wires carry the dimming signal; power stays on the main conductors.
- DALI adds addressing and scenes on two dedicated data wires inside the track profile; common in IEC/EN 60570 track systems.
- Para color quality, CRI ≥ 90 is a good baseline, but TM‑30 gives a fuller picture (use Rf fidelity and Rg gamut). Many museums/retailers now spec to TM‑30, not CRI alone.
Lighting design that sells: aiming & footcandle targets
- Accent aiming: ~30° from vertical minimizes glare on framed art and glossy packaging.
- Wall‑wash: As a rule of thumb, offset = ~⅓ of ceiling height; fixture spacing ≈ 1.2–1.5× offset for uniformity.
- Retail contrast: IES retail guidance supports accent levels 3:1 to 5:1 over ambient to make merchandise pop; check RP‑2‑20 for detailed criteria.
- Footcandle planning: Use the lumen (zonal‑cavity) method for quick estimates, then refine in software; it’s a good first pass, not the last word.
Step‑by‑step: aiming & spacing cheat sheet
| Use case | Haz | Offset from wall | Spacing | Aim |
|---|---|---|---|---|
| Artwork | Narrow/flood per size | 2–3 ft (9 ft ceiling) | ≈ offset | 30° to face |
| Wall‑wash | Dedicated wall‑wash or wide flood | ~⅓ ceiling height | 1.2–1.5× offset | 30–35° for uniformity |
| Retail gondola | Flood/elliptical | 4–6 ft | 1.0–1.5× beam dia. at target | Aim to verticals (faces/signage) |
| Texture graze | Very narrow | 6–12 in | 6–12 in | Steep angle along surface |
Troubleshooting (fast fixes)
| Symptom | Likely cause | Fix |
|---|---|---|
| Heads won’t energize | Adapter doesn’t match H/J/L; polarity reversed | Verify family, align to polarity line/P and re‑insert. |
| Flicker when dimming | Wrong dimmer type; driver mismatch | Use dimmer matching ELV/TRIAC/0–10 V/DALI labeling; keep 0–10 V wires isolated. |
| One group won’t switch | On multi‑circuit track, head is on wrong circuit | Rotate adapter selector or move to correct circuit (check manual). |
| Hot spots on walls | Spacing too wide/too close to wall | Usar offset ≈ ⅓ ceiling height; space ≈ 1.2–1.5× offset. |
| Failed inspection | Missing listing, damp‑location misuse, or code spacing | Usar UL 1574 listed track; honor “dry location only,” ≥ 5 ft above floor, clearances to combustibles, and support spacing. |
B2B buyer’s box: specs that keep projects on track
- Listings & standards: UL 1574 (NA), IEC/EN 60570 (EU); confirm NEC compliance in documentation. (shopulstandards.com, knowledge.bsigroup.com)
- Voltage/circuiting: 120 V vs 277 V; single vs 2‑/3‑circuit; data conductors (0–10 V or DALI). (contechlighting.com, powergeartracks.com)
- Óptica: Field‑changeable lenses (spot, flood, wall‑wash), glare control (snoots/honeycombs).
- Color: CRI 90+, or specify TM‑30 (e.g., Rf ≥ 85, Rg 95–105) for premium retail. (Energy.gov del Departamento de Energía)
- Drivers/dimming: ELV/TRIAC for retrofit simplicity; 0–10 V for scale; DALI for enterprise scenes & analytics. (contechlighting.com, powergeartracks.com)
- Serviceability: Twist‑lock heads, universal adapters, spares strategy.
- OEM/ODM: If you’re a distributor, designer, or brand, look for a manufacturer offering OEM/ODM track heads, rails, and drivers, with documentation for UL/IEC and photometry.
Pro note for North America: When your design includes lots of track in retail, include NEC 220.43(B) load allowances (150 VA per 2 ft) in feeder/service calcs; inspectors look for it. (Default)
Market snapshot (why track is still growing)
Recent research places the global track lighting market around US\$ 2.5–3.9 B in 2024, trending to ~US\$ 4–7 B by early 2030s (≈ ~7–8% CAGR), driven by LED retrofits, flexible retail formats, and control‑friendly infrastructure. Directional LEDs plus smart dimming (0–10 V/DALI) keep track systems relevant in 2025. (Valuates Reports, MAXIMIZE MARKET RESEARCH, Business Research Insights)
Reference install sheets (so you can compare instructions fast)
Manufacturers consistently require power off, correct polarity, environment ratings, y support spacing (often ≤ 4 ft). Review an instruction sheet that matches your exact brand/model before drilling: Juno, WAC, Lithonia/Acuity (examples linked). (pdf.lowes.com, WAC Lighting, img.acuitybrands.com)
Example: wall‑wash layout in a 9 ft retail bay (quick math)
- Offset from wall: 2–3 ft (choose 2.5 ft).
- Spacing: ~1.2–1.5 × 2.5 ft → 3–4 ft between heads.
- Beam: wide flood or dedicated wall‑washer.
- Aim: ~30–35° to vertical for smooth uniformity.
This lines up with common rules‑of‑thumb and trade guidance for uniform vertical illumination.
The human factor: color quality that makes products look right
If you’re specifying for brand or museum work, TM‑30 (Rf/Rg) describes color fidelity and saturation better than CRI alone. It’s now widely referenced by DOE/IES resources and leading manufacturers—use it when choosing heads. (Energy.gov del Departamento de Energía)
Install FAQ
Q1. Can I put any head on any track?
No. H/J/L families don’t mix; match the head to the track.
Q2. Do I need a special dimmer?
Yes—match the driver: TRIAC/ELV, 0–10 V, o DALI. A mismatched dimmer causes flicker or limited range.
Q3. How far from the wall for wall‑washing?
As a starting point: offset ≈ ⅓ ceiling height; spacing ≈ 1.2–1.5× offset; aim ~30–35°.
Q4. What about low‑voltage 48 V magnetic tracks?
Under NEC 411 (2023), low‑voltage lighting must not exceed 30 V AC or 60 V DC and be listed as a system or listed parts assembly. Check your exact listing and follow the instructions.
Q5. How many feet of track can I run on one circuit?
It’s not about feet—it’s load. For feeder/service calculations in non‑dwelling occupancies, include 150 VA per 2 ft of track per NEC 220.43(B). Branch circuits and drivers/dimmers then govern practical head counts.
Notes & sources (selected)
- IES definition of track lighting; IES Lighting Library. (ies.org, store.ies.org)
- H/J/L families and “no mix” rule; quick wire‑count ID. (The Home Depot, support.waclighting.com)
- UL 1574 scope for track systems; permanent connection. (shopulstandards.com)
- NEC Article 410 basics; track is permanently installed; fittings only. (thenecwiki.com)
- Feeder/service calc: 150 VA per 2 ft of track (NEC 220.43(B)). (Default, ecmweb.com)
- Dimming/control tracks: 0–10 V/DALI multi‑conductor tracks (examples). (contechlighting.com, powergeartracks.com)
- DALI/IEC 60570 and 3‑circuit references (ERCO/EN). (Energylight)
- TM‑30 color rendition overview (DOE/IES). (Energy.gov del Departamento de Energía)
- Wall‑wash spacing and aiming rules. (arch-products.com, lrc.rpi.edu)
- Installation sheet examples (Juno/WAC/Lithonia) for real‑world requirements. (pdf.lowes.com, WAC Lighting, img.acuitybrands.com)
- Track lighting market growth snapshots. (Valuates Reports, MAXIMIZE MARKET RESEARCH)