
Inhaltsverzeichnis
- Before You Start: A Crucial Safety Warning and Reality Check
- Phase 1: The Planning Stage – The Blueprint for Success
- Phase 2: The Preparation Stage – Measuring Twice, Cutting Once
- Phase 3: The Installation Stage – The Professional Process
- Phase 4: The Finishing Stage – The Final Details
- The Installation Process at a Glance
- Final Word: The Satisfaction of a Well-Planned Project
- FAQ About How To Install GU10 LED Downlights
There are few home improvement projects as transformative as a well-executed downlight installation. It can take a room from dated and dim to modern and brilliant, enhancing both its function and atmosphere. But the journey from an empty ceiling to a beautifully lit space is a project that demands careful planning and meticulous execution.
The question, “How to install GU10 LED downlights?” goes far beyond just connecting wires. It involves design, layout, preparation, and an unwavering commitment to safety. This is not a task to be rushed.
This guide is designed to be your project blueprint. We will walk you through the entire installation process in four distinct phases, from the initial design concept to the final flick of the switch. We’ll cover the professional techniques, the critical safety checks, and the essential planning steps that separate a flawless installation from a frustrating one.
Before You Start: A Crucial Safety Warning and Reality Check
CRITICAL SAFETY WARNING:
This guide details a professional process. Installing new lighting circuits and fixtures involves working with mains voltage electricity, which is inherently dangerous and can cause serious injury, death, or fire if done incorrectly. This work should only be performed by a qualified and licensed electrician who understands your local and national electrical codes (e.g., the NEC in the US, BS 7671 in the UK). This guide is for educational and planning purposes to help you understand the full scope of the project.
Phase 1: The Planning Stage – The Blueprint for Success
A successful project is 90% planning. Rushing this stage is the most common mistake.
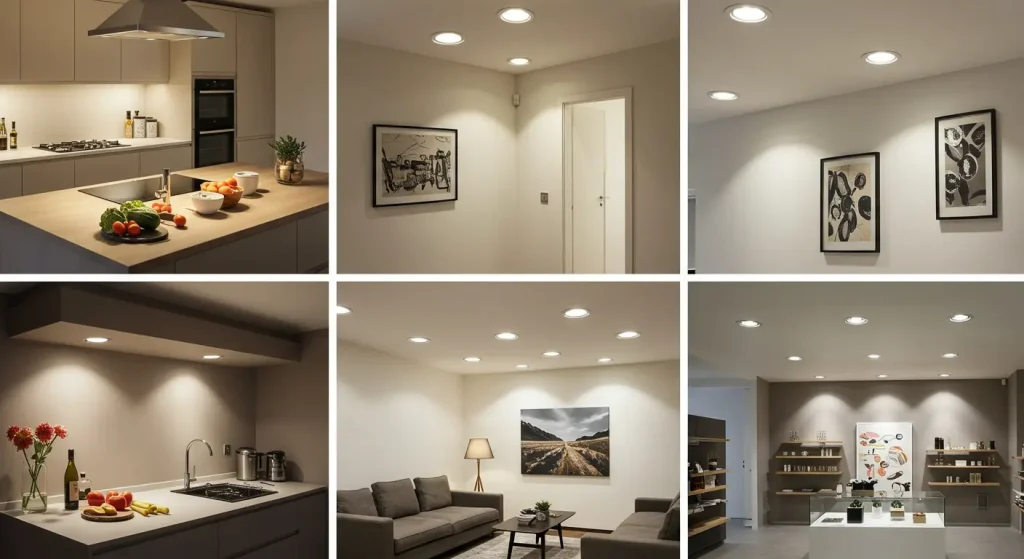
Step 1: Designing Your Layout (The Art)
First, forget about the fixtures and think about the light. What do you want to achieve?
- Ambient Light: For general, even illumination, plan a grid of fixed downlights. A good rule of thumb for spacing is to divide your ceiling height by two. For an 8-foot ceiling, spacing your lights about 4 feet apart is a great starting point.
- Task Light: Identify your key task zones—kitchen counters, reading chairs, home office desks. Plan to place dedicated downlights directly over these areas for focused, shadow-free light.
- Accent Light: Where is your artwork? Your fireplace? A beautiful textured wall? Plan to use adjustable (gimbal) downlights to highlight these features. This is what brings a room to life.
- The Golden Rule: Avoid a single, straight “runway” of lights down the center of the room. This looks dated and lights the floor, not the room. It’s often far more effective to place lights closer to the walls to create a sense of space (wall washing) and to highlight vertical surfaces.
Step 2: Choosing the Right Downlight (The Science)
With your layout planned, select your hardware. Use our “How to Choose a Downlight” guide for a full deep dive, but here is your essential checklist:
- System Type: We recommend a GU10 replaceable bulb system for its long-term flexibility.
- Fixture Function: Get a mix of fixed downlights for your ambient grid and adjustable (gimbal) downlights for your accent and task lighting.
- Safety Ratings:
- IC-Rated: A must-have if your ceiling has insulation. This means the fixture is approved for direct contact with insulation.
- Fire-Rated: Often required by code for ceilings with a habitable room above. Check your local regulations.
- Light Quality Specs:
- CRI: 90+ for true, natural colors.
- CCT: 2700K-3000K for a warm, inviting feel in living spaces; 3000K-4000K for kitchens and workspaces.
- Strahlwinkel: Choose based on your ceiling height and the lighting layer (wide for ambient, narrow for accent).
Step 3: Creating a Materials and Tools List
A professional plans ahead. Your list will include:
- Downlight housings (and GU10 bulbs)
- The correct type and gauge of electrical cable
- A new dimmer switch compatible with LED lighting
- Tools: Stepladder, stud finder, hole saw, drill, wire strippers, screwdrivers, safety glasses, dust mask.
Phase 2: The Preparation Stage – Measuring Twice, Cutting Once
Step 4: Finalizing and Marking Your Layout
Transfer your paper plan to the ceiling. Use a tape measure and a chalk line or laser level to ensure your marks are perfectly straight and accurately spaced. This is your last chance to make adjustments before cutting.
Step 5: Checking for Obstructions
This is the step where professionals save themselves major headaches.
- Use a high-quality stud finder to locate all the ceiling joists. Adjust your layout slightly to ensure no downlight position falls directly on a joist.
- Drill a tiny 3mm (1/8″) pilot hole in the center of each marked location. Push a piece of stiff wire (like a bent coat hanger) up into the hole and rotate it 360 degrees. This will confirm there are no hidden pipes, ducts, or other obstructions before you cut a large hole.
Phase 3: The Installation Stage – The Professional Process
Reminder: This phase details the work that should be performed by a qualified electrician.
Step 6: SAFETY – Isolate the Power Completely
The electrician will turn off the power at the circuit breaker, lock it out, and use a voltage tester to ensure the circuit is 100% dead.
Step 7: Cutting the Holes
Using a hole saw attached to a drill that matches the exact cut-out size specified by your downlight manufacturer (e.g., 75mm, 90mm), the electrician will cut the holes in the ceiling.
- Profi-Tipp: Running the drill in reverse first can score the drywall paper, leading to a cleaner cut. A dust collection bowl attached to the drill can catch almost all the messy drywall dust.
Step 8: Running the Electrical Cable
The electrician will run the new electrical cable from the switch to the first downlight hole, and then subsequently between the other holes, leaving some extra length at each one.
Step 9: Connecting the Downlights (The Loop-in/Loop-out Method)
This is the standard, professional method for wiring the parallel circuit.
- At the first hole, the electrician connects the main cable from the switch (“loop in”) to the fixture’s terminal block.
- They then connect a second cable (“loop out”) into the same terminals. This cable will run to the next hole.
- This process is repeated down the line. The “loop out” from one fixture becomes the “loop in” for the next.
- The final fixture in the chain only has a “loop in” connection.
- All Live, Neutral, and crucial Earth connections are made securely at each terminal block.
Phase 4: The Finishing Stage – The Final Details
Step 10: Fitting the Fixtures
Once wired, the downlight housings are pushed up into the ceiling holes. They are held in place by two spring-loaded clips that snap down onto the top surface of the drywall, securing the fixture firmly.
Step 11: Installing the GU10 Bulbs and Testing
With the fixtures in place, the GU10 bulbs can be inserted (push and twist) and secured with their retaining clips. The electrician will then safely restore power at the breaker and test the entire installation, ensuring every light works and dims correctly.
Step 12: Patching and Painting (If Necessary)
If any mistakes were made or old fixtures were removed, now is the time to patch any holes with drywall compound, sand smooth, and touch up the paint for a flawless finish.
The Installation Process at a Glance
| Phase | Key Steps | Hauptziel |
|---|---|---|
| Phase 1: Planning | Design layout, Choose fixtures, Create materials list. | Create a perfect blueprint for success. |
| Phase 2: Preparation | Mark the ceiling, Check for hidden obstructions. | Measure twice, cut once. Avoid costly mistakes. |
| Phase 3: Installation | Isolate power, Cut holes, Run cable, Connect wiring. | Execute the plan safely and to professional standards. |
| Phase 4: Finishing | Fit fixtures, Install bulbs, Test, Patch and paint. | Complete the project for a clean, professional result. |
Final Word: The Satisfaction of a Well-Planned Project
Installing a new downlight system is a significant upgrade to any space. By understanding the full scope of the project—from the initial creative vision of the layout to the critical safety checks of the installation—you empower yourself to achieve a truly professional result.
This knowledge allows you to plan your project with confidence, select the right materials for the job, and have a clear and productive conversation with the qualified electrician you hire to perform the installation. The end result will be a space that is not just brighter, but safer, more beautiful, and perfectly suited to your needs for years to come.
Ready to move from planning to reality?
While the installation is a job for the pros, the planning and product selection is where your vision takes shape. If you need expert guidance on designing your layout or choosing the perfect suite of GU10 downlights and controls for your project, our team of lighting specialists is here to help.
Contact us today for a professional consultation and let’s design your perfect space.