XHLUX
XHLUX
The reflected ceiling plan shows a neat slot through mineral fiber boards for a continuous luminous line. Behind the tile, the specifier is not sure whether the suspension grid, ductwork and the housing depth you are used to on open structure will still fit—or whether the board type even allows the finish detail you drew.
That gap is specific to linear light false ceiling work: board, grid and void behave differently from an exposed slab or a bare aluminium profile channel in plasterboard.
This page covers what to know before installing linear light in a false-ceiling system—board, grid and void—not the aluminium profile-channel cutting checklist in Was Sie vor der Installation einer linearen Profilleuchte an der Decke prüfen sollten, and not the run-length breakpoint diagnostic in How Long Is Too Long for One Ceiling Linear Light Run?.
For the wider suspend / surface / recess map, start with Wie wählt man die richtige lineare LED-Beleuchtung: Hänge-, Aufbau- oder Einbauleuchten?—then return here for false-ceiling recess, spacing and access.
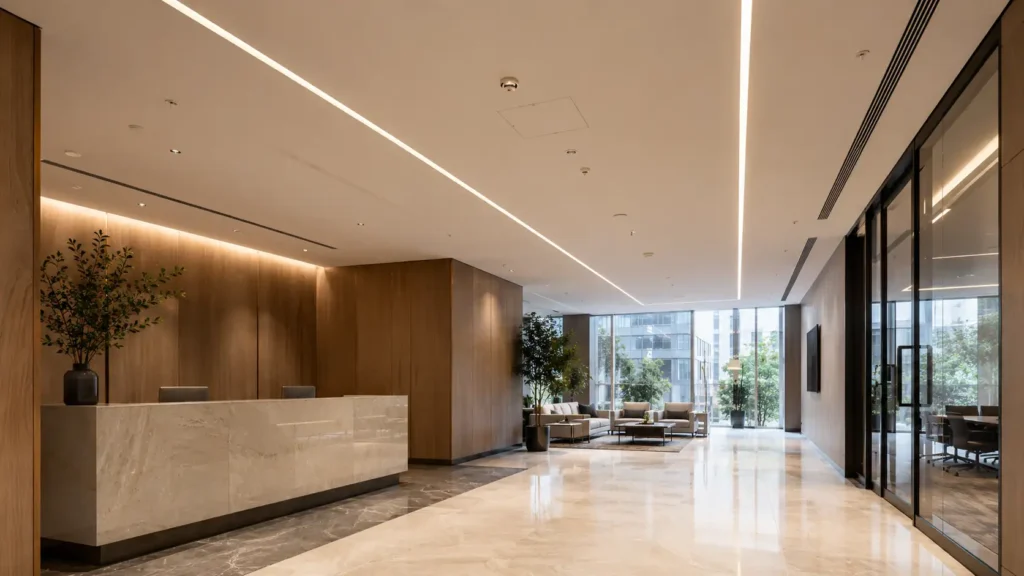
TL;DR: Before anyone cuts a false-ceiling board, check recess depth against the real void, choose plaster-in versus trim-out for that board family, set spacing to the grid module—not only the fixture catalogue—and sequence install and maintenance access while tiles can still move.
Inhaltsverzeichnis
- 📏 1. Check recess depth against the void, not just the fixture
- 🧱 2. Decide between plaster-in and trim-out finishes
- 📐 3. Set spacing within the false-ceiling grid
- 🛠️ 4. Sequence installation and maintenance access
- ✅ False-ceiling linear checks at a glance
- Was ist als Nächstes zu tun?
- 🏁 Conclusion
- Anmerkungen & Quellen
- Häufig gestellte Fragen
📏 1. Check recess depth against the void, not just the fixture
False ceiling linear light recess must clear everything above the visible board—not only the housing depth on the luminaire cut sheet.
On a false ceiling you are stacking:
- Finished board or tile thickness
- Grid or furring depth
- Services in the plenum (duct, cable tray, sprinklers)
- Structural slab or deck above
The recess pocket needs the fixture body, driver location if it sits in the void, clearance to sprinklers where codes apply, and any trim flange—all without crushing insulation or bridging the grid.
Mineral fiber and lay-in systems often give less usable void than a dedicated gypsum furring cavity built for a slot. A housing that recesses cleanly in a plasterboard mock-up may still collide with a main tee or a duct sleeve on site.
Pull a coordinated section through the longest run: board type, grid height, services and the linear housing section together. Compare to the maker’s minimum recess depth for that SKU—not a generic “fits in ceiling” note.
This draft does nicht publish a universal void-depth millimetre for every false ceiling. Void height varies by project structure, grid type and MEP routing. Use the section drawing and the fixture submittal; hold the cut until both agree.
🎯 Is fixture catalogue recess depth enough on a false ceiling?
No. Catalogue depth is the housing; false-ceiling recess is housing plus void, grid and services in section.
🧱 2. Decide between plaster-in and trim-out finishes
Plaster-in linear lighting on a false ceiling is realistic mainly where the board can receive a continuous plaster or compound finish around the aperture—typically gypsum board ceilings built for flush slots.
Mineral fiber acoustic tiles and many integrated panel systems do not offer the same plaster-in path. Those jobs usually need trim-out: flanges, bezels or surface profiles that land on the tile face rather than a skimmed seamless reveal.
| Board family | Typical finish path | Planning note |
|---|---|---|
| Gypsum board false ceiling | Plaster-in or trim-out possible | Coordinate slot width with plaster trade; driver access from above or a rated hatch |
| Mineral fiber / lay-in grid | Usually trim-out on tile face | Tile edge is fragile—avoid assuming plaster can hide a rough cut |
| Integrated metal / composite panels | Trim or factory kerf per system | Panel module may dictate slot length; field cuts need maker approval |
Choosing plaster-in on a drawing that will be built with lay-in tiles forces a finish change late—or a visible trim you did not budget.
Profile-channel plaster sequence and channel depth mechanics stay on the linear profile install-check article linked in the boundary—not re-derived here.
🎯 Can you plaster-in linear light on standard acoustic ceiling tiles?
Usually no. Acoustic lay-in tiles are trim-out jobs; plaster-in belongs on gypsum or monolithic board ceilings designed for it.
📐 3. Set spacing within the false-ceiling grid
Linear light false ceiling spacing follows the grid module as much as the photometric spacing guide.
Suspended mineral fiber ceilings commonly use 600 × 600 mm oder 600 × 1200 mm modules (24 × 24 in and 24 × 48 in equivalents) on metal suspension grids—widely published module sizes, not a single-brand secret. Layout that ignores the module often lands slots on tile joints, crosses main tees awkwardly, or forces non-standard tile cuts every metre.
Use the module to set:
- Run direction parallel or perpendicular to main tees—whichever keeps cleaner tile breaks
- Centre lines that respect half-tile symmetry at room edges
- Junctions where a linear slot must stop at a grid line for access or structure
Photometric spacing between separate linear heads still matters for even light on the floor or wall—but on false ceilings, grid alignment is the constraint that shows up first on the RCP.
Continuous-run length limits and breakpoint logic stay on the run-length diagnostic linked in the boundary—not repeated here.
🎯 Should linear slots ignore the ceiling grid if the lighting calc says otherwise?
Rarely on lay-in systems. Fix grid conflicts on the RCP before you optimise lux on paper.
🛠️ 4. Sequence installation and maintenance access
False ceiling lighting installation order decides whether you can ever reach the driver—or whether one bad tile traps the run.
Typical decision points:
- Rough-in first: feeders and drivers located above the grid before boards go up—when drivers must stay accessible from the plenum
- Slot before final tile: cut or route gypsum boards before final finish; on grid ceilings, plan which tiles lift for access
- Lift-out path: mark which tiles remove for driver swap without dismantling the whole linear run
- Fixed after finish: plaster-in slots that cannot be reopened without breaking finish—driver location must be reachable from a hatch or the slot end
Coordinate with the ceiling trade: who cuts the aperture, who reinforces around the slot, and who owns damage to acoustic tile edges.
Maintenance access is a false-ceiling question more than an open-ceiling question. If the only path to the driver is “remove ten metres of linear lens,” you have sequenced install and access wrong—fix that on the method statement before PO.
🎯 Is it always better to install boards first and cut slots in place?
Not when plenum access is required after finish. Sequence from driver access backward—not from tile install forward.
✅ False-ceiling linear checks at a glance
| Überprüfen | Gypsum board false ceiling | Mineral fiber / lay-in grid | Integrated panel ceiling |
|---|---|---|---|
| False ceiling linear light recess | Slot depth vs furring + services in section | Housing vs plenum depth above tee; watch main runners | Module kerf or trim depth per panel system |
| Plaster-in linear lighting | Often feasible with plaster trade coordination | Usually trim-out on tile face only | Factory or field trim per catalogue |
| Linear light false ceiling spacing | Align slot with framing; less tile modular | Align to 600 / 600 or 600 / 1200 mm module | Follow panel module and joint lines |
| False ceiling lighting installation | Sequence plaster, slot and driver access | Plan lift-out tiles at drivers and joins | Check field-cut rules with panel maker |
Grid module sizes in the spacing row are common industry modules—check the project grid drawing before you lock slot centres. No universal void-depth millimetre appears in this table.
Was ist als Nächstes zu tun?
- Draw a section through the longest slot: board, grid, services, housing.
- Pick plaster-in versus trim-out for the actual board family on the schedule.
- Snap slot centres to the ceiling module on the RCP.
- Write install and lift-out sequence on the method statement before tile fix.
Triage:
- If the detail is an aluminium profile channel cut into plasterboard—not a false-ceiling board and grid package—use the linear profile install-check article linked in the boundary.
- If recess depth is set but the question is how long one continuous run can be before it must break, use the run-length diagnostic linked in the boundary.
- If all four checks pass and you are releasing hardware, run Linear LED Suspension: What to Check Before You Order when the mount is suspended; for recess or trim linear on false ceilings, carry feed, driver access and end-cap detail on the PO the same way.
If you want a second pass on recess versus grid on your reflected ceiling plan, XHLUX can review the drawing against the board and fixture types you are considering.
🏁 Conclusion: What should you know before installing linear lights in a false ceiling?
Back at that mineral fiber reflected ceiling plan, the risk is not picking the wrong lumen package first—it is assuming open-ceiling recess habits fit a board-and-grid void. Check depth in section, match finish method to board type, align spacing to the module, and sequence access before the tiles are fixed.
Entdecken Sie unsere verwandten Blogbeiträge:
- Aufputz-Linearleuchten für Decken ohne Einbau
- How to Tell if Your Ceiling Needs Suspended or Surface Linear Lighting
- Ceiling-Mounted Linear Fixtures for Hallways: 5 Checks
Anmerkungen & Quellen
- Common suspended-ceiling grid modules of 600 × 600 mm Und 600 × 1200 mm are widely published layout sizes for mineral fiber lay-in systems; always check against the project reflected ceiling plan and grid submittal.
- No universal void-depth millimetre, plaster reveal dimension or brand-specific trim width is stated in this draft. Those values stay on fixture submittals, ceiling manufacturer data and coordinated sections.
- Profile-channel cutting, channel depth and plaster-in mechanics for aluminium profiles stay on the linear profile install-check article—not duplicated here.
- Run-length breakpoint and uniformity logic stay on the ceiling linear run-length diagnostic—not duplicated here.
- Structural, fire, electrical and access rules still apply. Check local codes and the installation sheet before install.