XHLUX
XHLUX

A deep recessed downlight and a flush recessed head can share the same cut-out size.
They do not share the same optical geometry.
The real difference is how far the LED source sits above the finished ceiling plane — and what that setback does to glare, ceiling calm, and the recessed downlight depth option you must clear in the void.
If you still need recessed vs surface-mounted vs adjustable routing, start on the LED downlight installation methods guide.
This page assumes the recessed path is already locked.
It compares deep-set / deep trim geometry with a flush (near-plane) aperture for commercial and light-commercial ceilings.
Wichtigste Erkenntnisse
– Deep recessed / deep-set = LED engine set back in a deep chamber or deep trim downlight design; shielding improves deep-set downlight glare reduction.
– Flush = source and luminous face sit near the ceiling plane; easier in shallow voids, weaker cut-off from normal view angles.
– Glare comfort is geometry + layout + lumen — not the word “deep” on a catalogue alone.
– Measure void depth and cable bend before you freeze the recessed downlight depth option.
1. Quick comparison: deep recessed vs flush
| Dimension | Deep recessed / deep-set | Flush (near-plane) recessed |
|---|---|---|
| Source position | Set back above the aperture (deep chamber / deep trim) | Near or at the finished ceiling plane |
| Glare cut-off | Stronger shielding from normal view angles | Weaker cut-off; source more visible off-axis |
| Deckenansicht | Darker aperture / “quiet” ceiling when aimed well | Brighter spots in the plane; more visual noise |
| Void need | Deeper housing / optical stack (SKU-dependent) | Often the shallowest recessed stack |
| Best fit | Desks, lounges, galleries, long sight lines | Utility, shallow voids, some canless wafers |
| Trade-off | Needs measured depth; may cost more per point | Faster in tight plenums; glare risk if over-lumened |
Neither row wins every zone.
Freeze viewing angles and measured void first, then pick the geometry that clears both.
🎯 Worin besteht der wirkliche Unterschied in einer einzigen Zeile?
A deep recessed downlight sets the LED back for cut-off; flush keeps the source near the plane and usually needs less void.
2. What “deep recessed” and “flush” actually mean
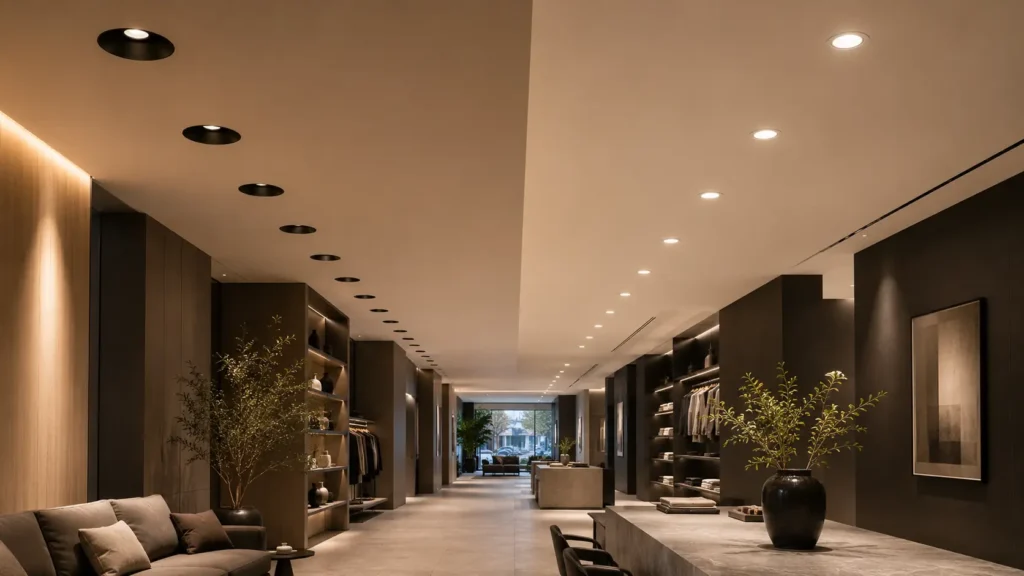
Deep recessed (also called deep-set or deep regress) moves the LED and primary optic up into a chamber above the aperture.
From most seated or standing views, the bright source stays hidden longer.
That physical setback is the core of deep-set downlight glare reduction.
A deep trim downlight design is one common way to buy that setback: the trim or baffle forms a deeper well so the engine sits farther from the plane.
Spülen recessed heads keep the luminous face close to the finished ceiling.
Many slim “wafer” or low-profile modules are flush in this sense even when they are still recessed into a cut-out.
Flush is not the same as surface-mounted.
Surface-mounted skips the cut-out — that fork stays on the installation-methods guide.
Trimless / plaster-in finish is also a separate decision: it changes how the aperture meets plaster, not whether the optic is deep-set or flush.
🎯 Is deep recessed only a bigger hole?
No — a deep recessed downlight is about source setback and shielding, not simply a larger cut-out on the drawing.
3. Glare and the “quiet ceiling” effect
When the source sits deep, side walls of the chamber cut off high-angle rays before they hit eyes across the room.
That is why deep-set packages are specified when people look toward the ceiling often — desks, lounges, galleries, hospitality circulation.
Glare-free recessed lighting as a project goal still needs more than depth:
- Beam class matched to spacing
- Reasonable lumen per point for the zone
- Reflector / baffle finish that does not glitter into view
- Layout that avoids aiming bright apertures into faces
Flush heads can still work in back-of-house, closets, and short-view rooms where comfort limits are loose.
They struggle when high output meets long sight lines with no shielding.
A correctly specified deep recessed downlight reduces that risk by hiding the source — still verify layout and lumen, not marketing alone.
For accent aiming and task glare checks after geometry is frozen, use the directional downlights for accent and task guide.
🎯 When does flush create the most glare risk?
When high lumen and wide beams sit flush in long sight-line rooms, so the bright face stays visible off-axis.
4. Recessed downlight depth option — the hard gate
Depth kills more deep-set specs than taste does.
Planning bands in millimetres: flush or slim recessed about 80 to 120; deep recessed often about 150 to 200 or more. Product-dependent — verify SKU sheet.
Typical recessed housing depth (planning bands)
Confirm on fixture sheet — product-dependent Flush / slimrecessed
~80–120 mm
Deep recessed/ deep-set
~150–200+ mm
Source: Industry planning bands from architectural recessed / deep-regress guides; verify SKU sheet
Industry planning bands often put flush / slim recessed stacks around 80–120 mm of housing depth, and many deep-set packages around 150–200 mm+.
Those are planning bands only — SKUs vary, and remote drivers can move heat and electronics out of the head.
Before you order:
- Measure as-built void at each zone (not catalogue photos).
- Add cable bend and any fire / IC clearances from the sheet.
- Confirm whether the driver is integral or remote.
- Reject any deep-set SKU that fails the measured recessed downlight depth option.
Shallow voids usually force flush, slim, or surface paths — not a deep chamber fantasy on a shallow plenum.
🎯 When does void depth kill deep-set?
When measured cavity plus bend and clearances cannot clear the deep housing on the sheet — change geometry before cutting.
5. When to choose which (decision matrix)
| Choose deep recessed / deep-set when… | Choose flush when… |
|---|---|
| Occupants face the ceiling often (desks, seating) | Void is shallow or full of ducts/joists |
| You need stronger cut-off for comfort or UGR briefs | Utility / short-view rooms tolerate brighter apertures |
| Architecture wants a darker, quieter ceiling plane | Budget and labour favour the thinnest recessed stack |
| You can prove void depth on the sheet | Retrofit forces a slim or wafer envelope |
Mixed ceilings are normal.
Use deep-set on primary occupied zones and flush only where depth or use-case allows — do not force one SKU family everywhere.
🎯 One rule before the order sheet?
Match geometry to viewing angles and measured void first; freeze lumen and CCT after the deep vs flush decision.
6. Spec checklist before you buy
Freeze these on the datasheet — not the mood board:
- Mounting / housing depth and remote-driver note
- Cut-out and trim / baffle depth (deep trim vs flush face)
- Beam angle and peak intensity suited to spacing
- Glare path: shielding, UGR claim only if the project brief needs it — verify method
- IC / Non-IC, airtight, IP, and fire-rated assembly notes where the ceiling requires them
- Aiming: fixed deep-set vs adjustable deep regress (tilt is a separate package)
Do not treat “anti-glare” marketing copy as a substitute for measured setback and layout.
🎯 What must be on the sheet before PO?
Housing depth, cut-out, beam class, insulation or fire notes, and remote vs integral driver — then zone glare expectations.
7. What to do next
- Confirm the recessed path on the installation methods guide if surface vs recessed is still open.
- Measure void depth and primary viewing angles per zone.
- Pick deep-set vs flush from the matrix above.
- For aiming and task glare after geometry is locked, use the directional accent and task guide.
- After geometry is frozen, continue with trim finish, multi-head layouts, or room-specific guides as your project needs — keep deep vs flush decided first.
Notes: Planning depth bands are industry ranges for orientation only. Confirm every millimetre, listing, and fire detail on the fixture sheet and the project lighting design. Use qualified electrical labour for mains work.