XHLUX
To install a ceiling corner linear light around a 90-degree corner, identify whether the turn is an inside or outside corner, select a compatible corner profile or accurately cut the straight channels, connect the LED sections with an approved method, and align the diffuser so the finished light line has as little interruption as the selected system allows.
Straight runs are usually simple. At a right-angle turn, three parts must change direction—and each joins differently:
- Aluminium profile or luminaire housing
- LED-лентах or integrated light source
- Диффузор or optical cover
Joining the aluminium does not automatically solve the LED connection or the diffuser continuity. Treat them as three details on the same drawing.
Для общего обзора подвесного, накладного и встраиваемого монтажа начните с Как выбрать линейные светодиодные светильники: подвесные, накладные или встраиваемые?—then return here for the 90° corner sequence.
Вкратце: Lock corner geometry (inside vs outside) first. Join the profile with a matched corner piece or a system-approved miter—not a generic straight connector. Connect the LED path only as the strip or luminaire sheet allows (often cut + connector or jumper; not a sharp sideways fold). Seat the diffuser last, then check for dark spots, leaks and insecure covers. Integrated bars need their own listed L-corners; do not field-cut them like a profile kit.
Оглавление
- 📐 1. Inside vs Outside 90-Degree Corners: What Changes?
- 🔧 2. How Do You Join Aluminum Linear Light Profiles at a 90-Degree Corner?
- 💡 3. How Do You Connect the LED Strip Around the Corner?
- 📋 4. How to Install Ceiling Corner Linear Lights Step by Step
- ⚠️ 5. How to Avoid Dark Spots, Light Leaks and Visible Seams at Corners
- 🧱 6. What If the Ceiling Corner Is Too Tight to Install the Profile?
- 🧩 7. Can Integrated Linear Lights Use the Same 90-Degree Corner Method?
- 🏁 Заключение
- Часто задаваемые вопросы
📐 1. Inside vs Outside 90-Degree Corners: What Changes?
The same “90°” label hides two geometries. Order the wrong corner piece and the emitting face will point the wrong way.
Ан inside corner is concave—two surfaces meet so the light line turns into the angle (common at a wall–ceiling junction or an internal perimeter turn). An outside corner is convex—the run wraps around a projection or an external perimeter edge.
Also separate:
- a wall-to-ceiling corner-mounted profile (emitting face aimed along the plane you specified), from
- a horizontal perimeter turn that stays in the ceiling plane around a bulkhead or room corner.
Matched inside and outside corner modules exist for many profile families. A straight in-line joiner only continues one axis; it does not create a 90° change of direction.
🎯 Why identify inside vs outside before you order?
Because corner modules, miter layout and emitting-face orientation differ; a straight joiner does not create a 90° turn.
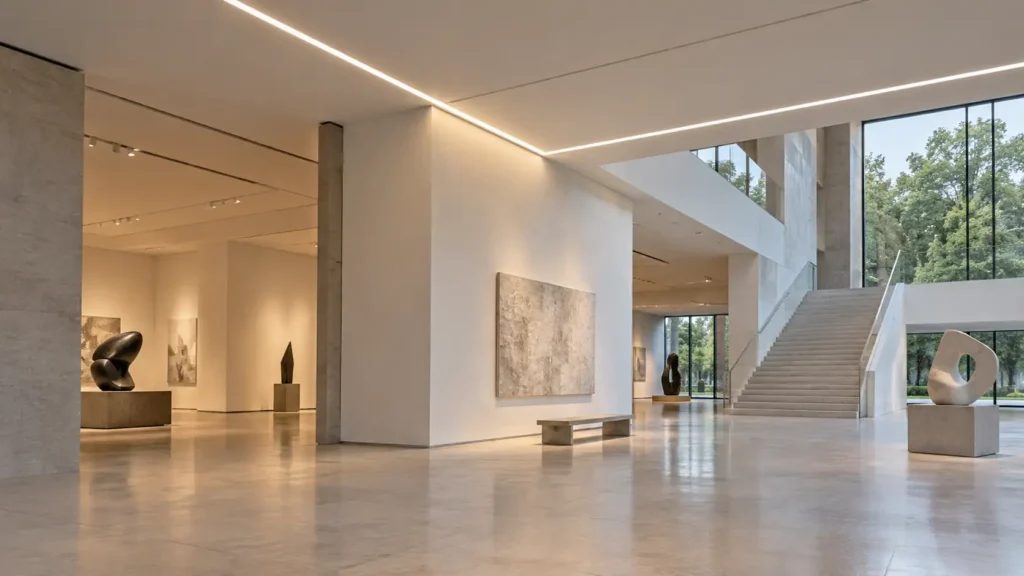
🔧 2. How Do You Join Aluminum Linear Light Profiles at a 90-Degree Corner?
Two practical paths exist for many profile kits. Neither is universal for every extrusion or every integrated bar.
Before you cut metal, freeze the ceiling interface on a section—channel depth, trim or plaster-in, driver access and joiners. The live pre-install checklist is Что нужно проверить перед установкой профильного светильника в потолок.
Option A. Manufacturer-Matched 90-Degree Corner Pieces
Factory inside and outside corner pieces keep series, cross-section, finish, mount type and diffuser family aligned. Typical mechanical steps (always follow that series’ sheet): place the corner against the geometry, slide each straight channel onto the joiner bars or into the corner sockets, then tighten the listed fasteners. Do not assume a generic corner casting fits an unrelated profile.
Option B. Two 45-Degree Miter Cuts
On systems that allow field miters, two opposing 45° cuts can form a 90° turn. Measure finished run length carefully—miter waste shortens each leg. Cut with a blade rated for aluminium, dry-fit on a flat surface, deburr, and use the system’s angled brackets, epoxy or mechanical joiners where the sheet requires them. Inside and outside layouts reverse which face is the long side of the cut.
| Фактор | Matched corner module | Field 45° miter |
|---|---|---|
| Совместимость | Locked to that profile series | Only when the maker allows field miters |
| Site work | Lower cutting skill; follow joiners | Accurate saw setup, dry-fit, deburr |
| Joint appearance | Designed for that family | Good when cuts are true; gaps show light leaks |
| Limits | Stock angles only (often 90°) | Not a substitute for every profile or integrated bar |
A 45° miter is не mandatory—and not appropriate—for every linear profile or integrated fixture.
🎯 Is a 45° miter always the right aluminium join?
No. Use it only when that profile family allows field miters; otherwise use the matched corner piece.
💡 3. How Do You Connect the LED Strip Around the Corner?
A neat aluminium corner does not prove the LED path is safe. Design the electrical light path on its own drawing.
Forcing a standard flat LED strip through a sharp sideways 90° fold can crack copper tracks, solder joints or emitters. Many commercial strips specify a minimum bend radius (often on the order of 20 mm) and allow bending only up or down—not laterally, and not with a twist. If the datasheet does not rate that movement, do not improvise it.
When the strip is cuttable:
- Cut only at marked cut points.
- Reconnect with a compatible L-shaped corner connector, or a short wire/jumper made to the strip’s pad layout, voltage and polarity.
- Match strip width, contact count, IP rating and current rating to the accessory.
- Route cables so nothing pinches the PCB or pulls on solder pads.
Electrical distinction:
- Low-voltage strip + remote driver systems must use the power supply and connection method the manufacturer specifies.
- Mains-voltage integrated linear luminaires must use their listed corner and electrical connection system—not strip accessories.
- Fixed building wiring must follow local regulations and be completed by qualified personnel where required.
🎯 Does a perfect aluminium join fix the LED connection?
No. Strip bend limits, cut points and approved connectors are a separate detail from the channel joint.
📋 4. How to Install Ceiling Corner Linear Lights Step by Step
Use this sequence for strip-in-profile ceiling corner runs. Integrated luminaires skip to their own listed corner kit (see section 7).
Step 1. Measure and Mark the Ceiling Corner Run
Record both straight lengths and the actual corner angle. Note inside vs outside. Mark mounting position and the direction of light. Subtract corner-piece length or miter waste from each leg before you cut.
Step 2. Check the Profile and Corner Components
Confirm profiles, corner pieces, LED strips, diffusers and fixings are one compatible family. Check cable and connector clearance. Plan driver location and later access before the ceiling closes.
Step 3. Prepare and Dry-Fit the Aluminum Profiles
Use manufacturer corner components where available. Otherwise prepare permitted miters accurately. Dry-fit alignment, joint position and mounting clearances before permanent fixing.
Step 4. Secure the Profiles at the Ceiling Corner
Mark fixings on a suitable supporting substrate. Install clips, brackets or fasteners per the system sheet. Check the corner is aligned—no twist, no wide gap.
Step 5. Connect and Position the LED Sections
Isolate the relevant supply. Install and connect LED sections through the approved corner arrangement. Avoid sharp unsupported bends and strained joints. Test per the manufacturer instructions before closing inaccessible parts.
Step 6. Fit the Diffusers and Finish the Corner
Measure diffuser sections or fit maker-matched corner covers. Align ends and keep the specified seat. Do not force brittle covers around unsupported sharp bends. Leave access for later service where the system requires it.
Step 7. Test the Finished Corner
Check light continuity through the turn. Inspect for dark sections, hotspots, diffuser gaps or light leakage. Confirm profiles and covers are secure. Check for flicker or intermittent connections before handover.
🎯 What order should you dry-fit the corner?
Measure → confirm parts → dry-fit aluminium → fix → connect LED → seat diffuser → test.
⚠️ 5. How to Avoid Dark Spots, Light Leaks and Visible Seams at Corners
A mechanically tight joint does not guarantee a continuous illuminated line.
| Видимая проблема | Likely cause to investigate | Practical correction |
|---|---|---|
| Dark spot at the corner | Emitters too far apart; unsuitable connector geometry | Review the light-source layout or use a purpose-designed illuminated corner from that system |
| Bright hotspot at the turn | Strip folded or bunched; diffuser poorly seated | Correct strip routing and diffuser compatibility |
| Light escaping from a seam | Misaligned profile or diffuser ends | Recheck joint alignment and any sealing detail the maker lists |
| Diffuser gap | Inaccurate cut or wrong corner cover | Recut or fit the correct system component |
| One side of the corner dark | Failed or incorrect electrical connection | Isolate supply; inspect the approved connection only |
| Uneven colour or intensity | Mismatched LED batches or voltage drop | Check LED specs, driver loading and feed arrangement |
A purpose-designed illuminated corner module can reduce interruption when it belongs to that manufacturer’s system. Do not promise that every mitered joint will look gap-free from every viewing angle.
🎯 Does a flush aluminium joint guarantee continuous light?
No. Emitter spacing, connector geometry and diffuser seats still decide what you see at the turn.
🧱 6. What If the Ceiling Corner Is Too Tight to Install the Profile?
Wall–ceiling intersections often block drill and screwdriver access after the channel is in place.
Check whether the system uses surface clips, concealed brackets or a mounting channel you can fix first. Many profiles need clips or brackets installed on the substrate before the extrusion slides or snaps on. Confirm the substrate can take those fixings. Do not replace required mechanical support with adhesive alone. Plan cable entry and corner connections while you can still reach them.
If tools or connectors cannot reach the corner after mounting, revise the sequence—or choose a profile family whose mounting method suits that junction.
🎯 What if you cannot reach fasteners at the corner after the channel is up?
Rework the sequence or change the mounting system; do not leave an unsupported adhesive-only fix.
🧩 7. Can Integrated Linear Lights Use the Same 90-Degree Corner Method?
Often no. A complete linear luminaire is not a field-cut strip-and-channel kit.
Integrated bars may use factory L-corners, listed internal/external connectors and dedicated optical covers. Many cannot be cut or modified on site. Verify the manufacturer’s permitted corner geometry, power connection, mounting system and optical continuity before the schedule calls the run “continuous.”
When the catalogue has no listed corner for that series, order a factory-prepared corner module or a custom configuration—do not invent a miter on a sealed housing.
🎯 Can you field-cut an integrated linear bar for a corner?
Only if that exact luminaire family lists field cutting and a matching corner kit; many do not.
🏁 Conclusion: How Do You Install Ceiling Corner Linear Lights at 90 Degrees?
A successful 90° ceiling corner depends on three details working together: the profile joint, то LED / light-source connection, and the diffuser.
Inside and outside corners need different parts and cut layouts. Matched corner components—or accurate, system-approved miters—beat improvised sideways strip folds and mismatched accessories. Continuity of the metal line is not the same as continuity of light.
Ознакомьтесь с другими статьями в нашем блоге:
- Как избежать тёмных стыков при соединении линейных LED-светильников
- Что такое линейный светодиодный светильник: руководство по непрерывным линиям на потолке и стене
- Как правильно установить линейный потолочный светильник?
Часто задаваемые вопросы
Linear Lighting for Commercial Corner Runs
XHLUX производит коммерческие Светодиодные линейные светильники for suspended, surface and recessed applications. Profile dimensions, corner geometry, optical continuity and control layout vary by series; we specify them project by project. Конфигурация OEM/ODM is available when a layout needs defined corner turns and mounting details.
If you already have reflected ceiling plans, corner types (inside/outside) and quantity, send those for a configuration review. We do not claim a single universal illuminated corner module or field-cut method without a matching datasheet.