

Why should you learn to replace LED track bulbs
LED track lighting is popular among home, shop and industrial users for its flexibility and energy-saving features. Whether it is decorative lights in living rooms, display lights in shops, or working lights in factories, LED track lights play an important role.
LED track lighting is easy to use and durable, but even the longest life span has an end. The lights in your living room are not working, a corner of the store window is dark, and the work area in the factory is lacking light – these situations require timely replacement of bulbs. It may cost a lot to hire someone to fix it, but it is simple and fast to do it yourself. Learning to replace LED track bulbs can not only maintain the lighting effect, but also extend the life of the entire system.

Whether you want to fix the lights at home or manage a large number of lamps in commercial and industrial spaces, this article will give you clear guidance. Are you ready? Let’s start with the preparation work.
Things to know before replacing
Before replacing the bulb, make sure you are prepared to ensure a smooth process:
Confirm the bulb type:
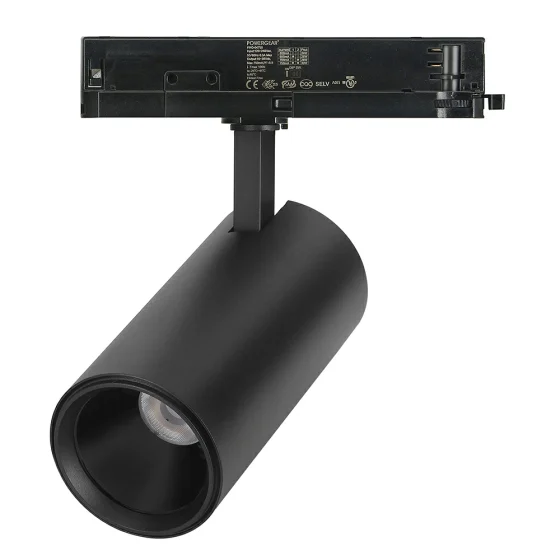
There are two common designs for LED track lights:Replaceable bulbs: such as GU10 and MR16, fixed with a slot or screw. Integrated LED: The bulb and the lamp holder are integrated, and you may need to replace the entire lamp holder. Look at your track light holder, which will be marked in the manual or on the bulb. Not sure? Take a photo and send it to our sales manager, who can help you quickly determine.
Prepare tools:
A pair of clean gloves (anti-fingerprint and anti-slip).
A ladder (if the light is installed high).
A new bulb (the wattage and model should be the same as the old one).
Optional: Screwdriver (for removing certain lamp holders).
Safety first: turn off the power switch and wait for the lamp head to cool down. LEDs generate less heat, but they may still be warm when you just turn off the light, so don’t burn your hands. Once you are fully prepared, you can start. Don’t rush, first figure out how your bulb is installed.
Identify the installation method of track bulbs
There are several ways to install LED track bulbs. Only by recognizing them can you change smoothly:
Snap-on type:The bulb is directly inserted into the lamp head and fixed by the snap. It can be loosened by gently pulling or pressing.
Rotation type:For example, for GU10 bulbs, tighten clockwise after inserting them, and turn counterclockwise when removing them. Don’t turn too hard, and it will be in place when you hear a “click”.
Plug-in type:Like MR16, two metal pins are inserted into the slot. Pull directly when removing, and push in when aligning when installing.

Check your lamp holder: the ones with pins are plug-in, the ones with bumps are rotating, and the ones that are directly stuck are snap-on. Don’t understand? Contact our sales manager, they will teach you how to disassemble it to avoid damaging the lamp holder.
Detailed steps for replacing LED track bulbs
After recognizing the installation method, follow these steps:
1. Turn off the power and confirm safety: Find the switch or circuit breaker and turn off the power. Use a test pen to confirm that there is no power before starting the operation. Safety first, don’t take risks.
2. Remove the old bulb:Snap-on type: Gently press the bulb and pull it out. Rotating type: Twist counterclockwise until it loosens. Plug-in type: Pinch the sides of the bulb and pull it out slowly. Use gloves to hold it, and don’t touch the glass part directly to avoid grease affecting the new bulb.
3. Install the new bulb: Aim at the slot or screw mouth, and gently push it in or tighten it clockwise. Stop when you hear a “click” or feel it in place. Don’t push too hard. Make sure the bulb models match, such as 10W for 10W, GU10 for GU10.
4. Test the new bulb: Turn on the power and see if it lights up. Adjust the angle of the lamp head to make sure the light shines where you want it to.
The whole process only takes a few minutes. It’s easy to change a lamp at home, and it’s almost the same to change a batch at a store or factory. If you don’t have spare bulbs on hand, contact our sales manager, they can immediately recommend a suitable one!
Precautions and FAQ
There are some small details to pay attention to when changing bulbs:
1. Don’t use too much force: LED bulbs are delicate, and tightening or pulling too hard may damage the socket. Just handle it with care.
2. The model must be consistent: the power and interface must be the same as the original. Otherwise, it may not light up, or the brightness may be wrong. Keep the old bulb packaging and choose the same when you buy a new one.

Common problems: No light: Check if the bulb is plugged in tightly or the power is off. Flickering: It may be a poor contact, reinstall it; it may also be that the driver is broken. Too dim: The power is not enough, change to a higher one, such as changing from 5W to 10W.
Have troubles that you can’t solve? Don’t mess around on your own, you can contact your local professionals, who can provide remote guidance or come to help.
Summary of this article
Replacing LED track bulbs is actually quite simple: turn off the power, remove the old lamp, install the new lamp, and test it, and it’s done in a few steps. Learn this skill, and you can fix the broken lights at home by yourself, keep the store windows in the best condition at any time, and seamlessly connect the factory lighting, which is both cost-saving and convenient.
LED lamps have a long lifespan and can be used for several years after replacement, maintaining the lighting effect while saving electricity. Whether you are a home user or managing a commercial or industrial space, mastering this little trick is very useful.
Want to try changing it yourself, but can’t find a matching LED track bulb? Or the lamp head is too complicated to handle? Contact our sales manager now! Send an email to [email protected] or follow the official website www.xhlux.com for more details. They will provide suggestions on bulb selection to keep your track lighting bright forever!


What is 48V Magnetic Track Lighting?
A low-voltage system where fixtures attach magnetically, reposition in seconds, and operate safely below the SELV threshold. Here is what that means for commercial projects.

What Makes a Reliable Commercial Lighting Project Partner
Learn what makes a reliable commercial lighting project partner and which factors matter most when working on long-term lighting projects.

How to Balance Brightness and Comfort in Commercial Lighting
This article explains how to balance brightness and visual comfort in commercial lighting to achieve both functional and comfortable environments.